better door detent location mod

Disclaimer: Links on this page pointing to Amazon, eBay and other sites may include affiliate code. If you click them and make a purchase, we may earn a small commission.

TurboEd

Full Access Member
Joined
Feb 16, 2013
Posts
375
Reaction score
99
Location
On my brain
Do you work 24/7? Takes less than an hour...

He's pacing himself

LOL I know.

:snoopfacepalm:

Partner's off on vacation so pretty much 24/7 yes. Last 21 days in a row no free weekends.

---------- Post added at 12:32 PM ---------- Previous post was at 12:31 PM ----------

But you can cut people open and they thank you for it so it's all good good fun hehehe.
 

TurboEd

Full Access Member
Joined
Feb 16, 2013
Posts
375
Reaction score
99
Location
On my brain
FINALLY. Took me 2 hours because the drivers side cover fell through the hole and had to go fishing. Right arm full of tiny sctatches but well worth it.

Seems it is not just the third detent as an upgrade. All detents seem to require more effort to overcome, as they should. Stock ones let doors go through them too easy. Too often causing "accidents".

---------- Post added at 03:59 PM ---------- Previous post was at 03:56 PM ----------

On the Raptor you will have to remove the 3 7mm screws to remove the glovebox, have to remove the fuse and instrument panel end covers.

---------- Post added at 04:02 PM ---------- Previous post was at 03:59 PM ----------

Always tie the 2-3 feet string to the detent you are removing and installing through the square hole in the truck. Save yourself troubles.
 

Tommysyko

Full Access Member
Joined
Nov 30, 2012
Posts
341
Reaction score
142
Location
Bay Area, CA
Got the passenger side installed today since I heard it was harder and passengers amen to have more difficulty. Few tips.
anuby9a7.jpg

I used the smaller rubber opening, lower than the one recommended in the instructions. (Props to another FRF member) I unscrewed and disconnected the harness and wiring immediately behind it for better access (2x 7mm screws and green connector disconnect)
y7eqy3yb.jpg

Don't know what the green connector was. But the stereo shut off after I disconnected it. Everything worked fine after I reconnected and put everything back.

The tip came when I was trying to reinstall the new detent. I fished a line through the door square. But I tossed my line above the door wiring harness. Took all of ten minutes after. I tried dropping my line jut in front of the harness but I had all sorts of clearance issues with the thick wiring and getting the detent fished up in place.

I thought it was pricy at first but I realized that it was a factory part that was modified (not a cheap Chinese break away part), it was $90 for the pair, not each, it's a mom and pop shop on the USA and it's a clean oem feel for fit and finish once installed.

The instructions were entertaining as well with folks that have a sense of humor. It'll probably work well parking down the line next to a potential hazard.


Sent from my iPhone using Tapatalk
 

kkitowski

Full Access Member
Joined
Jun 18, 2012
Posts
113
Reaction score
25
Location
Green Bay, WI
Well, I bought it last November on the group rate, but it was too cold to install, so I thought I would install it finally before Sept came around. The install on the drivers door took no more than 10-15 minutes, and the passenger door was probably 20 minutes. I agree the passenger door is harder, but not all that much. Just take your time, don't pull the plastic covers off all the way, and don't worry if your eyes can't see it -- your fingers can do all the work!

Much better before and after even though I am sure the wife will think it isn't much difference :)

Before and after pics

Thanks you Northernlight for this mod!!!
 

Attachments

  • photo 1.jpg
    photo 1.jpg
    43.3 KB · Views: 123
  • photo 2.jpg
    photo 2.jpg
    41.9 KB · Views: 126
  • photo 3.jpg
    photo 3.jpg
    41.3 KB · Views: 132
  • photo 4.jpg
    photo 4.jpg
    38.7 KB · Views: 135

TheJoker

FRF Addict
Joined
Dec 6, 2010
Posts
4,124
Reaction score
3,374
Location
N. E. Massachusetts
DIY Version

OK, so I've been following this thread from the start. It seems like everyone has had trouble with the mod to some extent. I decided, early on, to tackle the DIY version. I also went about it a little different.

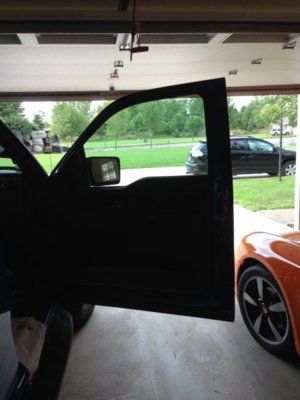
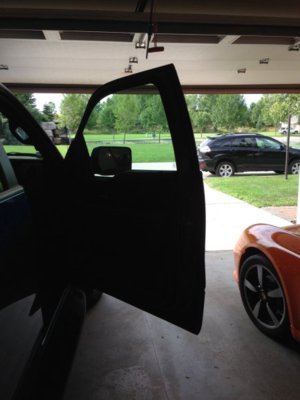
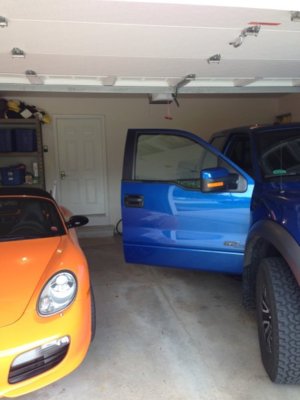
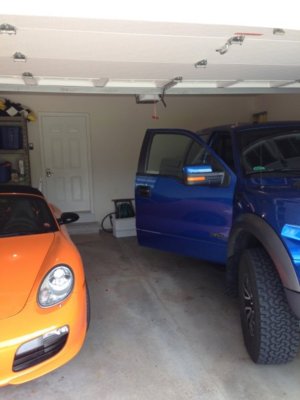
The main thing I did differently is that I removed the top rubber cover / boot behind the detent / dash (not the ones on the bottom behind the kick plates). They are slightly above (higher than) the detent but allows you to grab a hold of the detent arm while removing / replacing it. So no fishing line is needed. I will agree, that it is a bitch to access on the passenger side, replacing the boot, on this side, took longer than making the middle detents. Also, the kick plate didn't need to be removed.

Now, while cutting the middle / new detents, I was careful not to make them larger / deeper than the stock ones. I thought that this would weaken the detent arm, but while doing the second one, I realized that there is a steel plate running through the middle of it so there isn't any way of weakening them.

Each side took 20 mins, I did the DS first taking my time. The second one (PS) took no time at all to remove, cut, and replace. I spent about 15 mins just getting that damn boot back on, PAIN IN THE ASS! I also applied a lot of silicone lubricant behind the section which mounts to the door jamb, they operate nice and smoothly now.

So, my take is, DO IT! wether you buy the already modified detent arm, or you modify yours, it is well worth it. Read this thread and be patient. Also, thank you R1Jamn for the pic with the correct torque specs, these should be in PirateAirs torque spec thread. TheJoker
 

R1jamn

Full Access Member
Joined
Jun 18, 2011
Posts
401
Reaction score
299
Also, thank you R1Jamn for the pic with the correct torque specs, these should be in PirateAirs torque spec thread. TheJoker

No Problem. Glad it helped.
Good job on fabricating the middle detent yourself.
Metal plate running through the detent arm is good info too.
Thanks
 

TheJoker

FRF Addict
Joined
Dec 6, 2010
Posts
4,124
Reaction score
3,374
Location
N. E. Massachusetts
No Problem. Glad it helped.
Good job on fabricating the middle detent yourself.
Metal plate running through the detent arm is good info too.
Thanks

Yes, If you look at the detent arm, you will see 4 small holes, 1 at each of the detent locations. I assume that these holes were left by the mold, centering the metal plate. If you look into these holes you will be able to see the metal plate. In this pic, the hole is full of silicone, but you can see what I mean:


DevilSun

Full Access Member
Joined
Jul 20, 2014
Posts
67
Reaction score
76
Location
Oregon
I haven't had my truck two weeks or even put many miles on it yet, but I still wish I would have done this sooner. Love this mod! (Even more so because it's a supercab) I must have had good luck during the DD 3.0 install because between it took me less just about 40 minutes total start to finish.
 

Truckzor

FRF Addict
Joined
Feb 17, 2013
Posts
2,419
Reaction score
1,383
Well I finally just ordered mine after a minor "incident" at the gas station this past weekend. Knew I should have done this sooner!
 
Top