Last edited:


You are using an out of date browser. It may not display this or other websites correctly.
You should upgrade or use an alternative browser.
You should upgrade or use an alternative browser.
MiloX's 2012 Raptor SQ Build
- Thread starter MiloX
- Start date
Disclaimer: Links on this page pointing to Amazon, eBay and other sites may include affiliate code. If you click them and make a purchase, we may earn a small commission.
Alright... let's get this moving again...
Shit status: Real


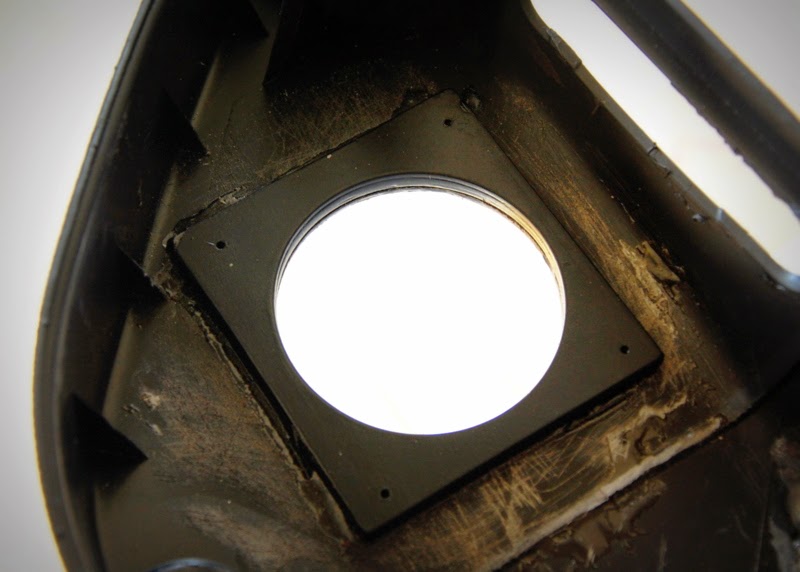
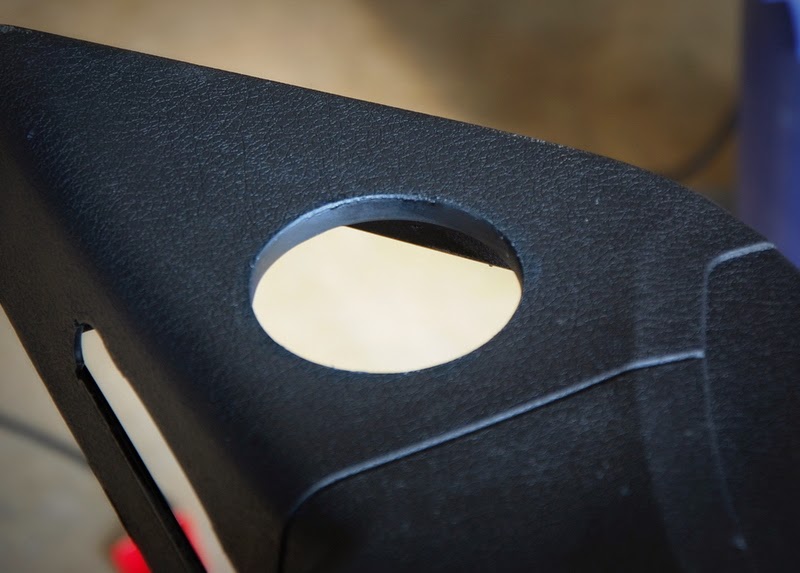
Had to do some sight trimming in order to get the A3's to fit. Nothing a little hole saw loving couldn't sort out.
---------- Post added at 11:48 PM ---------- Previous post was at 11:46 PM ----------
It was about this time in the build processes that I realized my trusty Zapcos were not going to cut it. It was time to go old school again and break out some love for:

---------- Post added at 11:50 PM ---------- Previous post was at 11:48 PM ----------
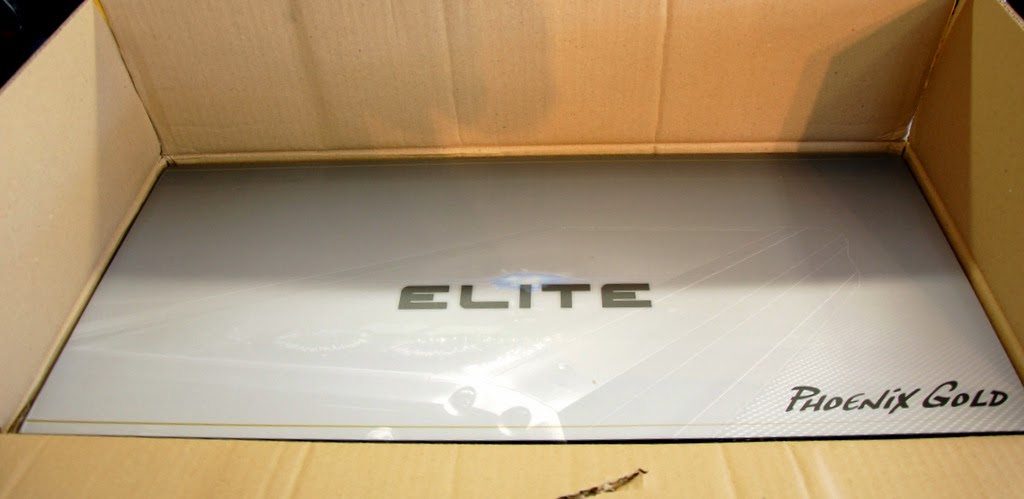
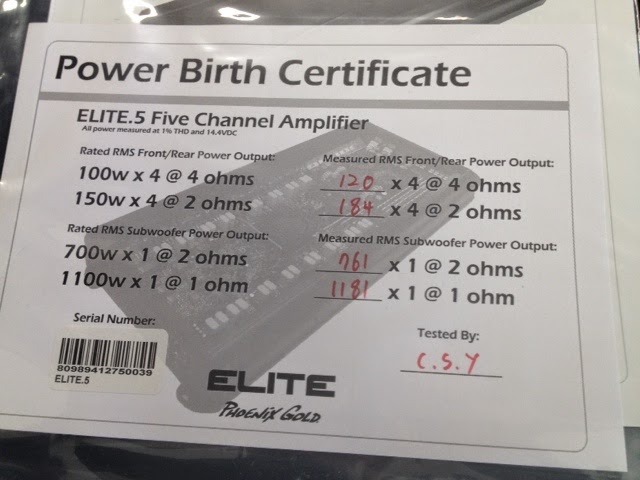
Decided to go with an ELITE.4 and an ELITE.5.... Where am I going to fit these monsters?
---------- Post added at 11:53 PM ---------- Previous post was at 11:50 PM ----------
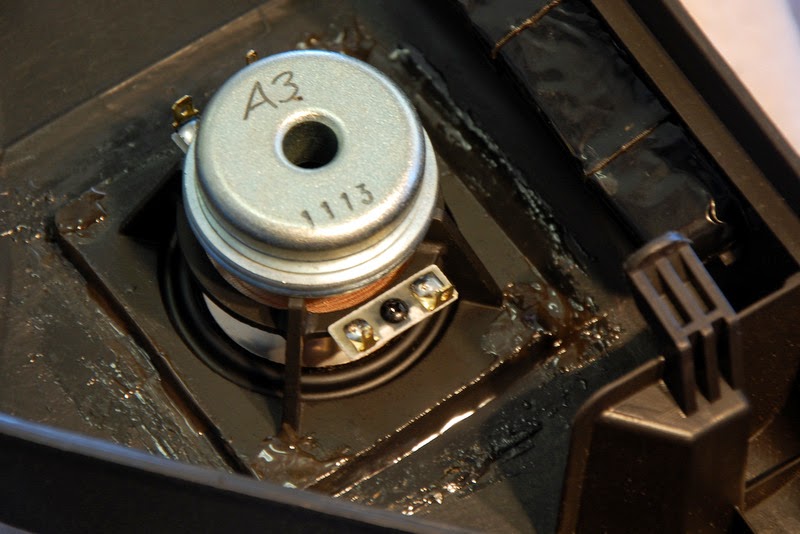
I also decided to turn my attention to my front stage. These Audience A3 Drivers are special. And needed a special home.
Hey all… like I said… made some progress on the doors over the weekend.
Pretty much hit my goals with one exception. I wanted to redo the midbass baffles with HDPE. Didn’t get that far. Oh well.
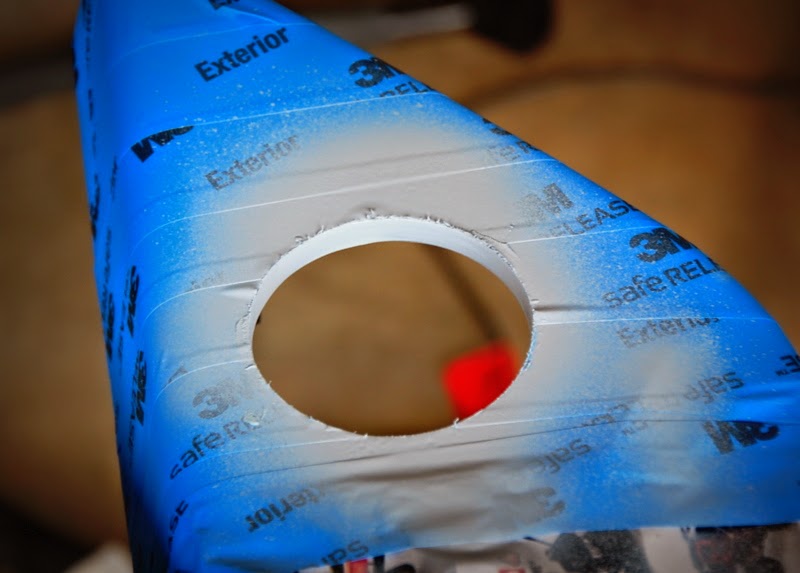
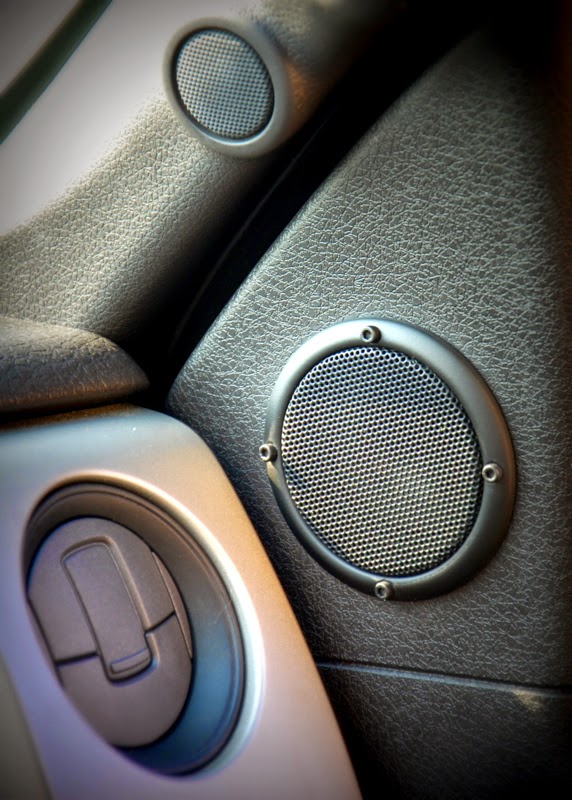
The grills in the Raptor are silver, so I set up the ghetto paint booth and started working on the grills for the A3’s:


Also decided to spray the other grills to match:

And now the fun begins. Here’s the build process for mounting the A3’s…
Marked the location:

Found the centerpoint and drilled a pilot hole:

Made a template to copy to the other door:

Used a 3” holesaw and sanded down the edges:

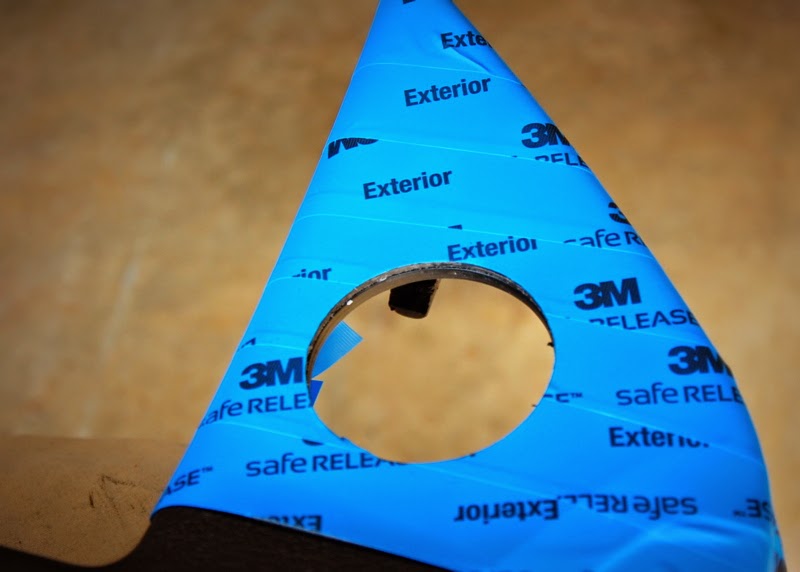
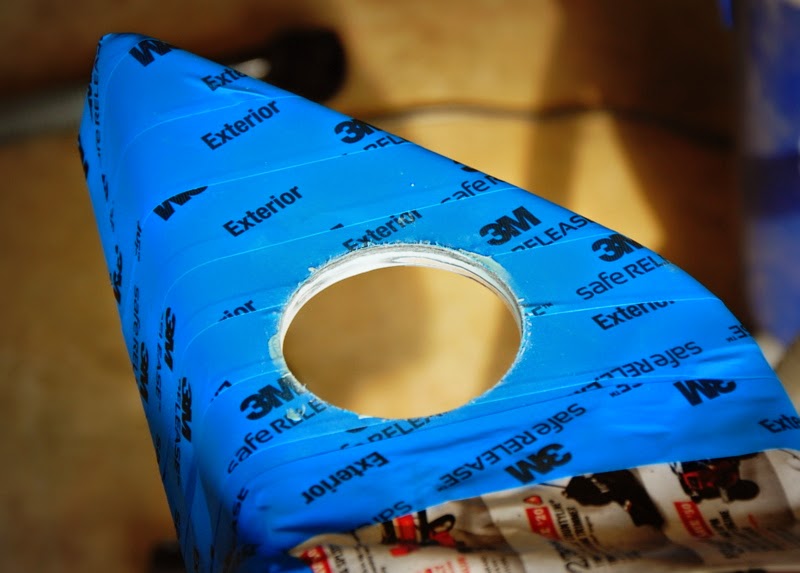
Used trim tape on the rectangular baffles of the driver to help keep the driver in place as I bonded it to the door, and to decouple most of the surface area from the actual panel:
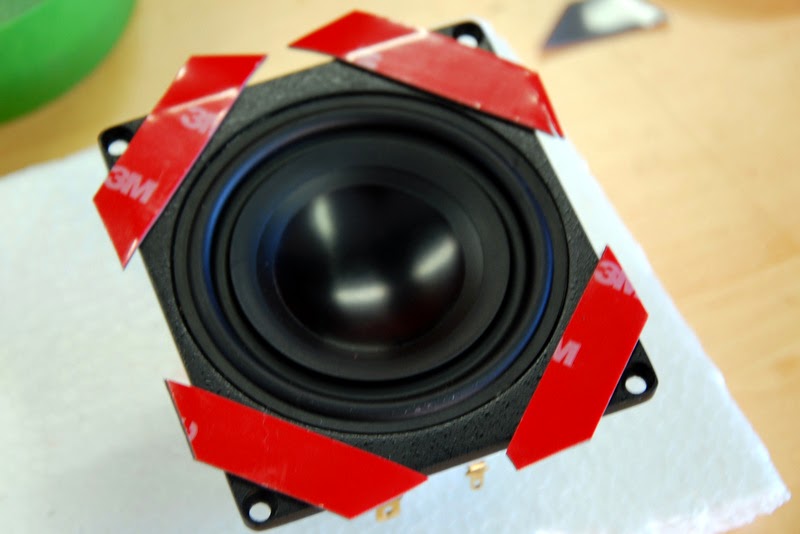
Trimmed the trim tape and bonded the driver to the door with steel reinforced plastic epoxy. These things aren’t going anywhere… I will have to cut the edges in order to pry them off… If I ever need to do that.
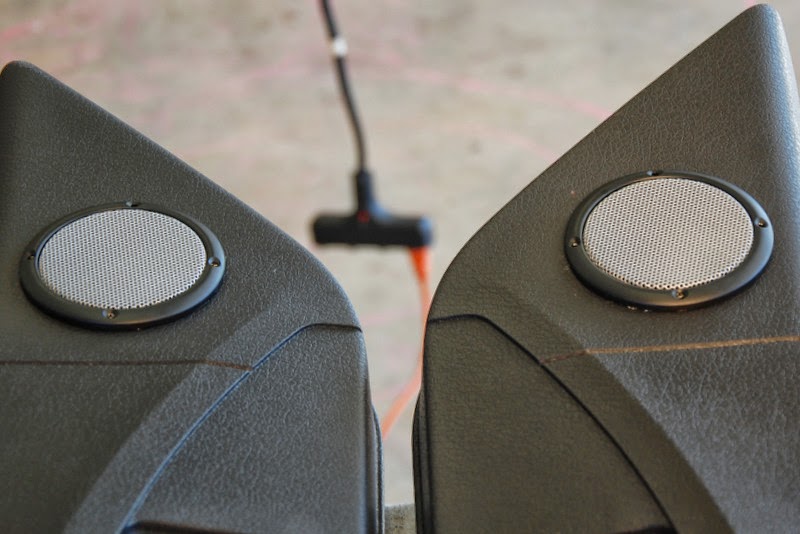
Affixed the grills. You’ll notice I am not through bolting these. Due to the weird shape of the driver’s baffle… through bolting was impossible. Well… technically not impossible… But I didn’t want to drill four more holes into each one. I will wind up gluing screw heads in place to cover the holes. Also looks like I need to clean up a bit of glue under one of the grills!

Finished:
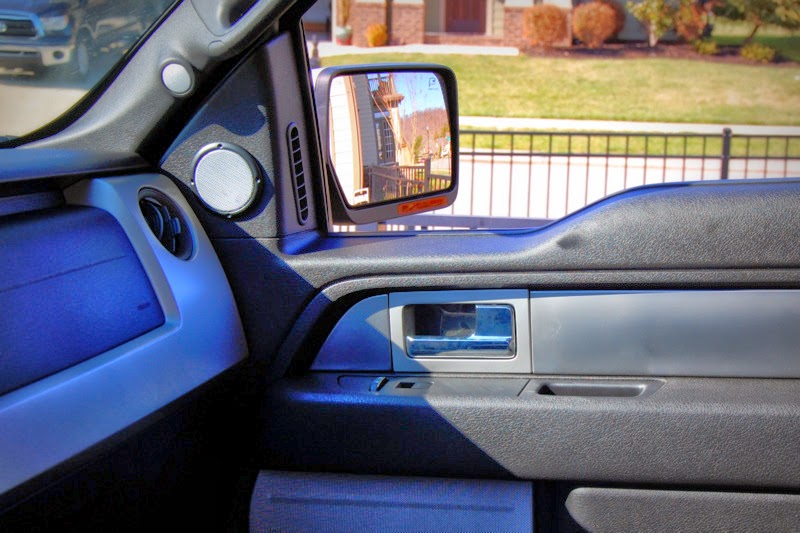
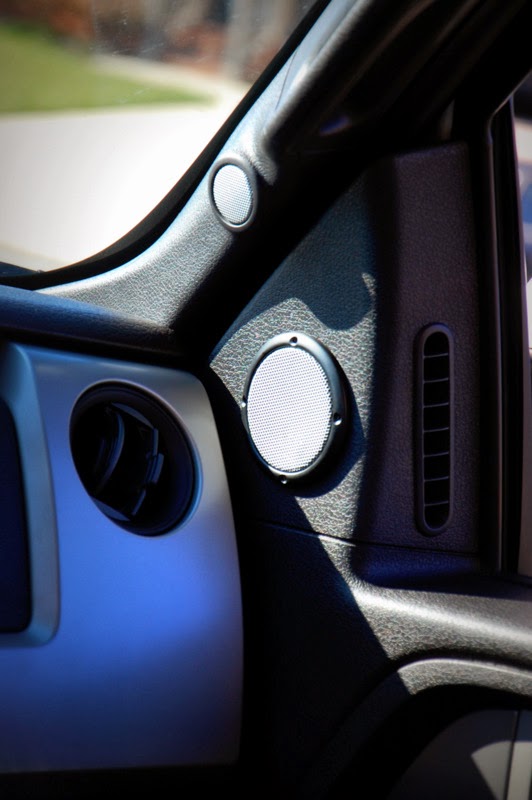
So… I went through all the trouble to paint the grills silver to retain the factory look. Now that I see them in the truck… I don’t like them. I think I am going to paint them all SEM Charcoal to match the carbon colored panels. What do you guys think?
Which I did. I wound up painting them all flat black.
---------- Post added at 11:55 PM ---------- Previous post was at 11:53 PM ----------
I then turned my attention to lower in the doors. Had to have a nice home for the Dyns.
Hey guys... Not that big of an update for this weekend, but I was able to complete the unfinished item from last week...
New HDPE baffles. God I love working with this stuff.
Anyway... on to the photos...


They seem to be pretty happy down there.
---------- Post added at 11:59 PM ---------- Previous post was at 11:55 PM ----------
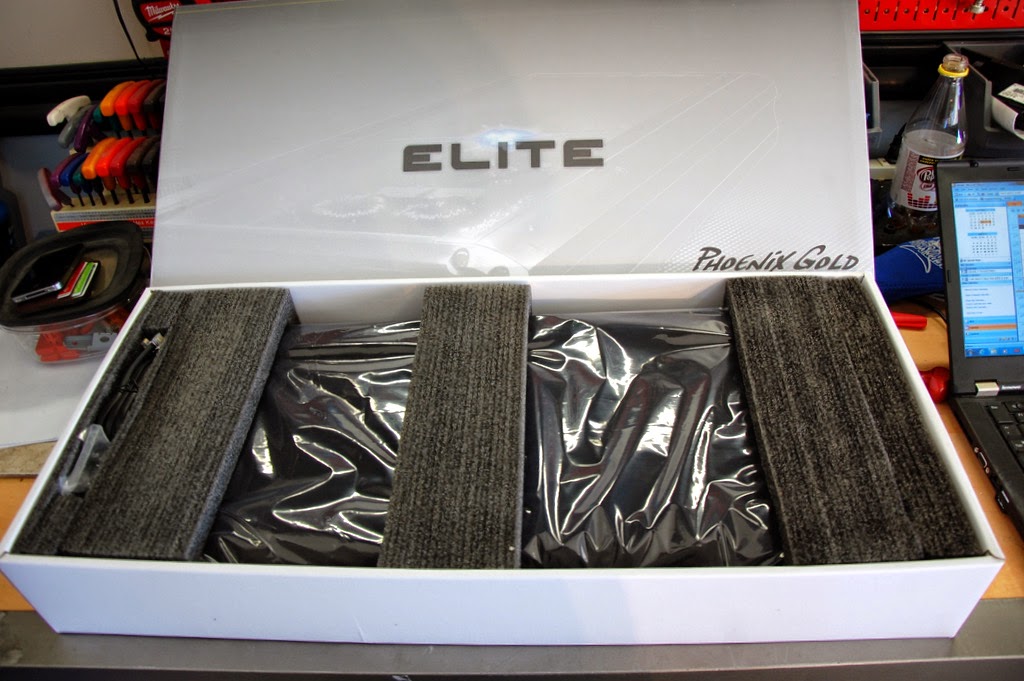
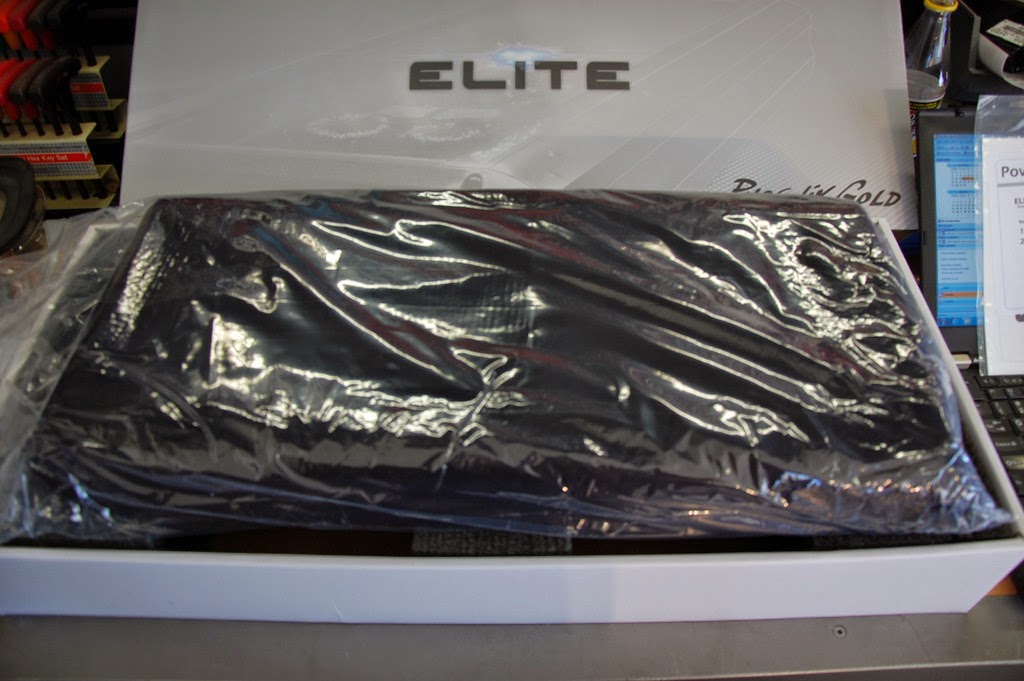
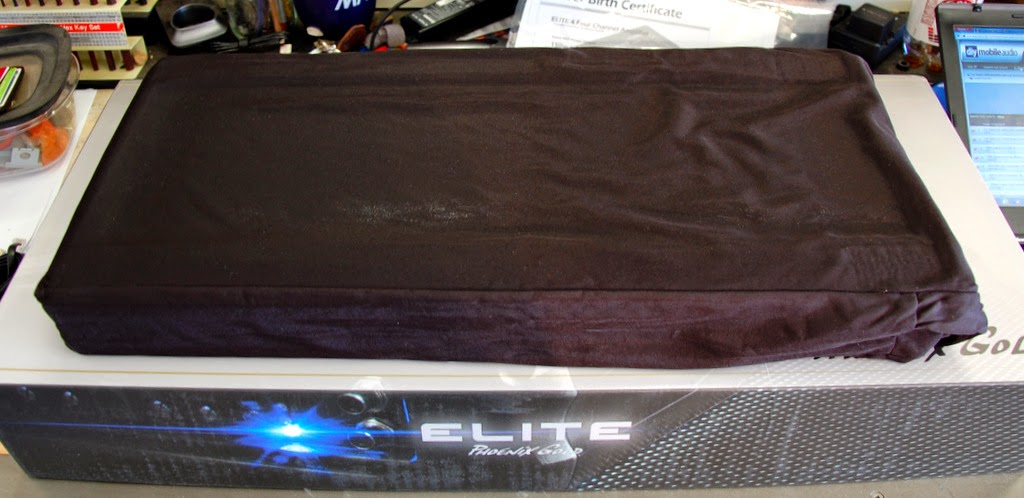
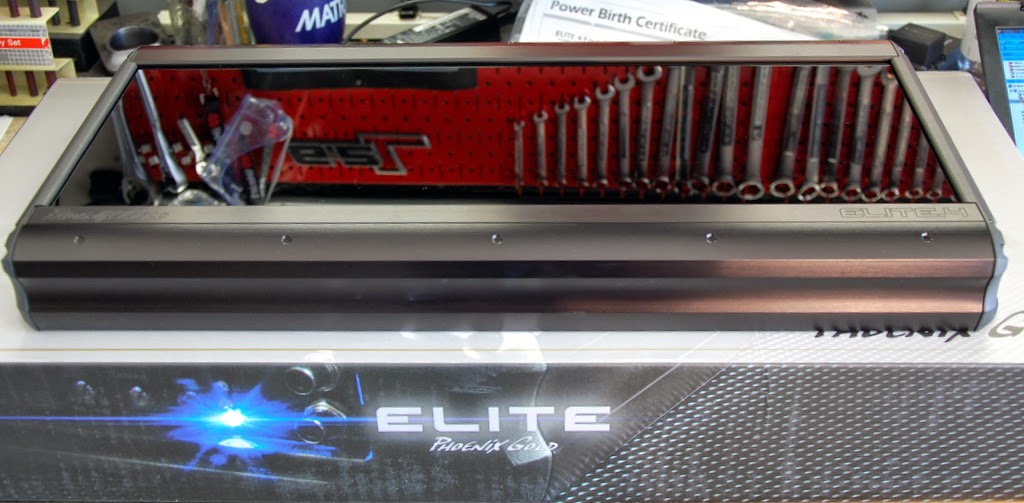
And BLAM. The amps arrive:
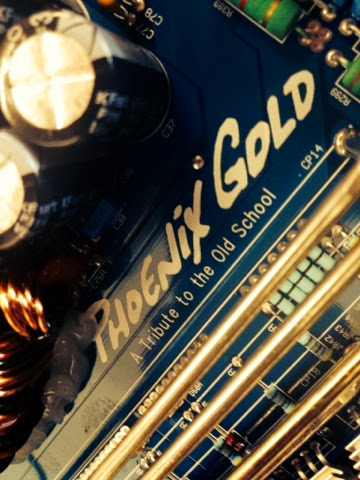
Yep. They’re in. And they are more beastly than I imagined. These things are gorgeous.
Have already started the mod process, but for now will leave you with some unboxing shots and a brief video.
Enjoy!

And the obligatory iPhone video:
---------- Post added 12-17-2014 at 12:04 AM ---------- Previous post was 12-16-2014 at 11:59 PM ----------
So behind the seats was the first plan. I had measured like 100 times. Except for one key measurement. The distance between the wall and the seats when they are folded up.
Here is my first attempt at roughing out a rack to go behind the seats.
Happy Dyngus day all. Hope you had a wonderful weekend.
Here's some updates from the X house.
Spent most of the day Sunday getting the base of the amp rack completed. Then I had an awesome dinner with cherished friends. A good day all around.
Here's a shot of the rack with the aluminum square tubing that I will be using for stand-offs. I chose aluminum instead of MDF as I am going to thru-bolt everything to everything. (These amps are HEAVY!)
The rack will be thru bolted to the cab wall, the stand-offs to the rack, and the amps to the stand-offs.
I apologize in advance for the crappy cell phone pics... but the Nikon's battery was dead. You will get what you will get, and you will like it!
Here's a couple of pics...


In the last two pics you can see the hardboard templates I made for the bottom of the amps. It gives you a better idea of what the finished product will look like.
Now... close your eyes and imagine that these templates were smoked plexi. With white edge lighting. With the amps mounted on top of them. With blue backlighting.... and you'll have a better idea of what the vision for the rack is.
Very simple. Very clean, but with a skosh of sizzle.
That's about it for today.
---------- Post added at 12:08 AM ---------- Previous post was at 12:04 AM ----------
Ok... here's what happened next. After suffering the defeat of not being able to fit the amps behind the seats, I just decided to move on to other areas while I sorted that out.
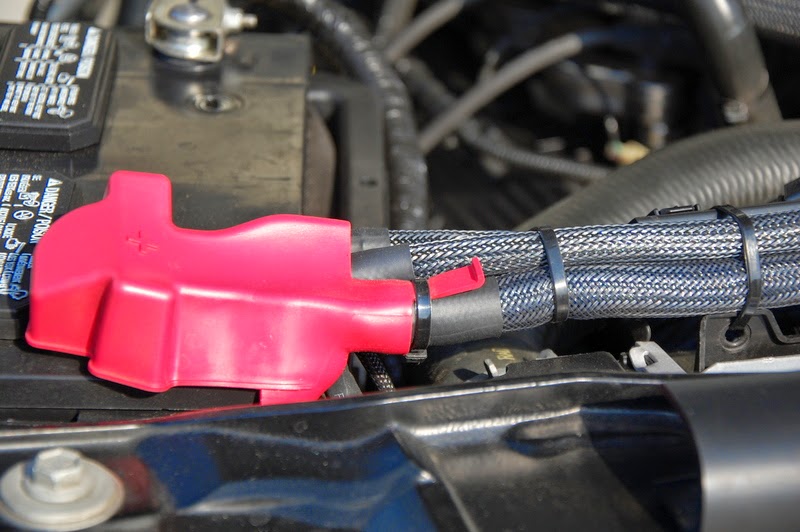
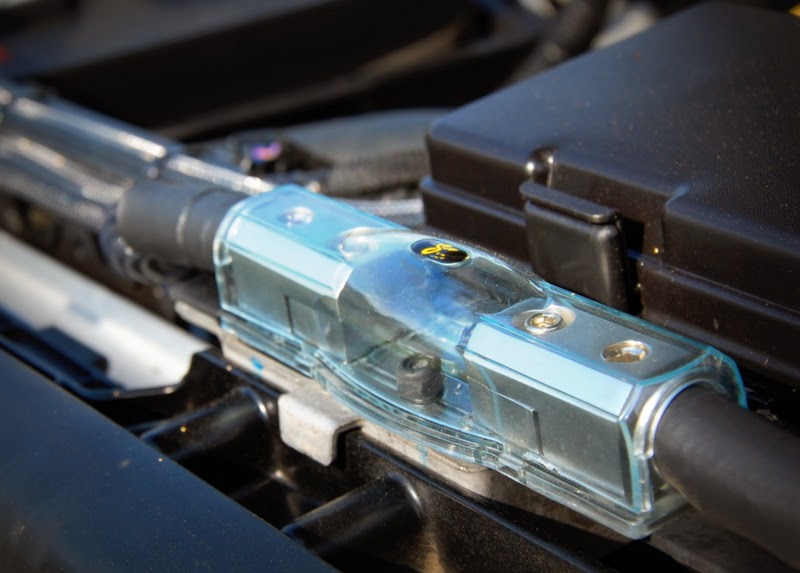
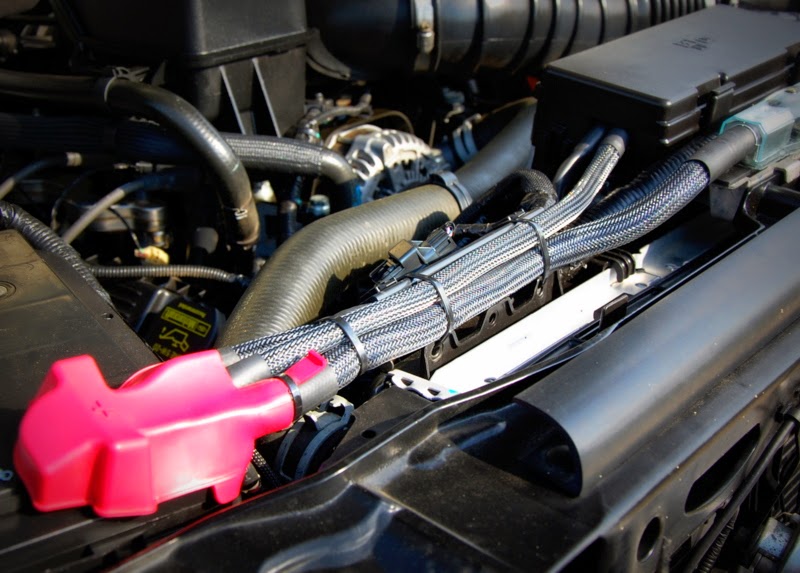
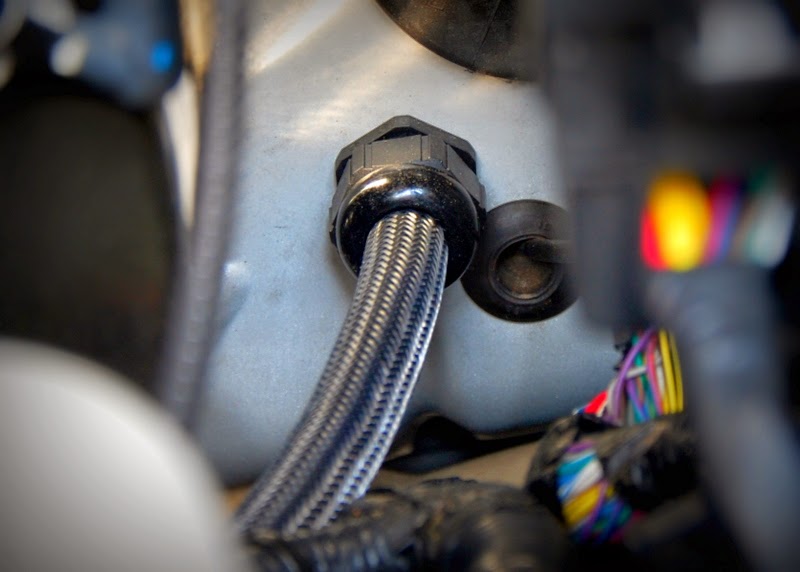
Updating the sails, adding new power cables and updating wires under the hood and such.
I know it has been a couple weeks… and unfortunately this weekend’s update isn’t really too exciting. I decided to redo the work on the sail panels as I wasn’t completely satisfied with the way my original method turned out. I decided to add a ¼” baffle on the backside of the panel for rigidity and better adhesion.
Here’s the build up. Standard filler, speaker gasket, and grill.

[url]http://1.bp.blogspot.com/-xwWRiV1QUXY/U4FJ9-Zg8AI/AAAAAAAABT0/jmdfEwQIFNc/s1600/DSC_7540.JPG[/url][img]
[img] http://2.bp.blogspot.com/-E-2c8i1MFdQ/U4FJ-JVojiI/AAAAAAAABSU/lSgN_br9bog/s1600/DSC_7543.JPG
I can’t recall whether or not I posted up what these look like with black grills… so much better IMO.
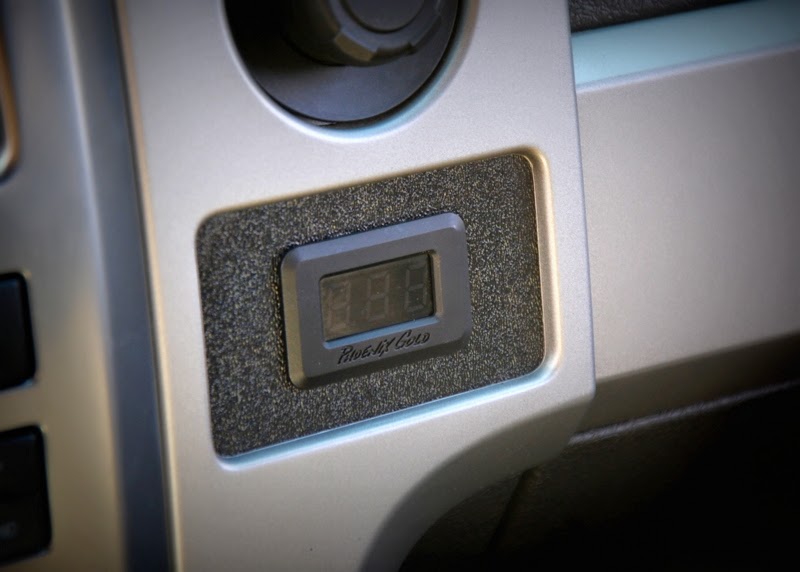
Also found some time to add the PG RMD to the dash. Replaced the OEM booger bin.

And also got around to dressing the OEM wiring in the engine compartment, and ran the 0GA to the cab.
And that’s about it. Tomorrow is Abby’s 8 year old birthday party... so it’ll be cake and ice cream. No 12v.")
---------- Post added at 12:11 AM ---------- Previous post was at 12:08 AM ----------
After a few days ruminating on what exactly I was going to do to make this happen,,, I used the truck for inspiration. Borrowing from the body lines on the tailgate, I decided to do an old school install in the truck bet. This post chronicles my initial sketches and work ups.
At the risk of being called a punk again... here's the progress. I told you ahead of time that it is boring. But hey....
So, like I said… I have been making fairly decent progress. Decided that in order for me to accomplish what I wanted out of this install I needed to move the amp rack into the bed. With the Bakflip and the BedRug… it’s pretty much a big trunk anyways.
After going through multiple iterations on design, I settled on the following. I may still tweak it yet, but this is the overall direction. The inspiration comes from the tailgate of the truck. It is a stacked design featuring 3 levels of depth, and 3 finish materials. You can kind of see the profile view on the right side of the pic below.
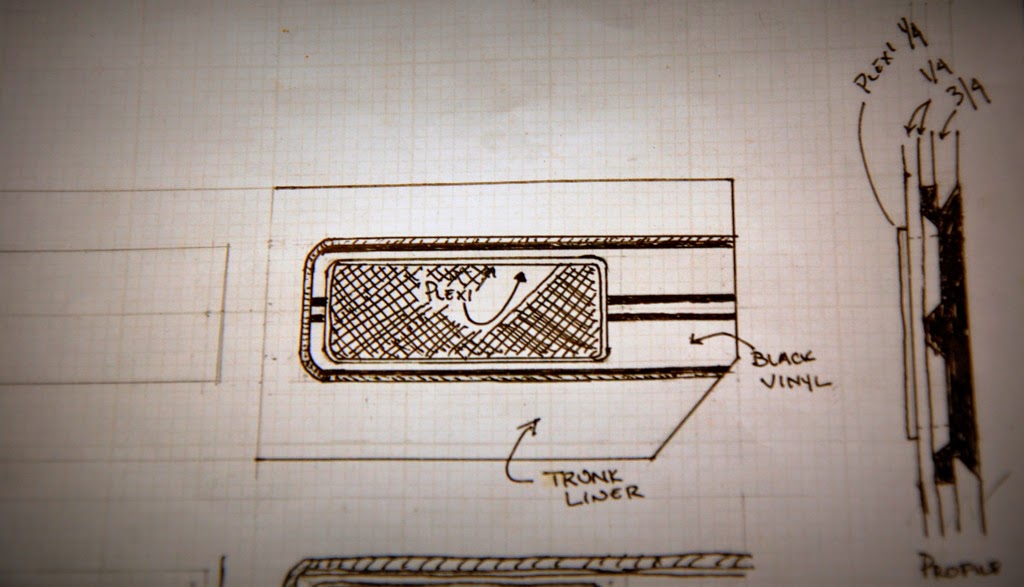
The outermost wall (Finish panel) will be ¾” MDF with a beveled edge floating ¾” from the next layer down. This wall will be covered in trunk liner for durability and design consistency with the rest of the bed. There will be white LED lighting illuminating the gap between this finish panel and the next layer down.
The next layer down will be laminated 1/4” MDF covered with vinyl. The top lam will be multiple strips of beveled MDF to match the body lines of the tailgate. Cut into this layer will be windows with removable inserts for amp display purposes. More on the build out of these insert templates later in the post.
The final layer is smoked edge-lit plexi with a 1/4” reveal. Again, will be using white LEDs.
Got all that?
So… in order to kick this off, I needed a way to attach the primary rack to the bulkhead of the bed. So, I milled up some cleats made out of HDPE and nutserted them into the sheet metal with 10-24 staineless machine screws:
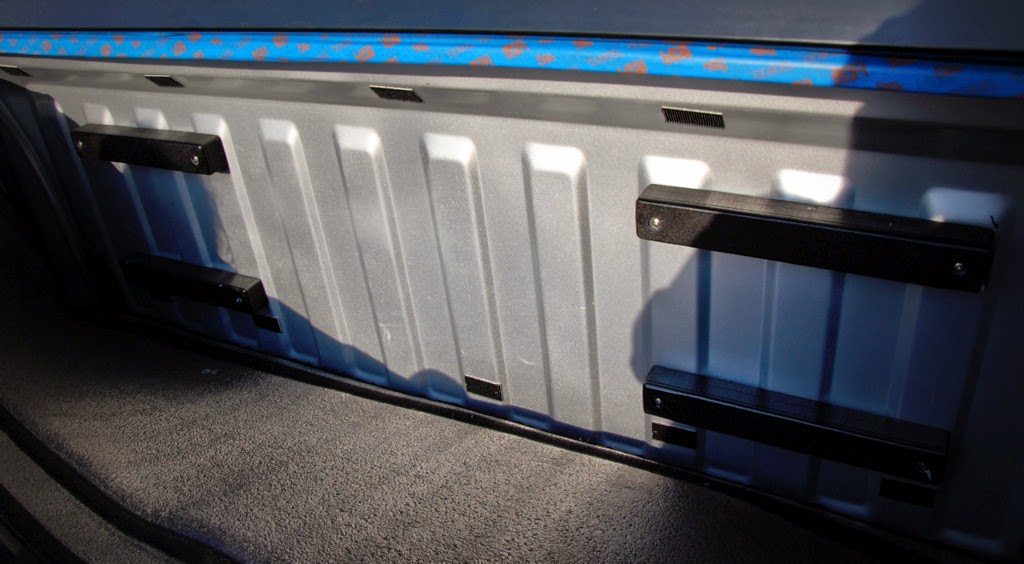
As an aside, I don’t know why it has taken me so long to buy a nutsert tool. Holy 9 pound baby Jesus this tool is amazing. I shit you not… I just run around looking for things I can nutsert. If you don’t have one… spend the $19 at harbor freight. You will not be disappointed.
So now that we have the anchoring system in place, it’s time to fit the actual rack into the bed. Not much to see here but a carpeted rack with t-nuts. The amps will be affixed with black acorn nuts.

Oh... one thing I did do, and I will be doing to all of the MDF pieces is I am applying generous coats of epoxy paint to help protect the substrate from moisture. I did a test piece and it held up incredibly well after give a week to cure.
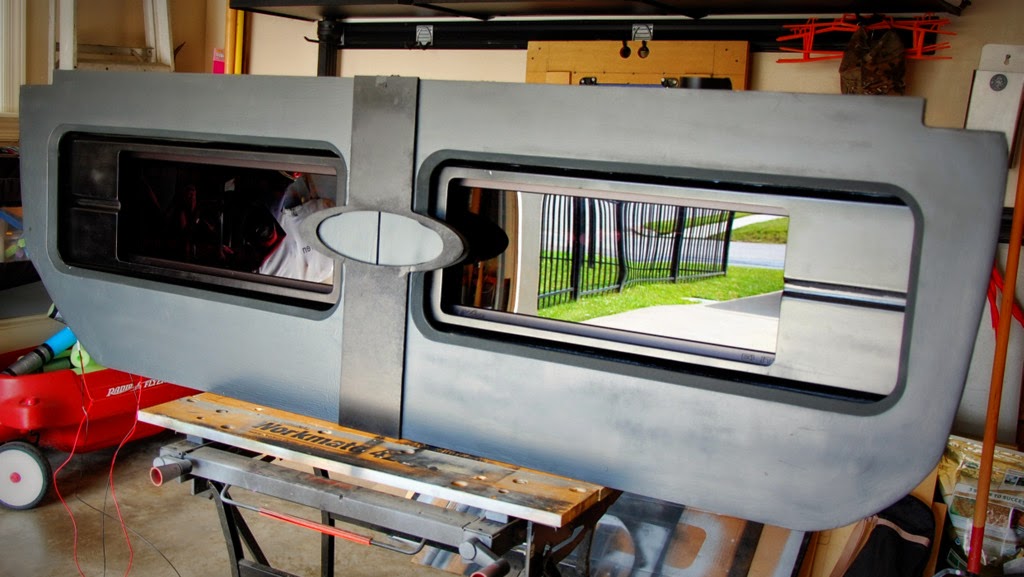
So now you have a sense of what the rack will look like, let’s put on our imagination glasses and look at what the primary finish template looks like in the bed.

Admittedly, this isn’t the best shot ever, but it does provide a sense of overall scale and proportion, which is critical in getting these things to look right. I am often criticized by how slowly I take this portion of my builds, but I THINK THINK THINK these things through. If I don’t like the angles or the proportions or any of the build elements I will stop NOW before I fire up another tool. I am very pleased with the scale here, and also really like the fact that the amps are not centered on the wall. They are raised an inch off of center. I think it adds visual interest and also better ties in the inspiration piece with the tailgate
So now we move into the template work. And just like any painter will tell you, it’s all in the preparation. Same is exactly true in our world. We may spend 2 hours perfecting templates and jigs that will see perhaps 2 minutes of use on the final wood. But that’s how it should be done.
Unfortunately I did not capture all of the template work I did on Sunday, but we can definitely admire it here.
Here’s the template for the window to be cut into layer number two, and the plexi template below it showing the 1/4" reveal.
Looks good right? Well, the only thing missing is creating an insert that can go into the window hole to protect the amps when they aren’t being shown off.
Thankfully I did have my camera ready for that process… so here we go.
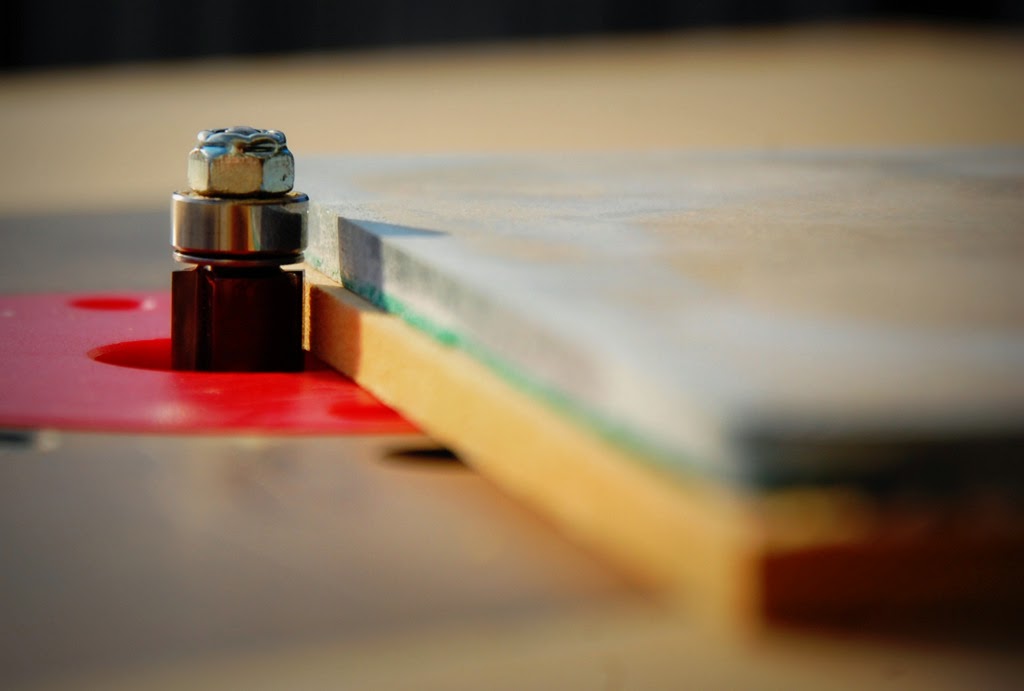
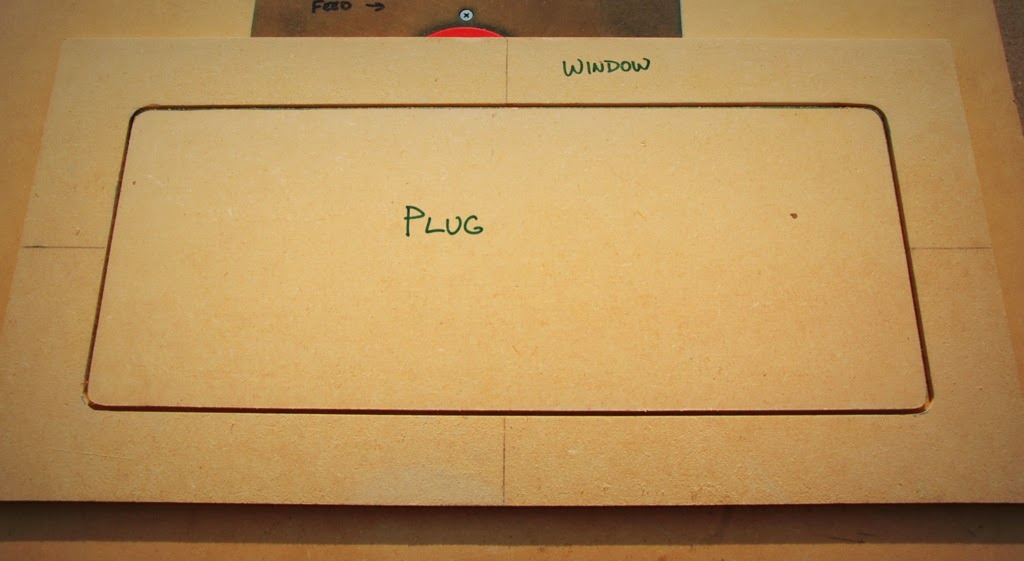
First step was to locate a work surface where we aren’t too concerned about body filler getting all fillery on it. Scrap MDF FTW. So I laid out the window template over a piece of ¼” MDF and used a washer to help scribe a line about 3/16” inside the window. Then cut this piece out and called it the PLUG.
Once the PLUG was cut out we could actually move this project forward. As you see below. I laid some blue tape on the scrap MDF and also covered the window template with the stuff. If you don’t want body filler on something…. Cover it.
Secondly. I trim taped the window piece to the scrap MDF to prevent it from moving.
Thirdly, I applied two layers of foam carpet tape to the inside cutout of the window. These two layers of tape represent the thickness of two pieces of vinyl.
Here you can see the finished product before the PLUG gets laid down in there:
And then the PLUG gets lam taped inside the window cutout:

You can see here that there is a bit of a significant gap to be filled between the MDF and the foam. Almost an 1/8th of an inch. That’s what the Matter is for.
After spreading out some of this body filling goodness from Clarkesville, TN… we’re rollin!
No joke kids. This stuff is worth every penny. Easiest to use body filler ever. Amazing stuff.
Anyways…. Here’s what we look like after a bit of sanding and adding some filler to an area that I was a little too light on.
Looking really good. The lines are extremely clean and match up well. The only thing left to do is to make an “actual” full MDF template from the one cobbled together with wood and Matter. So… time to fire up the router!
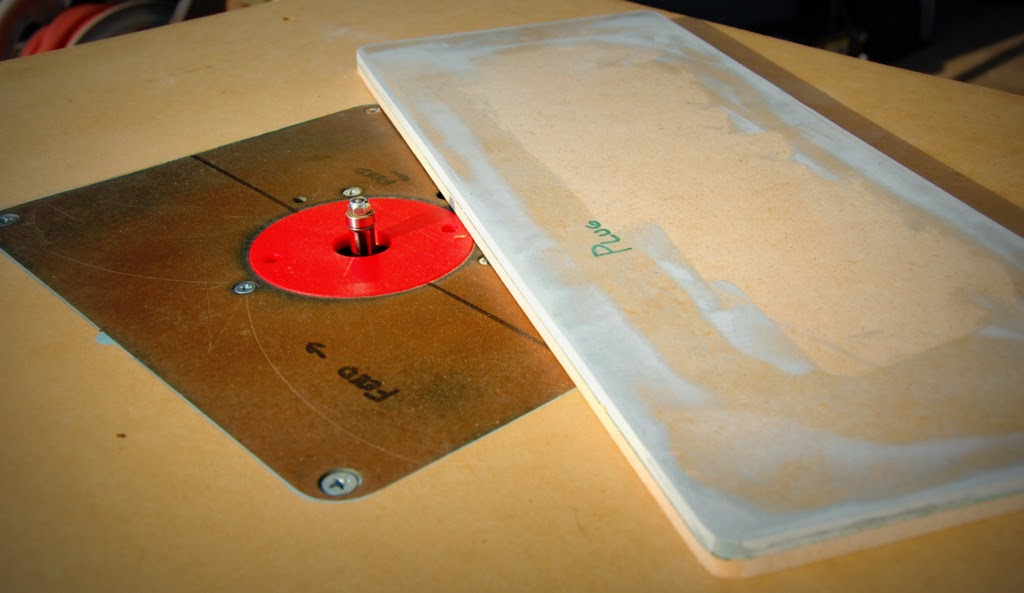
And viola! Looks like a pretty good fit.
Much more to come. Some more template work to do…. Some more wiring to do. Even have some more sound deadening to do. This build will never end.
---------- Post added at 12:13 AM ---------- Previous post was at 12:11 AM ----------
I then made some progress the following weekend. Started getting my wiring runs dressed and also started mocking up this amp rack pretty seriously.
---------- Post added at 12:15 AM ---------- Previous post was at 12:13 AM ----------
And after pretty much completing the prototype work it was time to see how things will kinda sorta look. Keep in mind there are no textiles used yet. This is all still mock-up.
Annnnd it’s update time.
Since the last update I have made some fairly decent progress with the amp rack. I finished the outer panels and hit them with a layer of resin, just to be safe.
I also got sick of looking at MDF brown, so I hit the panels up with the colors they will eventually be. The inner panels will be wrapped in black vinyl and the outer panels will be covered in charcoal trunk liner.
So it probably goes without saying, but just in case it doesn’t… this is not the final finish. Please ignore the imperfections in the material.
I promise it will look fantastic when complete.
With that out of the way, on to the pics.
Here’s the rack with the amps and the panels in place… also… you’ll see where I am thinking about going with the final trim piece that will cover the seams… not sure about it yet... but I like the direction:
And here with white accent lighting… I kinda like the white:
And then… I tried blue lighting… and it was GAME OVER:
It is going to look so hot when I get the side-lit plexi panel installed behind the black trim panel, I think.
White glow from inside the amps, a bold white outline from the plexi, and then the blue glow from the accent lighting… cannot wait to see what this looks like when it is complete.
So that's pretty much it. Waiting on some more parts to come in so I can get the wiring moving along.
I know it's been a long road. I really appreciate everyone following along.
I'd love to get the group's opinion on the blue vs. white. I have a couple of vids up on my YT channel: https://www.youtube.com/user/milox138/videos
Have a great week everyone.
---------- Post added at 12:18 AM ---------- Previous post was at 12:15 AM ----------
And a quick update on wiring the upfitter switches. I decided to use switch 3 for all of my 12v lights and accessories. Trouble was, I didn't have a place to hook all the wires up. Check out the vids.
Quick update on this chilly November evening.
---------- Post added at 12:21 AM ---------- Previous post was at 12:18 AM ----------
Relo'd the trailer brake controller.

Also relo'd the booger bin on the opposite side.

---------- Post added at 12:23 AM ---------- Previous post was at 12:21 AM ----------
Onto the processor rack behind the seat, but first a quick peek at the rear chassis ground.

And processor rack is ready to go in. Hopefully tomorrow.


---------- Post added at 12:24 AM ---------- Previous post was at 12:23 AM ----------
Ok. Rack installed.

Shit status: Real
Had to do some sight trimming in order to get the A3's to fit. Nothing a little hole saw loving couldn't sort out.
---------- Post added at 11:48 PM ---------- Previous post was at 11:46 PM ----------
It was about this time in the build processes that I realized my trusty Zapcos were not going to cut it. It was time to go old school again and break out some love for:
---------- Post added at 11:50 PM ---------- Previous post was at 11:48 PM ----------
Decided to go with an ELITE.4 and an ELITE.5.... Where am I going to fit these monsters?
---------- Post added at 11:53 PM ---------- Previous post was at 11:50 PM ----------
I also decided to turn my attention to my front stage. These Audience A3 Drivers are special. And needed a special home.
Hey all… like I said… made some progress on the doors over the weekend.
Pretty much hit my goals with one exception. I wanted to redo the midbass baffles with HDPE. Didn’t get that far. Oh well.
The grills in the Raptor are silver, so I set up the ghetto paint booth and started working on the grills for the A3’s:
Also decided to spray the other grills to match:
And now the fun begins. Here’s the build process for mounting the A3’s…
Marked the location:
Found the centerpoint and drilled a pilot hole:
Made a template to copy to the other door:
Used a 3” holesaw and sanded down the edges:
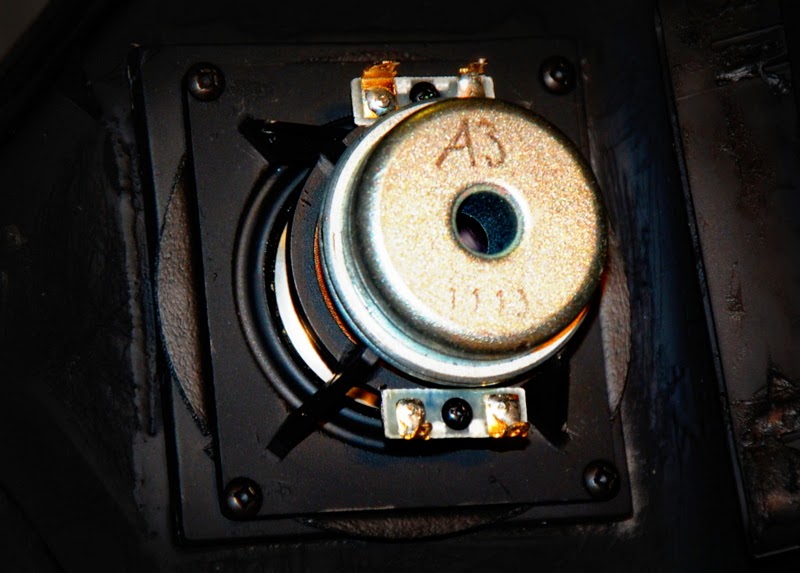
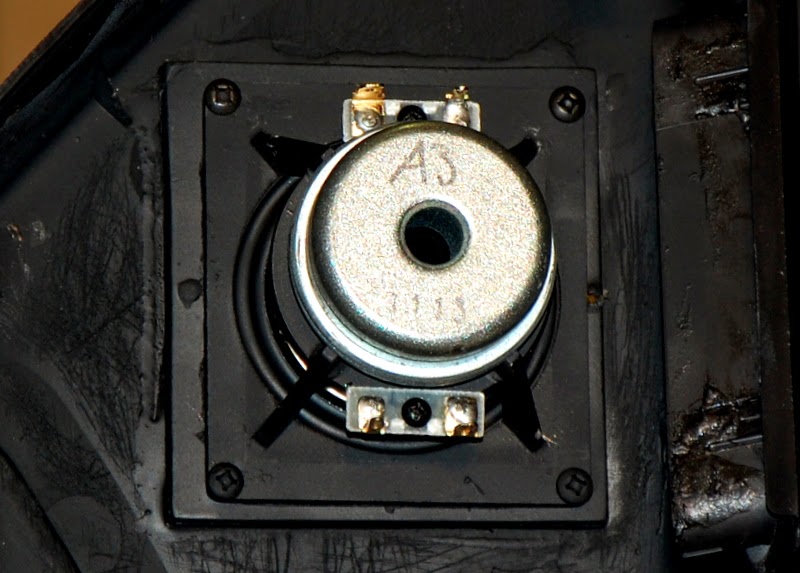
Used trim tape on the rectangular baffles of the driver to help keep the driver in place as I bonded it to the door, and to decouple most of the surface area from the actual panel:
Trimmed the trim tape and bonded the driver to the door with steel reinforced plastic epoxy. These things aren’t going anywhere… I will have to cut the edges in order to pry them off… If I ever need to do that.
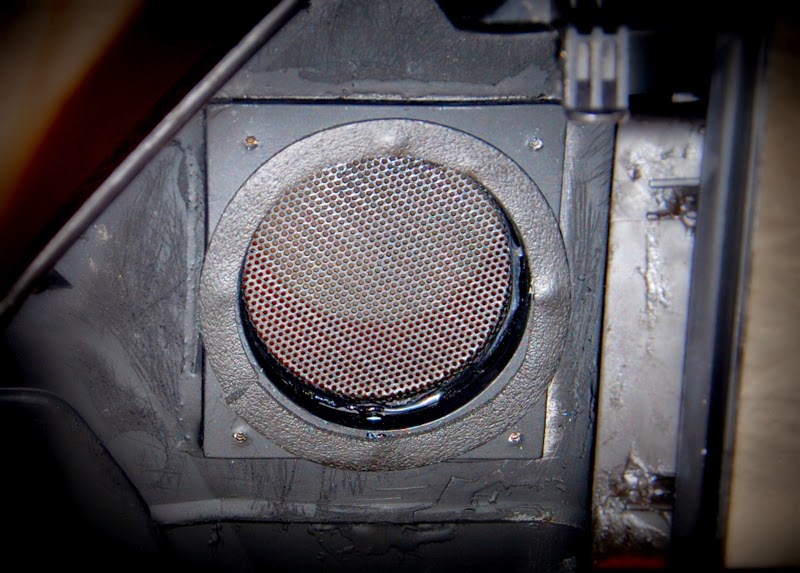
Affixed the grills. You’ll notice I am not through bolting these. Due to the weird shape of the driver’s baffle… through bolting was impossible. Well… technically not impossible… But I didn’t want to drill four more holes into each one. I will wind up gluing screw heads in place to cover the holes. Also looks like I need to clean up a bit of glue under one of the grills!
Finished:
So… I went through all the trouble to paint the grills silver to retain the factory look. Now that I see them in the truck… I don’t like them. I think I am going to paint them all SEM Charcoal to match the carbon colored panels. What do you guys think?
Which I did. I wound up painting them all flat black.
---------- Post added at 11:55 PM ---------- Previous post was at 11:53 PM ----------
I then turned my attention to lower in the doors. Had to have a nice home for the Dyns.
Hey guys... Not that big of an update for this weekend, but I was able to complete the unfinished item from last week...
New HDPE baffles. God I love working with this stuff.
Anyway... on to the photos...
They seem to be pretty happy down there.
---------- Post added at 11:59 PM ---------- Previous post was at 11:55 PM ----------
And BLAM. The amps arrive:
Yep. They’re in. And they are more beastly than I imagined. These things are gorgeous.
Have already started the mod process, but for now will leave you with some unboxing shots and a brief video.
Enjoy!
And the obligatory iPhone video:
---------- Post added 12-17-2014 at 12:04 AM ---------- Previous post was 12-16-2014 at 11:59 PM ----------
So behind the seats was the first plan. I had measured like 100 times. Except for one key measurement. The distance between the wall and the seats when they are folded up.
Here is my first attempt at roughing out a rack to go behind the seats.
Happy Dyngus day all. Hope you had a wonderful weekend.
Here's some updates from the X house.
Spent most of the day Sunday getting the base of the amp rack completed. Then I had an awesome dinner with cherished friends. A good day all around.
Here's a shot of the rack with the aluminum square tubing that I will be using for stand-offs. I chose aluminum instead of MDF as I am going to thru-bolt everything to everything. (These amps are HEAVY!)
The rack will be thru bolted to the cab wall, the stand-offs to the rack, and the amps to the stand-offs.
I apologize in advance for the crappy cell phone pics... but the Nikon's battery was dead. You will get what you will get, and you will like it!
Here's a couple of pics...
In the last two pics you can see the hardboard templates I made for the bottom of the amps. It gives you a better idea of what the finished product will look like.
Now... close your eyes and imagine that these templates were smoked plexi. With white edge lighting. With the amps mounted on top of them. With blue backlighting.... and you'll have a better idea of what the vision for the rack is.
Very simple. Very clean, but with a skosh of sizzle.
That's about it for today.
---------- Post added at 12:08 AM ---------- Previous post was at 12:04 AM ----------
Ok... here's what happened next. After suffering the defeat of not being able to fit the amps behind the seats, I just decided to move on to other areas while I sorted that out.
Updating the sails, adding new power cables and updating wires under the hood and such.
I know it has been a couple weeks… and unfortunately this weekend’s update isn’t really too exciting. I decided to redo the work on the sail panels as I wasn’t completely satisfied with the way my original method turned out. I decided to add a ¼” baffle on the backside of the panel for rigidity and better adhesion.
Here’s the build up. Standard filler, speaker gasket, and grill.
[url]http://1.bp.blogspot.com/-xwWRiV1QUXY/U4FJ9-Zg8AI/AAAAAAAABT0/jmdfEwQIFNc/s1600/DSC_7540.JPG[/url][img]
[img] http://2.bp.blogspot.com/-E-2c8i1MFdQ/U4FJ-JVojiI/AAAAAAAABSU/lSgN_br9bog/s1600/DSC_7543.JPG
I can’t recall whether or not I posted up what these look like with black grills… so much better IMO.
Also found some time to add the PG RMD to the dash. Replaced the OEM booger bin.
And also got around to dressing the OEM wiring in the engine compartment, and ran the 0GA to the cab.
And that’s about it. Tomorrow is Abby’s 8 year old birthday party... so it’ll be cake and ice cream. No 12v.
---------- Post added at 12:11 AM ---------- Previous post was at 12:08 AM ----------
After a few days ruminating on what exactly I was going to do to make this happen,,, I used the truck for inspiration. Borrowing from the body lines on the tailgate, I decided to do an old school install in the truck bet. This post chronicles my initial sketches and work ups.
At the risk of being called a punk again... here's the progress. I told you ahead of time that it is boring. But hey....
So, like I said… I have been making fairly decent progress. Decided that in order for me to accomplish what I wanted out of this install I needed to move the amp rack into the bed. With the Bakflip and the BedRug… it’s pretty much a big trunk anyways.
After going through multiple iterations on design, I settled on the following. I may still tweak it yet, but this is the overall direction. The inspiration comes from the tailgate of the truck. It is a stacked design featuring 3 levels of depth, and 3 finish materials. You can kind of see the profile view on the right side of the pic below.
The outermost wall (Finish panel) will be ¾” MDF with a beveled edge floating ¾” from the next layer down. This wall will be covered in trunk liner for durability and design consistency with the rest of the bed. There will be white LED lighting illuminating the gap between this finish panel and the next layer down.
The next layer down will be laminated 1/4” MDF covered with vinyl. The top lam will be multiple strips of beveled MDF to match the body lines of the tailgate. Cut into this layer will be windows with removable inserts for amp display purposes. More on the build out of these insert templates later in the post.
The final layer is smoked edge-lit plexi with a 1/4” reveal. Again, will be using white LEDs.
Got all that?
So… in order to kick this off, I needed a way to attach the primary rack to the bulkhead of the bed. So, I milled up some cleats made out of HDPE and nutserted them into the sheet metal with 10-24 staineless machine screws:
As an aside, I don’t know why it has taken me so long to buy a nutsert tool. Holy 9 pound baby Jesus this tool is amazing. I shit you not… I just run around looking for things I can nutsert. If you don’t have one… spend the $19 at harbor freight. You will not be disappointed.
So now that we have the anchoring system in place, it’s time to fit the actual rack into the bed. Not much to see here but a carpeted rack with t-nuts. The amps will be affixed with black acorn nuts.
Oh... one thing I did do, and I will be doing to all of the MDF pieces is I am applying generous coats of epoxy paint to help protect the substrate from moisture. I did a test piece and it held up incredibly well after give a week to cure.
So now you have a sense of what the rack will look like, let’s put on our imagination glasses and look at what the primary finish template looks like in the bed.
Admittedly, this isn’t the best shot ever, but it does provide a sense of overall scale and proportion, which is critical in getting these things to look right. I am often criticized by how slowly I take this portion of my builds, but I THINK THINK THINK these things through. If I don’t like the angles or the proportions or any of the build elements I will stop NOW before I fire up another tool. I am very pleased with the scale here, and also really like the fact that the amps are not centered on the wall. They are raised an inch off of center. I think it adds visual interest and also better ties in the inspiration piece with the tailgate
So now we move into the template work. And just like any painter will tell you, it’s all in the preparation. Same is exactly true in our world. We may spend 2 hours perfecting templates and jigs that will see perhaps 2 minutes of use on the final wood. But that’s how it should be done.
Unfortunately I did not capture all of the template work I did on Sunday, but we can definitely admire it here.
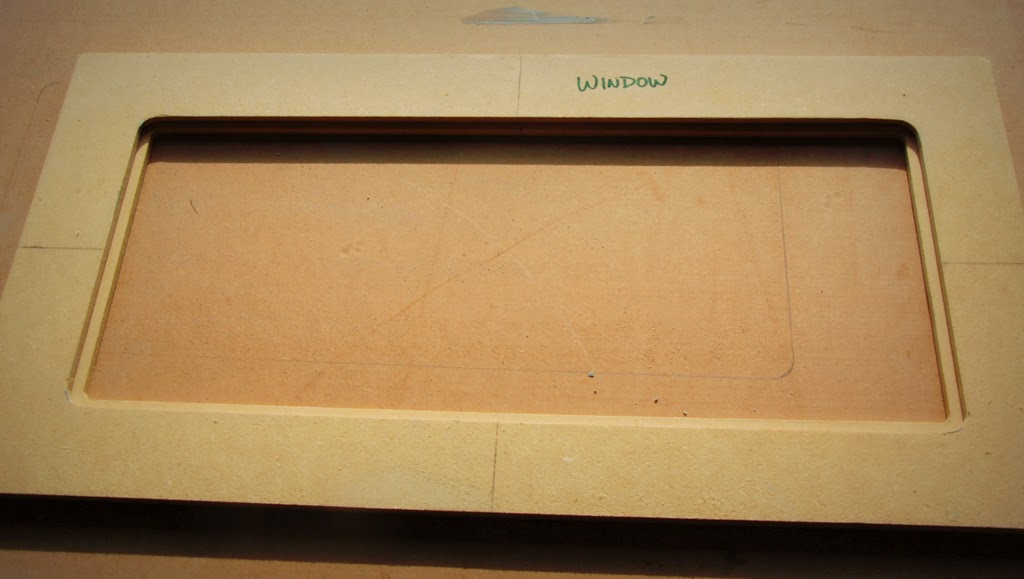
Here’s the template for the window to be cut into layer number two, and the plexi template below it showing the 1/4" reveal.
Looks good right? Well, the only thing missing is creating an insert that can go into the window hole to protect the amps when they aren’t being shown off.
Thankfully I did have my camera ready for that process… so here we go.
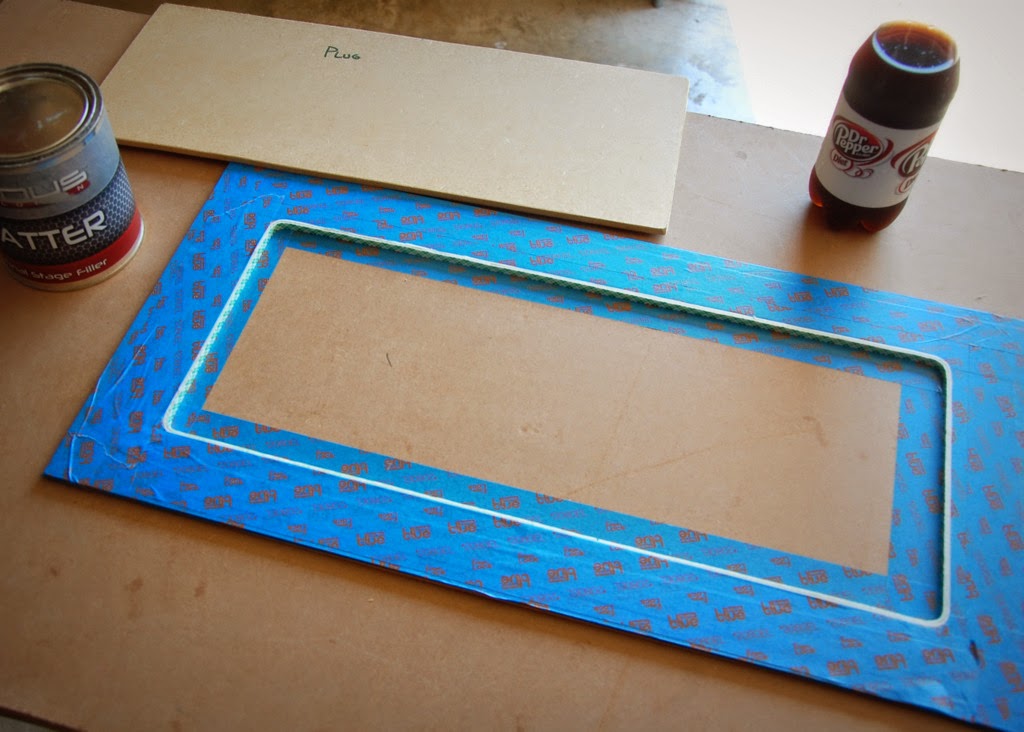
First step was to locate a work surface where we aren’t too concerned about body filler getting all fillery on it. Scrap MDF FTW. So I laid out the window template over a piece of ¼” MDF and used a washer to help scribe a line about 3/16” inside the window. Then cut this piece out and called it the PLUG.
Once the PLUG was cut out we could actually move this project forward. As you see below. I laid some blue tape on the scrap MDF and also covered the window template with the stuff. If you don’t want body filler on something…. Cover it.
Secondly. I trim taped the window piece to the scrap MDF to prevent it from moving.
Thirdly, I applied two layers of foam carpet tape to the inside cutout of the window. These two layers of tape represent the thickness of two pieces of vinyl.
Here you can see the finished product before the PLUG gets laid down in there:
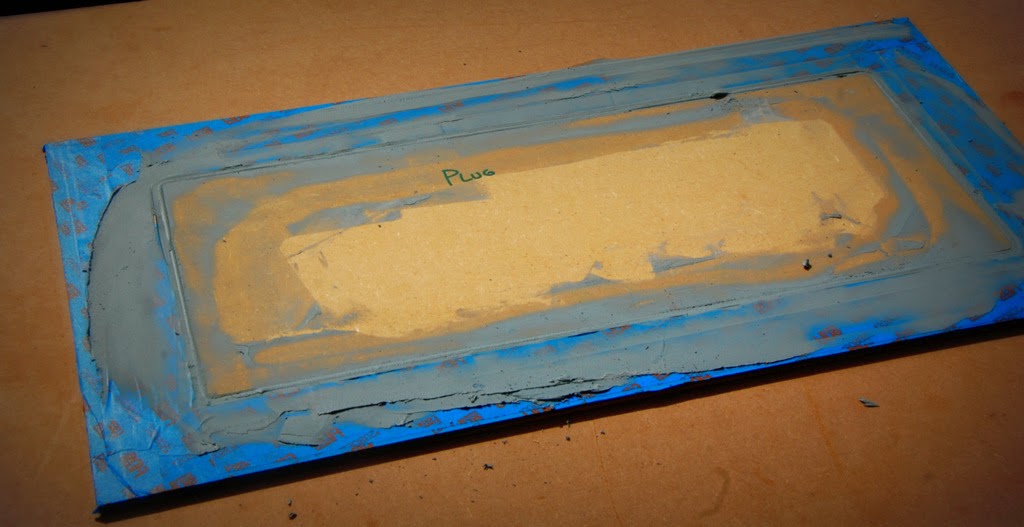
And then the PLUG gets lam taped inside the window cutout:
You can see here that there is a bit of a significant gap to be filled between the MDF and the foam. Almost an 1/8th of an inch. That’s what the Matter is for.
After spreading out some of this body filling goodness from Clarkesville, TN… we’re rollin!
No joke kids. This stuff is worth every penny. Easiest to use body filler ever. Amazing stuff.
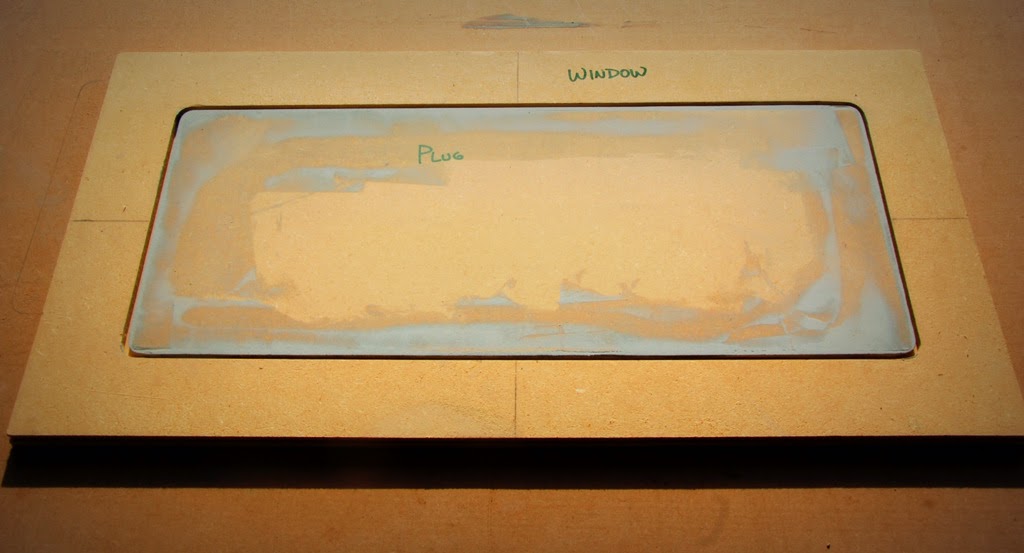
Anyways…. Here’s what we look like after a bit of sanding and adding some filler to an area that I was a little too light on.
Looking really good. The lines are extremely clean and match up well. The only thing left to do is to make an “actual” full MDF template from the one cobbled together with wood and Matter. So… time to fire up the router!
And viola! Looks like a pretty good fit.
Much more to come. Some more template work to do…. Some more wiring to do. Even have some more sound deadening to do. This build will never end.
---------- Post added at 12:13 AM ---------- Previous post was at 12:11 AM ----------
I then made some progress the following weekend. Started getting my wiring runs dressed and also started mocking up this amp rack pretty seriously.
Some progress from this weekend.


---------- Post added at 12:15 AM ---------- Previous post was at 12:13 AM ----------
And after pretty much completing the prototype work it was time to see how things will kinda sorta look. Keep in mind there are no textiles used yet. This is all still mock-up.
Annnnd it’s update time.
Since the last update I have made some fairly decent progress with the amp rack. I finished the outer panels and hit them with a layer of resin, just to be safe.
I also got sick of looking at MDF brown, so I hit the panels up with the colors they will eventually be. The inner panels will be wrapped in black vinyl and the outer panels will be covered in charcoal trunk liner.
So it probably goes without saying, but just in case it doesn’t… this is not the final finish. Please ignore the imperfections in the material.
I promise it will look fantastic when complete.
With that out of the way, on to the pics.
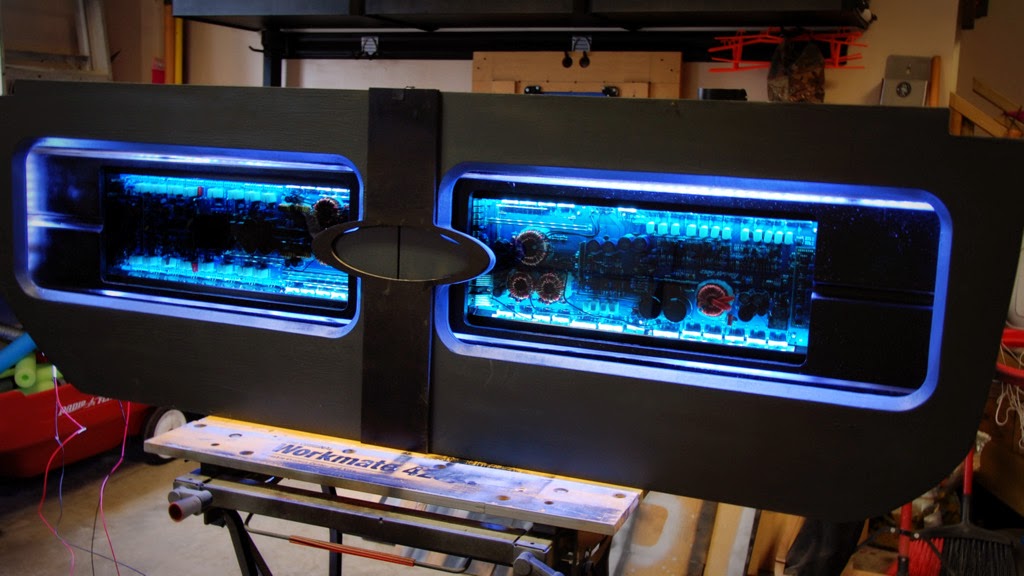
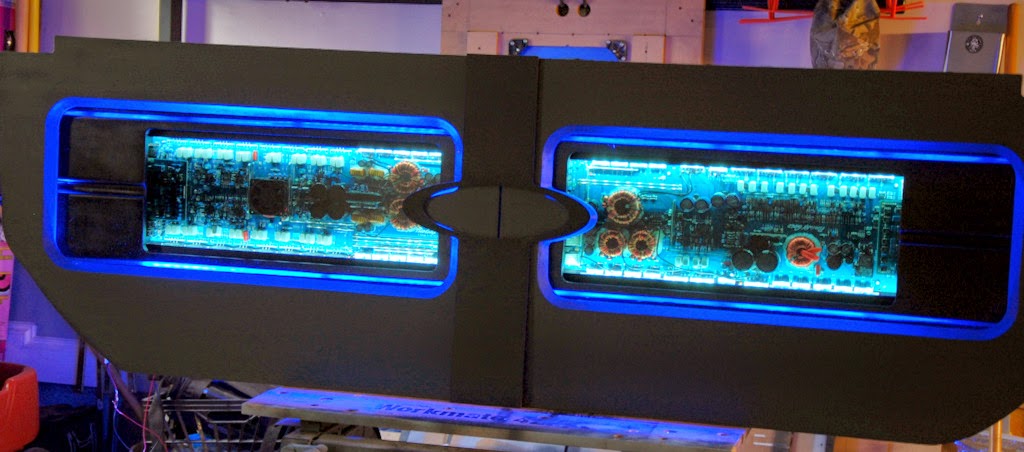
Here’s the rack with the amps and the panels in place… also… you’ll see where I am thinking about going with the final trim piece that will cover the seams… not sure about it yet... but I like the direction:
And here with white accent lighting… I kinda like the white:
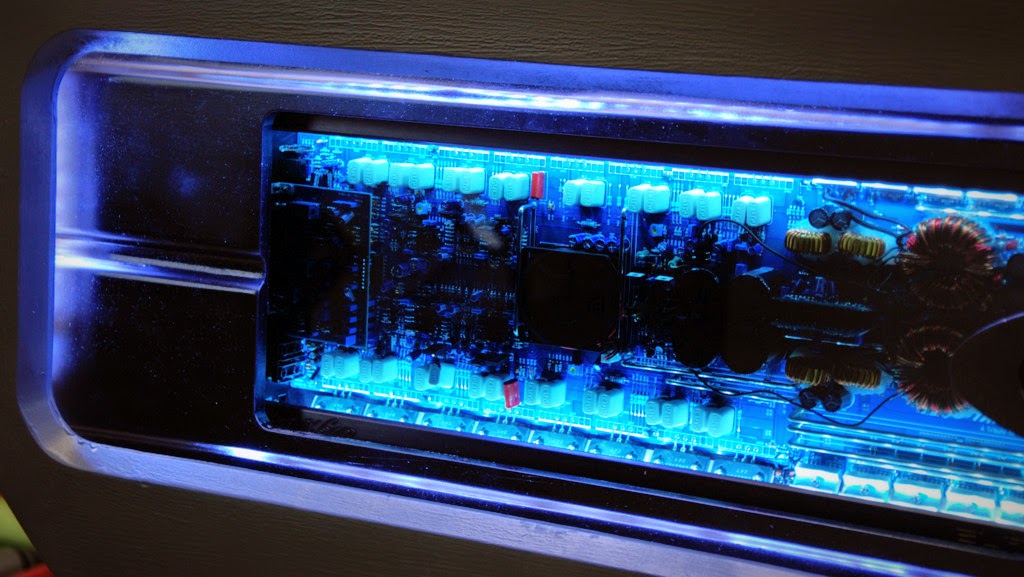
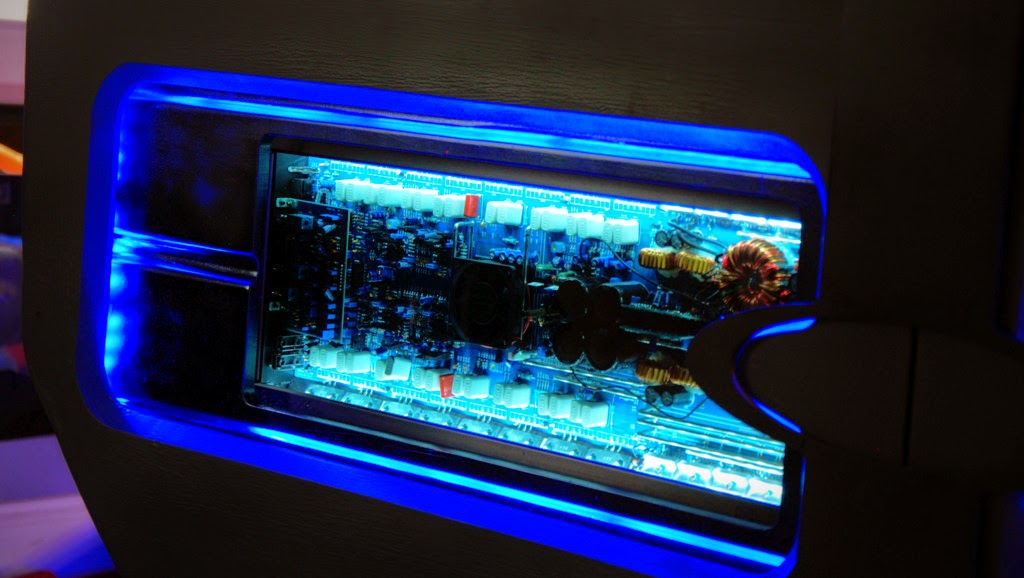
And then… I tried blue lighting… and it was GAME OVER:
It is going to look so hot when I get the side-lit plexi panel installed behind the black trim panel, I think.
White glow from inside the amps, a bold white outline from the plexi, and then the blue glow from the accent lighting… cannot wait to see what this looks like when it is complete.
So that's pretty much it. Waiting on some more parts to come in so I can get the wiring moving along.
I know it's been a long road. I really appreciate everyone following along.
I'd love to get the group's opinion on the blue vs. white. I have a couple of vids up on my YT channel: https://www.youtube.com/user/milox138/videos
Have a great week everyone.
---------- Post added at 12:18 AM ---------- Previous post was at 12:15 AM ----------
And a quick update on wiring the upfitter switches. I decided to use switch 3 for all of my 12v lights and accessories. Trouble was, I didn't have a place to hook all the wires up. Check out the vids.
Quick update on this chilly November evening.
---------- Post added at 12:21 AM ---------- Previous post was at 12:18 AM ----------
Relo'd the trailer brake controller.
Also relo'd the booger bin on the opposite side.
---------- Post added at 12:23 AM ---------- Previous post was at 12:21 AM ----------
Onto the processor rack behind the seat, but first a quick peek at the rear chassis ground.
And processor rack is ready to go in. Hopefully tomorrow.
---------- Post added at 12:24 AM ---------- Previous post was at 12:23 AM ----------
Ok. Rack installed.
Last edited:
Had to create a harness for the 360 to run to the factory amp under the center console. This day was not a lot of fun. Except for the races and beer part.
Progress!! Spent all damn day in the shop. Truck is still in pieces.
First up was making a harness for the 3Sixty.

Then I finally got the "Shifter Retaining Tab" released so I could get the shifter off. Spent way to much time making out with it when all I really needed to do was just bang it. Got the console removed and had complete access to factory amp.

Then went to the bench and made a ghetto tone generator to test the pinouts I found courtesy of Skierman. And they were right! Well done sir.

Ran wires to the rear.

And tapped the outputs up front. Still need to connect the rem in and fuse the B+. Will hopefully get to that tomorrow and get the console back together.

Then we had races.
https://vimeo.com/112014108
And now I am having a beer.

---------- Post added at 12:28 AM ---------- Previous post was at 12:26 AM ----------
Speaker wires run, and a fun little LED project to light up the kids shoes.
More progress...
Speaker wires run to the front and rest of connections for 3Sixty made:


Also added some more LEDs:


And I broke one while installing:

But I fixed it:

So yay. Progress is good.
---------- Post added at 12:30 AM ---------- Previous post was at 12:28 AM ----------
Then I had a cornea transplant in my left. Eye. My vision was 20/700 (that's really bad) before. I had a checkup today, and it's 20/20 -1. Damn good for being six weeks out.
Oh. Here's a quick eye update.
On the way home after surgery:

Day after surgery, last Tuesday:


And yesterday:

---------- Post added at 12:32 AM ---------- Previous post was at 12:30 AM ----------
I then added the speaker connections up front for easy access.
Not a whole lot to update... But I got the barrier strips sorted out up front. In the G, I installed these deep in the floor well. While it worked out well when I changed up the front stage, it was still a pain to get to. Not nearly as much of a pain as running new wire, but still inconvenient.
These are much more accessible. I think this will work out well.


---------- Post added at 12:33 AM ---------- Previous post was at 12:32 AM ----------
Obligatory wire vomit pics


---------- Post added at 12:34 AM ---------- Previous post was at 12:33 AM ----------
Little bit of a tease on the rack:

---------- Post added at 12:35 AM ---------- Previous post was at 12:34 AM ----------
And another tease:
---------- Post added at 12:39 AM ---------- Previous post was at 12:35 AM ----------
And BAM!!! Everything still fits.
Test fitting in the bed. Remarkably, everything still fits.

---------- Post added at 12:40 AM ---------- Previous post was at 12:39 AM ----------
Getting the sub box in:


---------- Post added at 12:41 AM ---------- Previous post was at 12:40 AM ----------
And she is NOW ALIVE.
Progress!! Spent all damn day in the shop. Truck is still in pieces.
First up was making a harness for the 3Sixty.
Then I finally got the "Shifter Retaining Tab" released so I could get the shifter off. Spent way to much time making out with it when all I really needed to do was just bang it. Got the console removed and had complete access to factory amp.
Then went to the bench and made a ghetto tone generator to test the pinouts I found courtesy of Skierman. And they were right! Well done sir.
Ran wires to the rear.
And tapped the outputs up front. Still need to connect the rem in and fuse the B+. Will hopefully get to that tomorrow and get the console back together.
Then we had races.
https://vimeo.com/112014108
And now I am having a beer.
---------- Post added at 12:28 AM ---------- Previous post was at 12:26 AM ----------
Speaker wires run, and a fun little LED project to light up the kids shoes.
More progress...
Speaker wires run to the front and rest of connections for 3Sixty made:
Also added some more LEDs:
And I broke one while installing:
But I fixed it:
So yay. Progress is good.
---------- Post added at 12:30 AM ---------- Previous post was at 12:28 AM ----------
Then I had a cornea transplant in my left. Eye. My vision was 20/700 (that's really bad) before. I had a checkup today, and it's 20/20 -1. Damn good for being six weeks out.
Oh. Here's a quick eye update.
On the way home after surgery:
Day after surgery, last Tuesday:
And yesterday:
---------- Post added at 12:32 AM ---------- Previous post was at 12:30 AM ----------
I then added the speaker connections up front for easy access.
Not a whole lot to update... But I got the barrier strips sorted out up front. In the G, I installed these deep in the floor well. While it worked out well when I changed up the front stage, it was still a pain to get to. Not nearly as much of a pain as running new wire, but still inconvenient.
These are much more accessible. I think this will work out well.
---------- Post added at 12:33 AM ---------- Previous post was at 12:32 AM ----------
Obligatory wire vomit pics
---------- Post added at 12:34 AM ---------- Previous post was at 12:33 AM ----------
Little bit of a tease on the rack:
---------- Post added at 12:35 AM ---------- Previous post was at 12:34 AM ----------
And another tease:
---------- Post added at 12:39 AM ---------- Previous post was at 12:35 AM ----------
And BAM!!! Everything still fits.
Test fitting in the bed. Remarkably, everything still fits.
---------- Post added at 12:40 AM ---------- Previous post was at 12:39 AM ----------
Getting the sub box in:
---------- Post added at 12:41 AM ---------- Previous post was at 12:40 AM ----------
And she is NOW ALIVE.
Last edited:
good choice on woofers.
looks like you have been busy.
looks like you have been busy.
mike.s
Well-Known Member
- Joined
- May 12, 2012
- Posts
- 974
- Reaction score
- 639
Wow!!! This is awesome! Amazing job!
infinitereality
SLC IR/8
Man, that's some serious progress!
Wow. This is an awesome build! How long did it take start to finish?
lka
Full Access Member
Nice work!
beachz
Full Access Member
Milo, I am not an audiophile. If the stereo is loud enough (or the exhaust) so that I can't hear myself sing, I'm good. But that is some nice work!!! Nicely done, sir.
Congrats on the transplant recovery!!! That is awesome! The pirate look was working for you though.
Congrats on the transplant recovery!!! That is awesome! The pirate look was working for you though.
Thanks everyone. This build took waaaaaaay too long (Over a year!). But having 3 kids and a wife and job kinda puts a dent in shop time.
So far she is sounding pretty good. I have got to get her ready for SBN in March, so there's a lot of tuning to be done.
So far she is sounding pretty good. I have got to get her ready for SBN in March, so there's a lot of tuning to be done.
Similar threads
- Replies
- 15
- Views
- 2K
- Replies
- 15
- Views
- 4K
- Replies
- 5
- Views
- 607
Members online
- sambhutta
- WRX2RAPTOR
- mobin
- shigman
- zaiiake
- Jepper84
- kknyrass
- WhiskeyTangoGTFO
- elpechedepeche
- Louisiana Barefoot
- Wangchung83
- julien194b
- Hard R
- 04Ram2500Hemi
- KingKoopa17
- eljefe_tx
- 2010RaptorSvt
- jrd79
- brunorulez
- Raptorman19
- 2022 Ruth
- jp1seattle
- Coyote_695
- SeasickLI
- destructo1776
- JBTAC
- fordfreek
- R Level
- Solidred
- MORaptor1
- jAKe47
- GenDos19
- Braaaaptor
- Helopilot
- Xerxes
- schumacher1111
- RabDog
- Nood1es
- Reptar854
- FmaxTurboSi
- Locker1
- Skai
- bellnghmrider
- mprice1234
- bjorn-dpc
- IIAWAH808
- SuprSeb
- JohnyPython
- drnash21
- TCB
Total: 1,842 (members: 87, guests: 1,755)