nGauge Holder for 2018 Ford Raptor

Disclaimer: Links on this page pointing to Amazon, eBay and other sites may include affiliate code. If you click them and make a purchase, we may earn a small commission.

Raptus

Full Access Member
Joined
Apr 2, 2018
Posts
274
Reaction score
128
Location
Northern, CA
First I want to thank all of the forum members who have contributed to this forum. The information that is shared on this forum has been a great source of information and has helped me select and implement numerous mods to my 2018 Raptor.

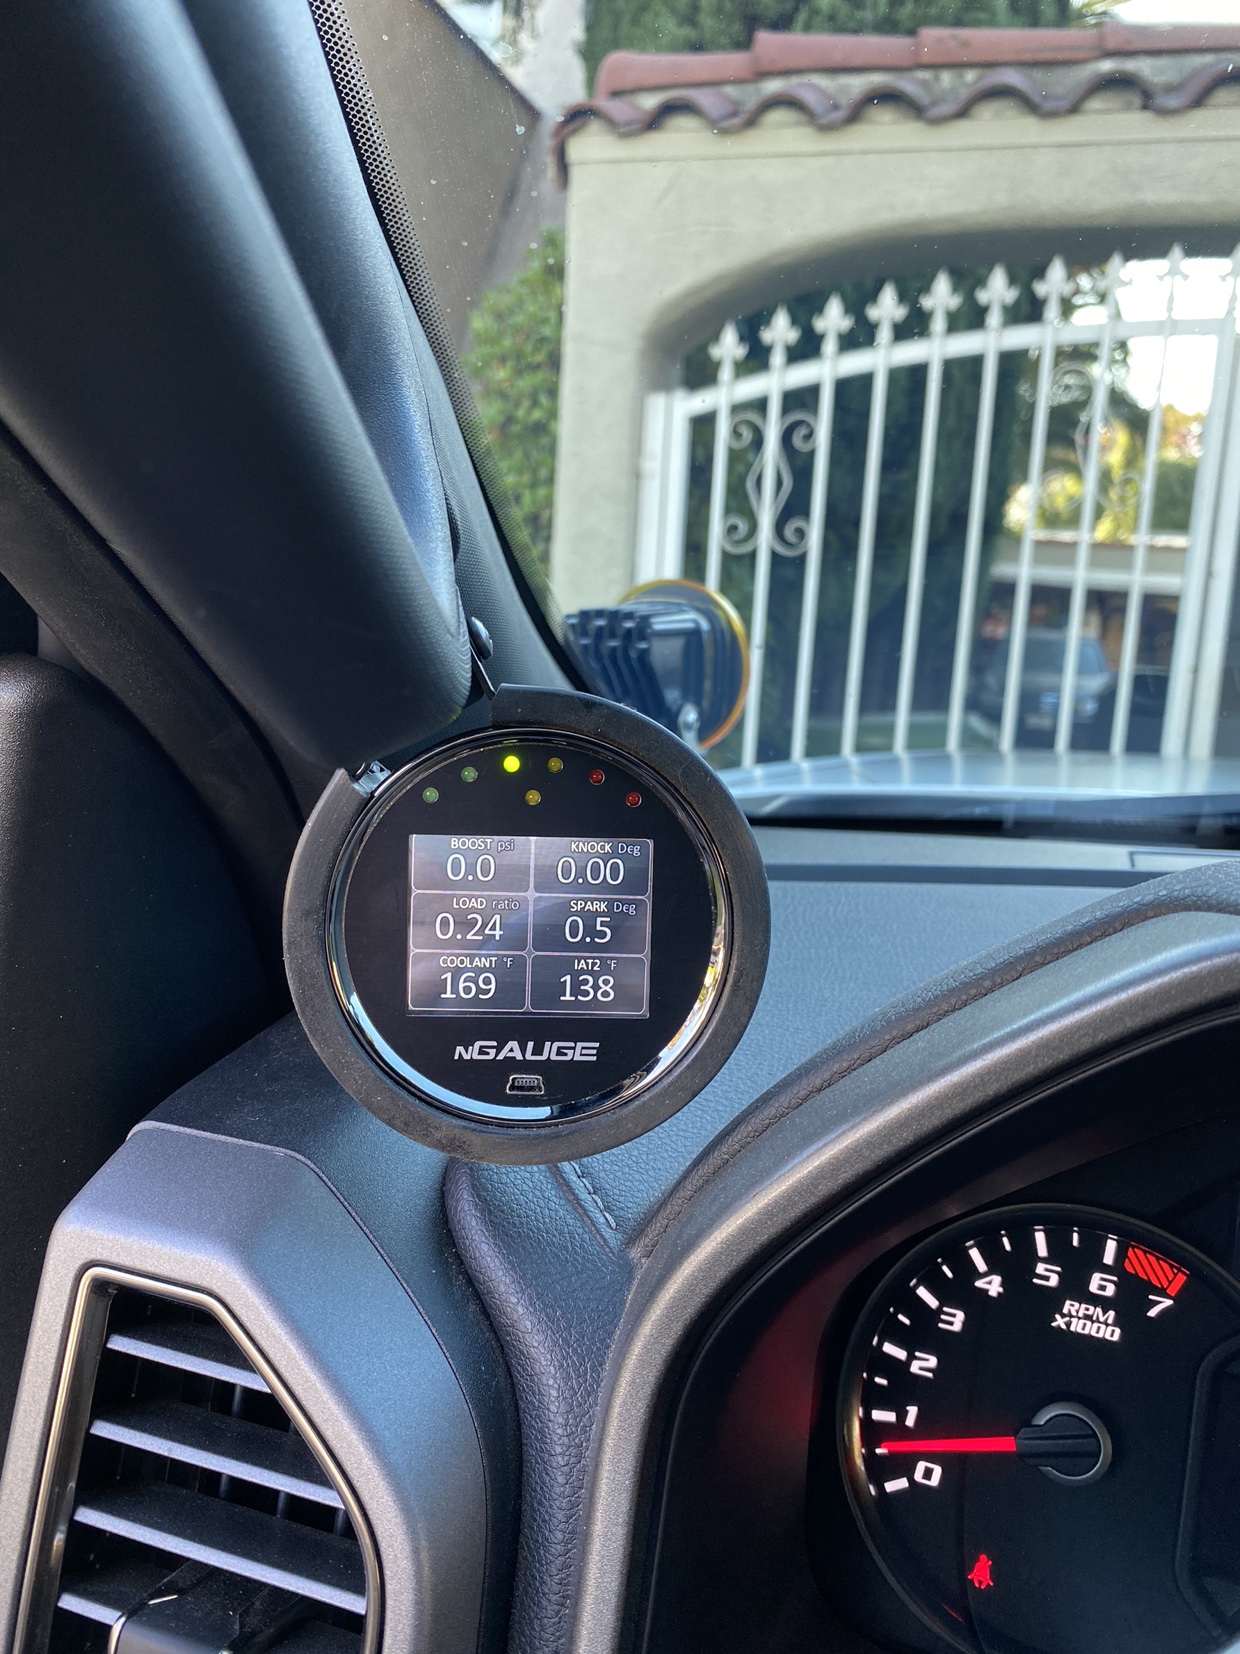
After months of searching and contemplation I finally figured out how to easily/cleanly mount an nGauge in my 2018 Ford Raptor. Total cost $30.00. Installation time 1-2 hours depending on how much time you spend running the cable to the OBD port under that dash.

0.JPG


A.jpg

B.jpg

Parts Required

C.jpg

Holley Performance 26-620 Gauge Pedestal Mounting Bracket. This can be purchased at Summit Racing for $20.00.

https://www.summitracing.com/parts/hly-26-620

D.jpg

(1) M6 x 1.0 x 40-50mm long socket head cap screw.
(3) Flat washers with a total stack height of 0.150” and a maximum diameter of 0.75”
 
OP
OP
Raptus

Raptus

Full Access Member
Joined
Apr 2, 2018
Posts
274
Reaction score
128
Location
Northern, CA
Installation Instructions

E.jpg

Use a 1/4" drill bit to oversize the top mounting hole.

F.jpg

Remove the lower A-Pillar fastener cover by pinching it with your fingers or by using a plastic molding removal tool. Be careful when working around the dash and A-Pillar because the material is very soft and scratches easily. You will need to permanently remove the lower A-Pallar fastener cover to mount the nGauge holder. Just pull the cover off gently and save it in case you want to replace it at a later date.


G.jpg

Remove the lower A-Pillar fastener with an 8mm socket.

H.jpg

Insert the M6 x 1.0 x 40-50mm socket head cap screw through the 1/4" diameter hole in the top of the nGauge holders mounting bracket. Add the (3) Flat washers with a total stack height of 0.150” and a maximum diameter of 0.75” as shown above and fasten the socket head cap screw into lower A-Pillar attachment point.

I.jpg

Insert nGauge, tighten machine screws and run cable to OBD port under the dash.
 
Last edited:
OP
OP
Raptus

Raptus

Full Access Member
Joined
Apr 2, 2018
Posts
274
Reaction score
128
Location
Northern, CA
Instructions Part 2

If you want to hide the nGauge cable for a clean installation follow the directions below.


J.jpg

Remove the upper A-Pillar fastener cover by pinching it with your fingers or by using a plastic molding removal tool. Leave the upper A-Pillar cover attached to the A-Pillar.

Remove the upper and lower A-Pillar fasteners with an 8mm socket.

K.jpg

Pull the A-Pillar cover off just far enough to disconnect the speaker connector. Once the speaker is disconnected remove the A-Pillar.

L.jpg

Remove the drivers side vent cover by using a plastic molding removal tool. Be careful when working around the dash because the material is very soft and scratches easily.

M.jpg

Run the wire from the OBD port to the nGauge as shown above. You need to make sure you run the cable behind the plastic frame for the side vent cover or you will not be able reinstall the side vent cover.

O.jpg

Bundle the excess wire with a nylon tie.
 
Last edited:
OP
OP
Raptus

Raptus

Full Access Member
Joined
Apr 2, 2018
Posts
274
Reaction score
128
Location
Northern, CA
Instructions Part 3 of 3

P.jpg

Store the excess cable behind the vent as shown above.

Q.jpg

Install the A-Pillar cover behind the nGuage cable as shown above.

R.jpg

Reinstall the drivers side vent cover and enjoy your new nGauge holder!
 
Last edited:

nikhsub1

FRF Addict
Joined
Mar 5, 2017
Posts
4,169
Reaction score
4,774
Location
Los Angeles
So i mounted mine, soler easy. I reused the stock bolt, seems fine to me. Now I just have to route the cable. How do we make it so the gauge view opens automatically at each startup?

86c49f675cc5ebbd16e3ad02cf63e2cb.jpg

97f91cf3087f892c76324f9719949219.jpg


cae100d49090abb234a05a3d34f040c2.jpg


Sent from my iPhone using Tapatalk Pro
 

nikhsub1

FRF Addict
Joined
Mar 5, 2017
Posts
4,169
Reaction score
4,774
Location
Los Angeles
The cable you have is flat - mine is thick and round. I think I will need a flat one like you have.
 
OP
OP
Raptus

Raptus

Full Access Member
Joined
Apr 2, 2018
Posts
274
Reaction score
128
Location
Northern, CA
Make sure to use the washer set or you will permanently deform the edge of the lower A-Pillar fastener pocket. You will not notice it unless you remove the nGauge holder and reinstall the lower A-Pillar cover. Not a real big deal but it will be noticeable if you look.

Go to diagnostics and settings to have the nGauge open gauges at startup.
 
OP
OP
Raptus

Raptus

Full Access Member
Joined
Apr 2, 2018
Posts
274
Reaction score
128
Location
Northern, CA
The cable you have is flat - mine is thick and round. I think I will need a flat one like you have.

If you are careful and cut the sheathing of the cable off where it gets pinched between the dash and A-Pillar you should be able to flatten the wires. It’s not the cleanest solution but it should work.
 
Top