GEN 1 Shock rebuild

Disclaimer: Links on this page pointing to Amazon, eBay and other sites may include affiliate code. If you click them and make a purchase, we may earn a small commission.

Gumby

FRF Addict
Joined
Mar 7, 2023
Posts
1,354
Reaction score
2,470
Location
Nashville
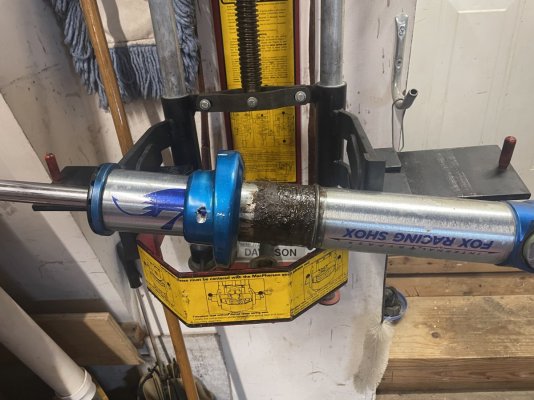
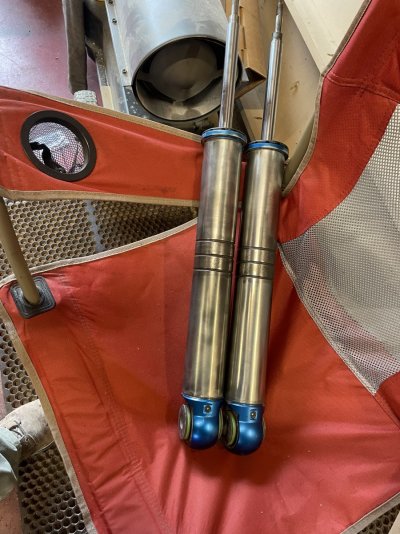
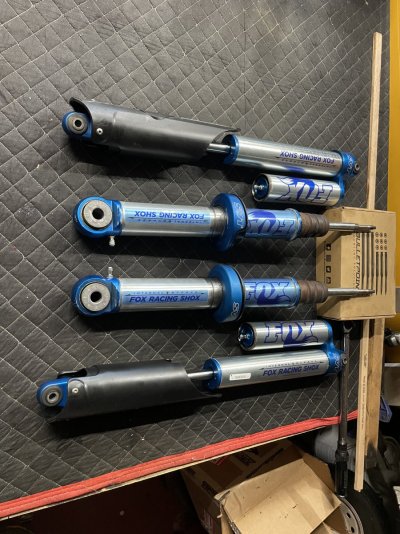
I acquired an extra set of shocks from a friend. I figured I might as well start a rebuild. I do have a couple of questions. I am going to get my kits from Smitty suspension. They list different kinds an Viton or a Buna. How do I know witch one I have? I will call them on Monday. The set screw in One of the perches Didn't cooperate. LOL... so think I will need one of them (perch) I had a thought to drill both of them both through Below the spring tap and put a grease fitting in. It would be below the spring Just to add some grease occasionally. Keep the perch from welding its self to the shock body. Thoughts????
I was going to get new stickers/perch from Kar Tec Offroad. I Removed the coating that came stock.....pretty much had to.. How far do you think I should polish them before the new stickers go on? I could make them like a minor but though that might be excessive. LOL @Jhollowell And anyone else that has rebuilt their own. LOL771CF176-1FFC-4171-AF62-5C0BA6631848.jpeg83B8CA87-2EA6-476F-BD28-06050E645ECA.jpeg355C2C68-8E7A-409C-A105-B3B8AFB80900.jpeg
 
Last edited:

Sozzy12

FRF Addict
Joined
Oct 13, 2017
Posts
1,780
Reaction score
2,958
Location
South Idaho
Dang, I forgot those had bushings originally... I had Forged install heims when they were rebuilt a while back. I also had.flutter stacks and different valving, and shroeder valves installed. I think there is another place offering rebuild services? Forged is out of business now I hear.
 

Whoops

Member
Joined
Dec 4, 2023
Posts
27
Reaction score
85
Location
Santa Cruz
From what I understand, you want buna. Viton is more for racing and is more prone to leaking on daily drivers. Something about Viton withstanding high heat better but not working as well as buna at lower temps. I've rebuilt several sets of King's and a set of ADS. I've always chosen Buna.
But, who knows? Maybe I got bad info in the past.
 

Jhollowell

Full Access Member
Joined
Mar 14, 2016
Posts
682
Reaction score
636
Location
Everett, wa
Those cleaned up nicely!!! And yeah, welcome to the world of rebuilding 10+ year old shocks. I would look at shock seals for your seal kits as they seem to have the best prices. I cerakote the bodies as well as the retaining clip on the fronts to keep them from corroding again. Amazon sells a black oxiding kit that i thought about getting for the retaining clips as well as the ones on the rear shock.
 
OP
OP
Gumby

Gumby

FRF Addict
Joined
Mar 7, 2023
Posts
1,354
Reaction score
2,470
Location
Nashville
@Jhollowell I have a couple questions. Do you need to pull a vacuum on the nitrogen chamber before you fill with nitrogen? Just trying to figure out how you get the build air out. Do you fill bleed fill bleed fill bleed? If so how many times?
 

Jhollowell

Full Access Member
Joined
Mar 14, 2016
Posts
682
Reaction score
636
Location
Everett, wa
@Jhollowell I have a couple questions. Do you need to pull a vacuum on the nitrogen chamber before you fill with nitrogen? Just trying to figure out how you get the build air out. Do you fill bleed fill bleed fill bleed? If so how many times?
The fronts and rears are a little different.

Rear - Install IFP and push all the way down. Install bypass tube and fill with 28oz of fluid. SLOWLY cycle the IFP up and down a few inches to remove any trapped air. When no more bubbles come up when pushing the IFP down, the system is bled. Pull the IFP up a few inches to decrease the height of the fluid in the main body. This will help to not overflow fluid when you install the shaft and top cap. I install the shaft/top cap with the shaft fully extended. Once the top cap is tight, open the bleed screws, charge with Nitrogen and close the bleed screws when no more bubble come out. You can also let it sit for a few min after you open the bleed screws and let it vent naturally then add the nitro to push the IFP up and purge all the remaining air. The important thing is to fill it with enough fluid so that when you charge the system the IFP does not bottom out at the end of the chamber. if you fill the rear with 28oz you should be good. PS, don't forget to add the snap ring on the IFP cap before charging. That thing will come off like a missile... ask me how i know

Fronts - Install the IFP and and snap ring. Remove valve core or depress valve to push IFP down a few inches. Install bypass tube and fill with 20oz of fluid. Install top cap and shaft with shaft fully extended. open bleed screws and let it vent a few min. Charge with nitro and close bleed screws when no more bubbles are present. The fronts are a lot easier since most of the air is displaced when you pour the fluid in. But the same thing goes, make sure you don't top out the IFP when you charge it. 20oz is good for the fronts.

You could push the IFP all the way down/up (closest to the valve) before you charge it with nitro. That would purge all the "air" out and give you 100% nitro in the chamber.

Hopefully this helps. if not reach out again, i'm happy to help with this stuff and as you can see i don't mind giving a through explanation.
 
OP
OP
Gumby

Gumby

FRF Addict
Joined
Mar 7, 2023
Posts
1,354
Reaction score
2,470
Location
Nashville
@Jhollowell Thank You. I did all of what you said for the oil side. The gas side was more of my concern. Am I over thinking things? How do you get rid of the build air? In the rear for example there is "build air" between the IPF and the cap. if you just charge it with nitrogen you have a "build air/ nitrogen" mix. should I bleed fill bleed, a few times to try to lower the % of "build air"? I might be overthinking it.
 

Jhollowell

Full Access Member
Joined
Mar 14, 2016
Posts
682
Reaction score
636
Location
Everett, wa
@Jhollowell Thank You. I did all of what you said for the oil side. The gas side was more of my concern. Am I over thinking things? How do you get rid of the build air? In the rear for example there is "build air" between the IPF and the cap. if you just charge it with nitrogen you have a "build air/ nitrogen" mix. should I bleed fill bleed, a few times to try to lower the % of "build air"? I might be overthinking it.
you might be overthinking it but it seems reasonable to try to get all the build air out before charging. On the rear shock you could pull the IFP all the way up, install the cap and then charge it. that would bleed out most of the build air. Do the same thing for the fronts. push the IFP all the way down while holding the valve open, then charge it.
 
OP
OP
Gumby

Gumby

FRF Addict
Joined
Mar 7, 2023
Posts
1,354
Reaction score
2,470
Location
Nashville
you might be overthinking it but it seems reasonable to try to get all the build air out before charging. On the rear shock you could pull the IFP all the way up, install the cap and then charge it. that would bleed out most of the build air. Do the same thing for the fronts. push the IFP all the way down while holding the valve open, then charge it.

Well late for all that. I will just charge them then bleed them and charge them.I am going to do that 5x. should mostly be nitrogen. mostly LOL or do you think 10 times? Do you do this? or am I just waisting nitrogen?
 
Last edited:
OP
OP
Gumby

Gumby

FRF Addict
Joined
Mar 7, 2023
Posts
1,354
Reaction score
2,470
Location
Nashville
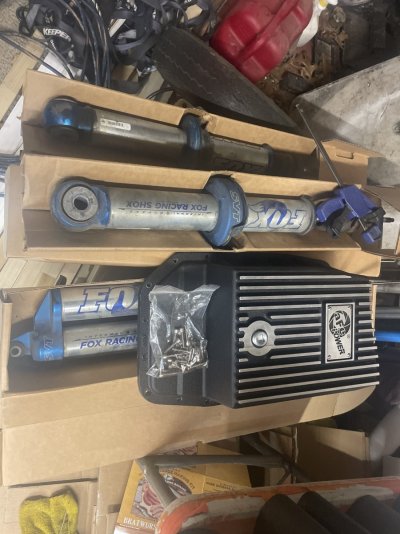
This is the finished product. The overall difficulty was 5 out of 10. The cleaning was the worst part. not a fan really of the stickers from karTec. I wrapped the bottoms of the front shocks with a clear vinyl I like how those came out. The cost wasn't bad $200 in kits, tools and Oil. $250 in regulators hose and fittings. $18 in nitrogen. I had the tank. The stickers were 11 each bucks not worth it IMO I am sure I can get a local co to make me better ones. I have 20k before these have to go on the truck. So might try to get something like that.59AFF20E-6856-4E9D-B443-66BDD648173B.jpeg
 
Last edited:
Top