Tips & Tricks
Some of my admissions below are a little embarrassing for someone whom feels they know their way around a garage. I am including them because I feel that others may learn from my mistakes. There are a lot of new things going on here. If I was doing these one after another, I am sure I could do most of this blindfolded. Instead, I dive in blind and learn how to use some new tools.
My best advice after reading all of the service manuals, watching videos online, then doing the work is that you should just go ahead and replace any and all seals you come across in working on your truck. These are quite inexpensive overall and may have added up to roughly $300 for the entire service including everything listed below. If you don’t replace all the seals you will likely experience fluid leaks. To repair these leaks, you will have to take it all apart again. It is noticeable how much taller the new rubber seals are than the old crushed ones.
My next best advice is to use a torque wrench. No more calibrated right arm. Torque specs are everywhere in the manual.
Clean the darn thing before you start. Road grime builds up even if you keep her nice and shiny. I doused the engine bay with some Simple Green and hit it with the pressure washer on HOT. Stay away from electrical and connections. For extra measure, I had my battery disconnected when I cleaned the engine bay and then let it dry. This is also a good time to inspect how things look under there. If you see excessive oil or grime - investigate. You may have some other maintenance items to add to your list. I found a leaking passenger side front axle seal to tend to. In addition to a good wash, it is recommended to have compressed air and an air gun handy to blow out dust and dirt from the fuel and electrical connections.
The turbo coolant and oil lines are a bit tough to pull out if your truck is a few years old. Those o-rings have fused to the metal on both the line and the block. I’m not sure if there are sprays that could soften these, but mine required a little prying and pulling to pop them out. Clean those coolant lines and the block ports well. Brake cleaner really helps clean off those old o-ring residuals. Kind of melts the rubber. My preference is to clean as I disassemble. That way, it is a bit easier on me when I go to put it all back together.
Spray down the turbo bolts (downpipe and manifold) with penetrating oil a few days in advance. This should help break loose those rusty fasteners.
For me, the worst part of this service was getting at the driver side coolant line on the back of the block. Unless you have the wingspan of an osprey with tiny little hands, you are unlikely to be able to remove the driver side turbo coolant fastener from inside the wheel well. I was able to put my finger tips on the fastener but not able to get a tool on this one from inside the wheel well. The driver side head is a couple inches closer to the firewall than the passenger side (cylinder offset) and this really limits space. I was either able to view the faster, or feel it. Not both. The solution for me was to remove the intake manifold and supplementary fuel injector rails. This provides access through the valley pan above the motor to access this fastener. When removing the intake manifold, the manual wants you to replace those six manifold seals.
It looks like it may be possible to leave the turbo coolant line in the back of the block, simply pulling out the slip fitting. Since pulling these out of the block and cleaning them was a real hassle, I suggest simply replacing the slip fitting seal and leaving the tube end in the block if you think you can reattach it. The manual requires removal, cleaning, and reinstallation of all seals. The effort does not seem worth it, especially on the driver side. This could save considerable time.
Don’t drop the Y pipe. The service manual tells you that you need to drop the Y-pipe to get the turbos out. Dropping the Y-pipe is somewhat complex and involves supporting the transmission while pulling out the support bracket. This is a lot of work that seems avoidable. You can pull the turbos out with this still attached.
Let’s talk about intercoolers. This is by far the easiest and best item under the hood to upgrade from stock. It works, but really seems to be limited. Data I’ve seen online seems to show that the stock unit gets heat soaked relatively quickly. It has limited capacity and when you remove them…. They seem quite fragile. There are lots of options out there. Many options fit the OEM location which may be most desirable. If they fit the OEM location, your active grille shutters get to stay and function like they should. These literally equate to 1-2mpg on the highway. Keep them if you can. General engineering rule of thumb on an intercooler is that they are literally never large enough. Get the largest volume you can possibly package in the space you have available. Most aftermarket intercoolers are quite durably constructed. I chose the Wagner intercooler for my application. This fits in the stock location but also protrudes up into the radiator area to grab a little more volume. It is a bit more effort to install but I am trying to maximize intercooler volume for heat transfer. This intercooler may give you grief if you plan to lift the cab on and off as this little protrusion is slightly backward canted. It matches the internal geometry under the hood amazingly well.
The coolant has apparently changed for all F series trucks. I had ORANGE coolant. Yellow is now specified and requires a thorough rinse as they are apparently not compatible with each other. The turbo coolant lines seem to be the lowest point in the system. Even though I flushed and drained everything through the radiator tubes, more coolant came out when I detached these lines and the turbo from the block. That flush requires removal of the radiator (to wash it upside down). Might as well pull the entire front end off while you are at it. Good opportunity to install a new intercooler with the grille off if you have not already. A little extra room in front of the engine was appreciated when working on the AC compressor and hand turning the motor.
Measuring the coolant concentration is interesting. The manual recommends a refractometer. The one I purchased only indicates the TEMPERATURE that the coolant is good for. This does not help you calculate CONCENTRATION and can only be used to adjust blind. It is possible you find a refractometer that reads % concentration for ethylene glycol, but you can also cross reference the freezing point (reading) with ethylene glycol concentrations online. That route is a little more complicated but makes concentration adjustment much easier in my opinion.
I had a small heart attack when I went to use the coolant vacuum purge tool for the first time. Watched all the videos, bought the nice Airlift tool. Did not get one ounce of vacuum the first time I hooked it up. I admit, I may have panicked. I usually do impressive work. DID I FORGET TO HOOK SOMETHING UP? Nope. You just don’t know how to use your new tool. All of the videos online show people fitting the correct sized adapter to their coolant reservoir and then mounting the unit. So, I gave that a shot. There was a perfectly sized rubber grommet to accommodate my expansion tank. Nope. ALL WRONG. If you look inside the coolant filler neck, there is a small drain hole. The rubber grommet I tried sealed nicely against the lip, but had a hole to atmosphere and gave me fits. Just use the Airlift tool without any adapters and it works flawlessly. It literally pulled a vacuum in less than a minute. Works as described once you hook it up correctly. Practice makes perfect.
To fill it up the coolant after pulling vacuum, just hook up your intake hose and drop the other end in the bucket of coolant. It apparently helps if your bucket is roughly the same height as the radiator. I used a small step stool to hold mine. Coolant volume is about 4 gallons, so a 5 gallon bucket is perfect to hold all of the fluid. It is helpful to push the entire tube into the coolant to pre-fill. Close the valve to retain the fluid before you take it out of the bucket. Hook it up, open the valve to your coolant system…. And watch it fill up. This works beautifully. And, you are guaranteed not to have air pockets.
Some questions you might ask when using a vacuum purge and refill kit for the first time;
Q: Do I need a big air compressor or will a small pancake work?
A: A small pancake worked fine for me. Roughly 2 CFM at 90 psi was more than adequate
Q: I am reading absolutely no vacuum. What did I do wrong?
A: This is clearly a big leak. Check how you mounted it to the tank first. Double check the radiator petcock is closed next. Then check your lines. Make sure all those coolant lines are attached and have their spring clips installed.
Q: How do I know if I have a leak?
A: Once you pull vacuum, you can leave it there for a few minutes to make sure it holds vacuum tight. The tool says 20 seconds and you are good to go.
Q: What do I do if it doesn’t hold vacuum?
A: Trouble shoot your leak. There is another tool called a coolant pressure tester that will apply a small amount of pressure to the coolant. This will force water or coolant from the leak to help you spot it.
When shopping for coolant you will see both pre-mix and concentrate in a myriad of colors. Unless you did a complete flush and fill with new coolant, concentrate and a refractometer are your best friends. You probably need to be able to test your coolant and make sure the concentration is where you need it anyway. That is particularly true if you are just topping off your system. Never mix colors. I decided to keep everything MotorCraft and ordered up some YELLOW. My truck came with Orange coolant, which is no longer available. When switching coolant you will need to flush and fill. That is more involved than simply draining the coolant and involves removal of the radiator to wash it out in addition to fully flushing the block.
The engine block turbo oil filters come with a blue plug in them that proved challenging to remove. Before you lose your **** and grab a pair of pliers like I did, the plug has left handed threads. You can use the T45 on it. Turn clockwise and it will come right out. Counterclockwise and it will spin all day long. I repeat - all day long. There are no markings on the product or packaging to help you.

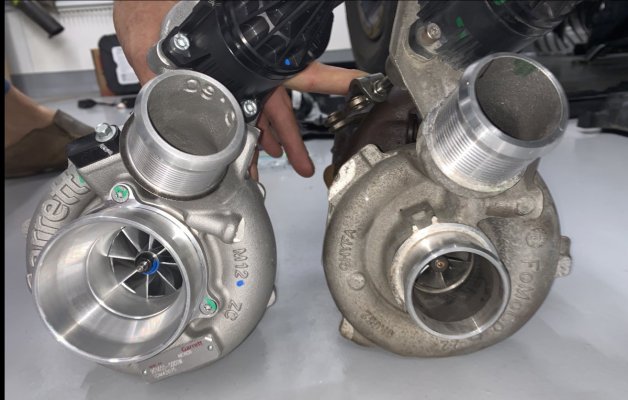
You hang the turbos with coolant lines attached. They are tricky, but the somewhat tight packaging does a relatively good job holding the turbo in place. Once roughly in the correct location, you hook up the coolant lines to the block. Make sure you seat the o-rings fully before you run in the fastener. The manual suggests bolting down the turbo before installing the oil drain tube. I found it a little easier to leave the Turbo to manifold bolts off when getting the drain line in. Bolting them down after seemed a bit easier. These corrugated drain tubes are pretty stiff, but do bend. Use your hands and not a tool to shape them a touch.
I think I finally got the hang of mounting the turbos about the time I was done the job. What worked the best for me was to get the turbo with coolant lines preinstalled into their space. Then, I inserted the oil drain into the turbo while everything was loose. Its an easy “pop” this way. Then, I take the whole turbo and lines as a unit, insert the other end of the drain into the oil pan. The downpipe and drain sort of help hold everything in place here. I am able to connect the block sides of the coolant lines and then bolt down the turbo. The reason I like this method is that everything stays loose and has a little play to wiggle those lines into their holes. You really don’t want to force them. Once you get a line into its hole, I recommend finger tight fastener to keep them from popping out. Refrain from tightening them down until they are all plugged in correctly. Wiggle, wiggle. Take your time.
Those boost tubes take a bit of effort, but that is nothing new to those whom have taken these apart. I like to use a mist of Simple Green on silicone tubing to make them install easier. Makes it so much easier when I’m not fighting friction.
If you happen to grab the UPR catch can, they require a vacuum connection to their unit in addition to the “clean line". They suggest drilling a hole in the passenger side turbo inlet tube. Since I have installed the Turbosmart e-BOV I have an extra vacuum port available on the driver side. The BOV comes with a plug for this line. I added a 1/4 NPT hole and was able to screw in the fitting to connect the UPR. Line length even works out when connecting down by the intercooler. Nice clean install and no new holes.
When I put it all back together, I left the truck on jack stands, front tires off, wheel well liners off, and all skid plates off for the first firing. I did this so that I could see everything on the off chance of a leak or a tube popping off. I always have a fire extinguisher handy when firing an engine for the first time. Once this was successful, I buttoned up everything but the front skid plate. This would allow access to the boost tubes should you not tighten them adequately. I left the truck this way while doing the tuning of the truck to provide quick and easy access should it be necessary.
There really should be a tool to insert into the intake manifold that helps protect the firewall during service. The rubber hooks on the top of the vanity cover seems to have a tendency to grab the fabric attached to the firewall and have taken a few chunks out of the cloth. Grr. I’m trying to be delicate, but this keeps snagging and looks bad. I might purchase a spare engine vanity cover just to cut out the attachment point to the manifold. I need something to cover this area (smooth) to be able to pull this part in and out without damaging that cloth. Something that pops in and pops out of those hooks would be ideal.
Some of my admissions below are a little embarrassing for someone whom feels they know their way around a garage. I am including them because I feel that others may learn from my mistakes. There are a lot of new things going on here. If I was doing these one after another, I am sure I could do most of this blindfolded. Instead, I dive in blind and learn how to use some new tools.
My best advice after reading all of the service manuals, watching videos online, then doing the work is that you should just go ahead and replace any and all seals you come across in working on your truck. These are quite inexpensive overall and may have added up to roughly $300 for the entire service including everything listed below. If you don’t replace all the seals you will likely experience fluid leaks. To repair these leaks, you will have to take it all apart again. It is noticeable how much taller the new rubber seals are than the old crushed ones.
My next best advice is to use a torque wrench. No more calibrated right arm. Torque specs are everywhere in the manual.
Clean the darn thing before you start. Road grime builds up even if you keep her nice and shiny. I doused the engine bay with some Simple Green and hit it with the pressure washer on HOT. Stay away from electrical and connections. For extra measure, I had my battery disconnected when I cleaned the engine bay and then let it dry. This is also a good time to inspect how things look under there. If you see excessive oil or grime - investigate. You may have some other maintenance items to add to your list. I found a leaking passenger side front axle seal to tend to. In addition to a good wash, it is recommended to have compressed air and an air gun handy to blow out dust and dirt from the fuel and electrical connections.
The turbo coolant and oil lines are a bit tough to pull out if your truck is a few years old. Those o-rings have fused to the metal on both the line and the block. I’m not sure if there are sprays that could soften these, but mine required a little prying and pulling to pop them out. Clean those coolant lines and the block ports well. Brake cleaner really helps clean off those old o-ring residuals. Kind of melts the rubber. My preference is to clean as I disassemble. That way, it is a bit easier on me when I go to put it all back together.
Spray down the turbo bolts (downpipe and manifold) with penetrating oil a few days in advance. This should help break loose those rusty fasteners.
For me, the worst part of this service was getting at the driver side coolant line on the back of the block. Unless you have the wingspan of an osprey with tiny little hands, you are unlikely to be able to remove the driver side turbo coolant fastener from inside the wheel well. I was able to put my finger tips on the fastener but not able to get a tool on this one from inside the wheel well. The driver side head is a couple inches closer to the firewall than the passenger side (cylinder offset) and this really limits space. I was either able to view the faster, or feel it. Not both. The solution for me was to remove the intake manifold and supplementary fuel injector rails. This provides access through the valley pan above the motor to access this fastener. When removing the intake manifold, the manual wants you to replace those six manifold seals.
It looks like it may be possible to leave the turbo coolant line in the back of the block, simply pulling out the slip fitting. Since pulling these out of the block and cleaning them was a real hassle, I suggest simply replacing the slip fitting seal and leaving the tube end in the block if you think you can reattach it. The manual requires removal, cleaning, and reinstallation of all seals. The effort does not seem worth it, especially on the driver side. This could save considerable time.
Don’t drop the Y pipe. The service manual tells you that you need to drop the Y-pipe to get the turbos out. Dropping the Y-pipe is somewhat complex and involves supporting the transmission while pulling out the support bracket. This is a lot of work that seems avoidable. You can pull the turbos out with this still attached.
Let’s talk about intercoolers. This is by far the easiest and best item under the hood to upgrade from stock. It works, but really seems to be limited. Data I’ve seen online seems to show that the stock unit gets heat soaked relatively quickly. It has limited capacity and when you remove them…. They seem quite fragile. There are lots of options out there. Many options fit the OEM location which may be most desirable. If they fit the OEM location, your active grille shutters get to stay and function like they should. These literally equate to 1-2mpg on the highway. Keep them if you can. General engineering rule of thumb on an intercooler is that they are literally never large enough. Get the largest volume you can possibly package in the space you have available. Most aftermarket intercoolers are quite durably constructed. I chose the Wagner intercooler for my application. This fits in the stock location but also protrudes up into the radiator area to grab a little more volume. It is a bit more effort to install but I am trying to maximize intercooler volume for heat transfer. This intercooler may give you grief if you plan to lift the cab on and off as this little protrusion is slightly backward canted. It matches the internal geometry under the hood amazingly well.
The coolant has apparently changed for all F series trucks. I had ORANGE coolant. Yellow is now specified and requires a thorough rinse as they are apparently not compatible with each other. The turbo coolant lines seem to be the lowest point in the system. Even though I flushed and drained everything through the radiator tubes, more coolant came out when I detached these lines and the turbo from the block. That flush requires removal of the radiator (to wash it upside down). Might as well pull the entire front end off while you are at it. Good opportunity to install a new intercooler with the grille off if you have not already. A little extra room in front of the engine was appreciated when working on the AC compressor and hand turning the motor.
Measuring the coolant concentration is interesting. The manual recommends a refractometer. The one I purchased only indicates the TEMPERATURE that the coolant is good for. This does not help you calculate CONCENTRATION and can only be used to adjust blind. It is possible you find a refractometer that reads % concentration for ethylene glycol, but you can also cross reference the freezing point (reading) with ethylene glycol concentrations online. That route is a little more complicated but makes concentration adjustment much easier in my opinion.
I had a small heart attack when I went to use the coolant vacuum purge tool for the first time. Watched all the videos, bought the nice Airlift tool. Did not get one ounce of vacuum the first time I hooked it up. I admit, I may have panicked. I usually do impressive work. DID I FORGET TO HOOK SOMETHING UP? Nope. You just don’t know how to use your new tool. All of the videos online show people fitting the correct sized adapter to their coolant reservoir and then mounting the unit. So, I gave that a shot. There was a perfectly sized rubber grommet to accommodate my expansion tank. Nope. ALL WRONG. If you look inside the coolant filler neck, there is a small drain hole. The rubber grommet I tried sealed nicely against the lip, but had a hole to atmosphere and gave me fits. Just use the Airlift tool without any adapters and it works flawlessly. It literally pulled a vacuum in less than a minute. Works as described once you hook it up correctly. Practice makes perfect.
To fill it up the coolant after pulling vacuum, just hook up your intake hose and drop the other end in the bucket of coolant. It apparently helps if your bucket is roughly the same height as the radiator. I used a small step stool to hold mine. Coolant volume is about 4 gallons, so a 5 gallon bucket is perfect to hold all of the fluid. It is helpful to push the entire tube into the coolant to pre-fill. Close the valve to retain the fluid before you take it out of the bucket. Hook it up, open the valve to your coolant system…. And watch it fill up. This works beautifully. And, you are guaranteed not to have air pockets.
Some questions you might ask when using a vacuum purge and refill kit for the first time;
Q: Do I need a big air compressor or will a small pancake work?
A: A small pancake worked fine for me. Roughly 2 CFM at 90 psi was more than adequate
Q: I am reading absolutely no vacuum. What did I do wrong?
A: This is clearly a big leak. Check how you mounted it to the tank first. Double check the radiator petcock is closed next. Then check your lines. Make sure all those coolant lines are attached and have their spring clips installed.
Q: How do I know if I have a leak?
A: Once you pull vacuum, you can leave it there for a few minutes to make sure it holds vacuum tight. The tool says 20 seconds and you are good to go.
Q: What do I do if it doesn’t hold vacuum?
A: Trouble shoot your leak. There is another tool called a coolant pressure tester that will apply a small amount of pressure to the coolant. This will force water or coolant from the leak to help you spot it.
When shopping for coolant you will see both pre-mix and concentrate in a myriad of colors. Unless you did a complete flush and fill with new coolant, concentrate and a refractometer are your best friends. You probably need to be able to test your coolant and make sure the concentration is where you need it anyway. That is particularly true if you are just topping off your system. Never mix colors. I decided to keep everything MotorCraft and ordered up some YELLOW. My truck came with Orange coolant, which is no longer available. When switching coolant you will need to flush and fill. That is more involved than simply draining the coolant and involves removal of the radiator to wash it out in addition to fully flushing the block.
The engine block turbo oil filters come with a blue plug in them that proved challenging to remove. Before you lose your **** and grab a pair of pliers like I did, the plug has left handed threads. You can use the T45 on it. Turn clockwise and it will come right out. Counterclockwise and it will spin all day long. I repeat - all day long. There are no markings on the product or packaging to help you.
You hang the turbos with coolant lines attached. They are tricky, but the somewhat tight packaging does a relatively good job holding the turbo in place. Once roughly in the correct location, you hook up the coolant lines to the block. Make sure you seat the o-rings fully before you run in the fastener. The manual suggests bolting down the turbo before installing the oil drain tube. I found it a little easier to leave the Turbo to manifold bolts off when getting the drain line in. Bolting them down after seemed a bit easier. These corrugated drain tubes are pretty stiff, but do bend. Use your hands and not a tool to shape them a touch.
I think I finally got the hang of mounting the turbos about the time I was done the job. What worked the best for me was to get the turbo with coolant lines preinstalled into their space. Then, I inserted the oil drain into the turbo while everything was loose. Its an easy “pop” this way. Then, I take the whole turbo and lines as a unit, insert the other end of the drain into the oil pan. The downpipe and drain sort of help hold everything in place here. I am able to connect the block sides of the coolant lines and then bolt down the turbo. The reason I like this method is that everything stays loose and has a little play to wiggle those lines into their holes. You really don’t want to force them. Once you get a line into its hole, I recommend finger tight fastener to keep them from popping out. Refrain from tightening them down until they are all plugged in correctly. Wiggle, wiggle. Take your time.
Those boost tubes take a bit of effort, but that is nothing new to those whom have taken these apart. I like to use a mist of Simple Green on silicone tubing to make them install easier. Makes it so much easier when I’m not fighting friction.
If you happen to grab the UPR catch can, they require a vacuum connection to their unit in addition to the “clean line". They suggest drilling a hole in the passenger side turbo inlet tube. Since I have installed the Turbosmart e-BOV I have an extra vacuum port available on the driver side. The BOV comes with a plug for this line. I added a 1/4 NPT hole and was able to screw in the fitting to connect the UPR. Line length even works out when connecting down by the intercooler. Nice clean install and no new holes.
When I put it all back together, I left the truck on jack stands, front tires off, wheel well liners off, and all skid plates off for the first firing. I did this so that I could see everything on the off chance of a leak or a tube popping off. I always have a fire extinguisher handy when firing an engine for the first time. Once this was successful, I buttoned up everything but the front skid plate. This would allow access to the boost tubes should you not tighten them adequately. I left the truck this way while doing the tuning of the truck to provide quick and easy access should it be necessary.
There really should be a tool to insert into the intake manifold that helps protect the firewall during service. The rubber hooks on the top of the vanity cover seems to have a tendency to grab the fabric attached to the firewall and have taken a few chunks out of the cloth. Grr. I’m trying to be delicate, but this keeps snagging and looks bad. I might purchase a spare engine vanity cover just to cut out the attachment point to the manifold. I need something to cover this area (smooth) to be able to pull this part in and out without damaging that cloth. Something that pops in and pops out of those hooks would be ideal.
")