DIY 36" behind-grille LED bar

Disclaimer: Links on this page pointing to Amazon, eBay and other sites may include affiliate code. If you click them and make a purchase, we may earn a small commission.

AJ-Raptor

Active Member
Joined
Sep 5, 2017
Posts
62
Reaction score
14
After much research, I decided that the Rigid LED bars and similar products - although seem to be of higher quality - cannot match the chinese competition in terms of value versus what you pay.

So I bought what seems to be a good quality chinese 36" LED bar through Aliexpress and it was $130 delivered! that is at least 1/3 of any high-end brands. It uses Cree chips so i hope its going to be fine.

spm=a2g0s.9042311.0.0.7q3yYh"]https://www.aliexpress.com/item/72W-12-inch-Offroad-CREE-LED-Light-Bar-Dual-Row-Combo-Spot-Flood-Factory-Sale-Fast/1936973177.html?spm=a2g0s.9042311.0.0.7q3yYh[/URL]

Now I used the step by set video from CJ Off road YouTube video as a guide. The fenders on the Raptor are different though so this needs to be considered.

https://www.youtube.com/watch?v=UFh0uwZlhD4&t=100s

I have learned a lot during the process of disassembling and reassembling everything. It was more difficult that I though to be honest but I will share my tips with you.

I did not take photos when removing everything but I took photos when I put things back.

In the following post I will add the photos with some comments. I will also add the final result.
 
OP
OP
A

AJ-Raptor

Active Member
Joined
Sep 5, 2017
Posts
62
Reaction score
14
Please wtchthe video I post the link to before attempting the removal of the grille.


oASipwU.jpg

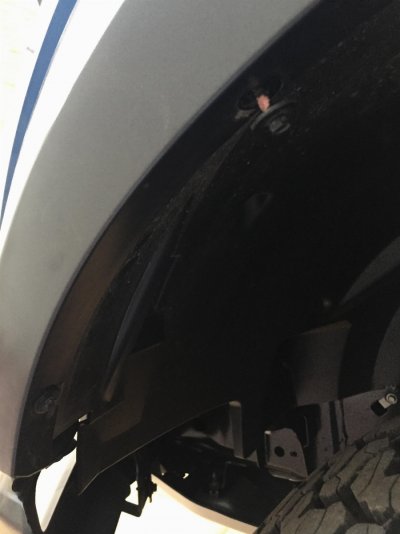
Removel of 7mm screws from front fender. There is one trim panel clip on top of the headlight trim that needs to be removed.

Removing the panel is a bitch. You will need to pull out straight ahead. Since the Raptor has the additional fenders, you cannot grab the trim panel like in the video so I had to pry open the fenders a little to be able to grab the panel. Putting the light trip panel back is a pain too. You need to start with the clips toward the grille first then move outward or it will never seat.

After you remove the head light panels you need to remove the redactor shield as per the CJ Off Road video and its pretty straight forward.

After that, you need to remove the 4 10mm screws in as per the video too. The bad thing is that these screws are screwed into plastic threads!! i did not like that as you can easily strip them so be careful.

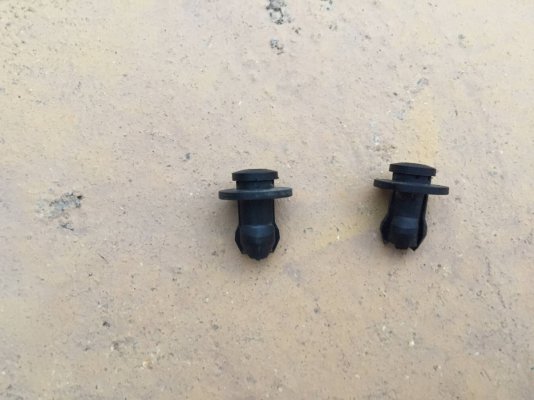
The video tells you to remove 4 pins too like these ones:

LyyfxOX.jpg

Those are tough to remove as explained in the video however, there is no need to remove them now. The can be removed later when the whole grille assymbly is off.

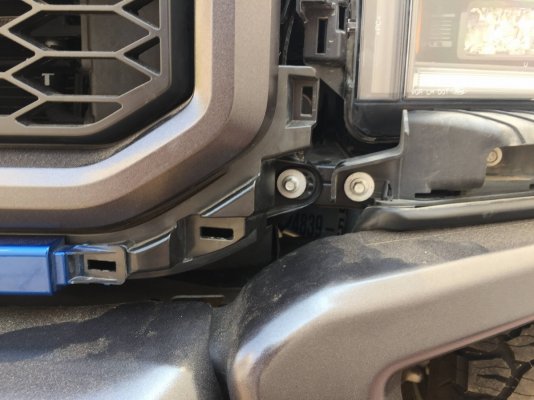
Then you remove 8mm bolt below the headlight:(the one to the left)

23230F6.jpg

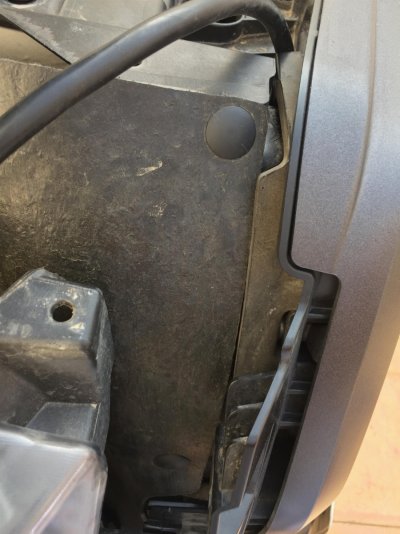
Then the 3 clips on the side for the rubber shield:

qXc1xMj.jpg

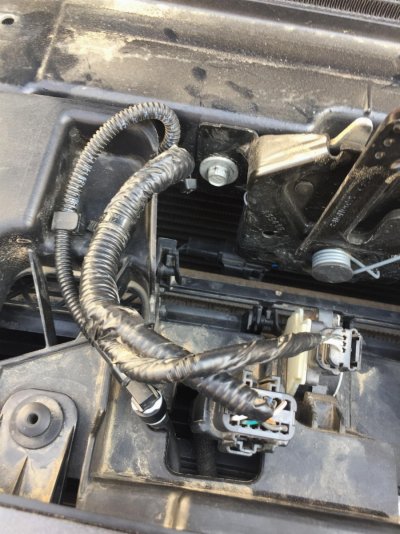
There are then 2 connectors in the top middle section of the grille and a water line which was not in the video that you need to disconnect.

p59IYuC.jpg

Now that the whole grille with th shutter are out, its time to remove the shutters. As in the video its a straight forward task. BUT putting things back is a proof that the team who designed this mechanism is plain idiots.

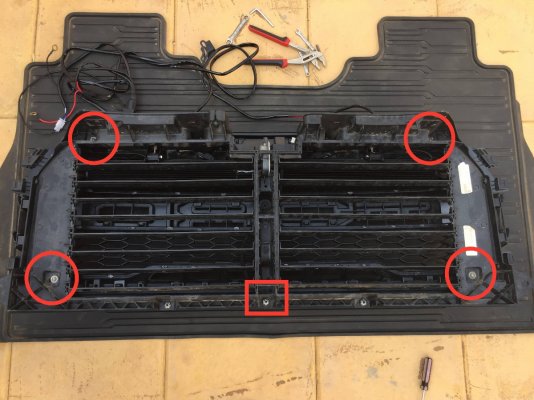
The for bolt/screw - more on that later - on each corner fit into a plastic piece that is so fragile, inaccessible and its unstable so each time you try to align the screw it pushes the plastic piece and you can't engage the teeth!! so frustrating beyond imagination. I was cussing in my mind the whole time at the guy who designed this non-sense. Its a bolt on screw with washers and once you start tightening to engage the plastic piece underneath it tightens on its own and leave a gap. I should've made a video but it was night and i was frustrated. Anyway, beware of that issue. I tried glueing the plastic pieces but it doesn't work. The only thing that worked is shoving a tiny flat screw driver below the plastic piece to make it stable enough to receive the screw.

Here is the grille with the shutters, you can see the screws one at each corner, the bottom square is where you have very cheap plastic molded screws and I broke one of them :mad::

96Jq2jm.jpg

Now the unique part...

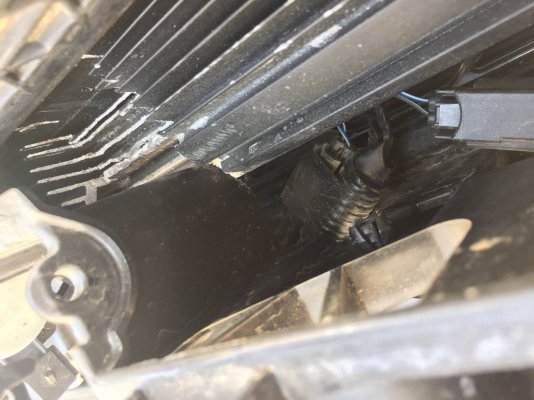
The LED bad is too thick to clear the shutter assymbly. So o decided to cut the colling fins at the area when its rubbing. I did a lot of cutting - with primitive tools I admit - but it still was not clearing the plastic.... so i ended up cutting part of the plastic which looks like a prism and it cleared the LED bar finally. I do not think that I will be suffering from any overheating issues too... lets hope i dont!

2pcdN91.jpg

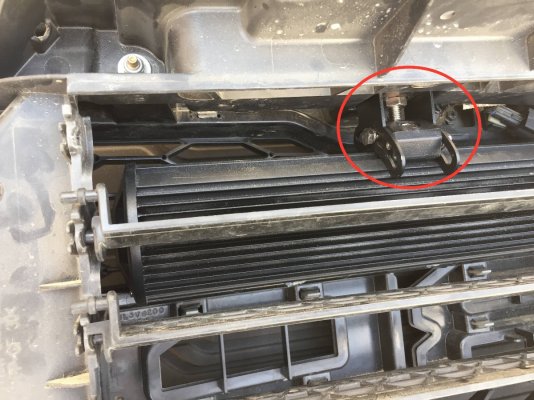
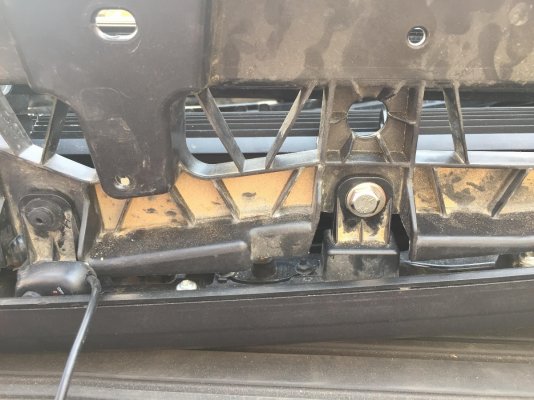
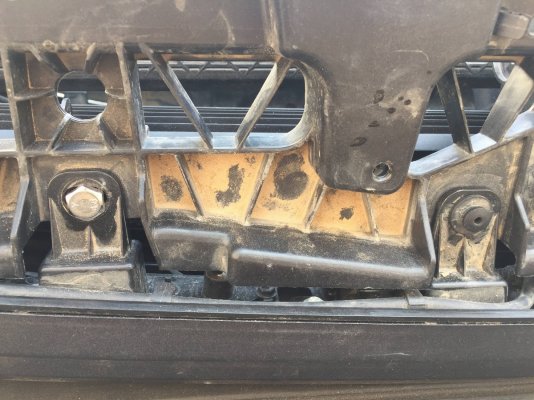
Now the mounting! I found a solution by replacing the pins with screws and bolts and routing the bar upside down:

gCOX2ML.jpg

You can see now the bolt with the washer compared to the pin after final assembly:

icRBb8l.jpg
VtTnxXp.jpg

---------- Post added at 08:24 PM ---------- Previous post was at 08:03 PM ----------

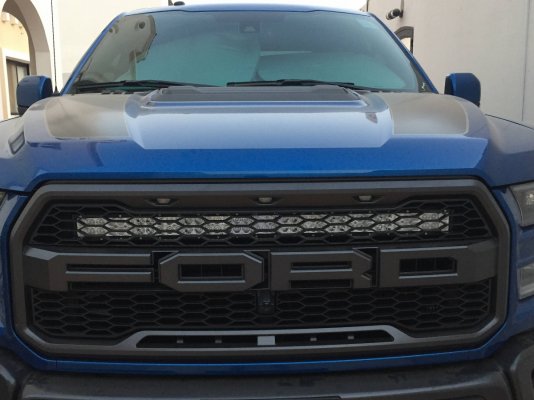
Final result:
jJMTm1o.jpg

https://youtu.be/iBeJT1Bq9Ts
https://www.youtube.com/watch?v=fAe2mXCGeoE

vidoes didn't come out as in reality due to camera adjusting to light.

---------- Post added at 08:27 PM ---------- Previous post was at 08:24 PM ----------

Now...

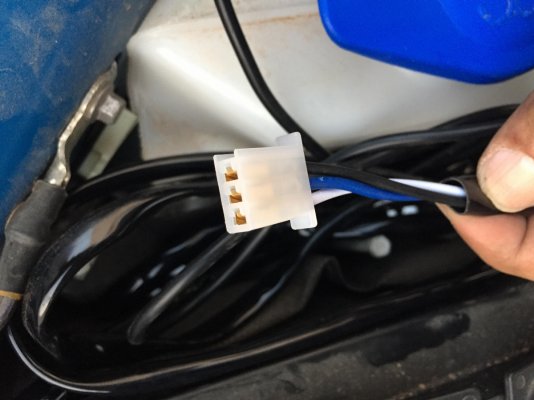
I'm a bit challenged when it comes to electrical work. I was about to identify the AUX1 cable but I have no idea how to connect it to the harness the bar came with.

This is how it looks like and I dont know what to do. Help appreciated.
VsJm9lc.jpg

My ideal set up would be connecting the high beams with the LED bar while having one of the aux switches as a kill switch.
 

smurfslayer

Be vewwy, vewwy quiet. We’re hunting sasquatch77
Joined
Dec 16, 2016
Posts
16,300
Reaction score
24,045
Very similar to what I did, except I picked the faster color and went with 2x 17” lights to avoid the fitment issues.

http://www.fordraptorforum.com/f265/led-light-bar-behind-grill-pics-53894/

are you using a relay ( it’s a rhetorical question because you need one for that much current).

Others on here have tapped the high beam + aux switch with a relay but I just did a relay to aux1.

Good work getting them mounted. I can’t remember if I wrote up the relay or not, but plenty of ‘net help available with wiring up a relay.
 
OP
OP
A

AJ-Raptor

Active Member
Joined
Sep 5, 2017
Posts
62
Reaction score
14
Very similar to what I did, except I picked the faster color and went with 2x 17” lights to avoid the fitment issues.

http://www.fordraptorforum.com/f265/led-light-bar-behind-grill-pics-53894/

are you using a relay ( it’s a rhetorical question because you need one for that much current).

Others on here have tapped the high beam + aux switch with a relay but I just did a relay to aux1.

Good work getting them mounted. I can’t remember if I wrote up the relay or not, but plenty of ‘net help available with wiring up a relay.

Yes I am using a relay that was supplied with the kit.

I still need to find a way to connect the system to an aux switch. Does the aux cable connect directly to the inside of the relay?
 

smurfslayer

Be vewwy, vewwy quiet. We’re hunting sasquatch77
Joined
Dec 16, 2016
Posts
16,300
Reaction score
24,045
@AJ-Raptor

The relay will be powered from the battery and grounded. If it came with the kit, you should have instructions.

If not, you can search either here or via internet- 4 pin automotive relay wiring or 5 pin automotive relay wiring.

Your light will be “switched” so the light “power” will only come from the switch leg of the relay. that is, the pole of the relay that is powered when the ‘signal’ is turned on.

The pole for the wire that powers the switch leg (to the light) will come from the Up fitter bundle located close to the firewall. There are allegedly 2 bundles, one with “power” when the respective up fitter switches are on and a 2nd bundle (not findable on my truck) that are “pass thru”. this bundle is for inside the cab accessories.

You want the powered bundle. ID the up fitter wiring by the Raptor owners manual supplement.

Now, if you are going to try and wire this light to trigger with high beams, you’ll need to do some research but I think a few users have done that here. I have mine wired to up fitter 1.
 
OP
OP
A

AJ-Raptor

Active Member
Joined
Sep 5, 2017
Posts
62
Reaction score
14
@AJ-Raptor

The relay will be powered from the battery and grounded. If it came with the kit, you should have instructions.

If not, you can search either here or via internet- 4 pin automotive relay wiring or 5 pin automotive relay wiring.

Your light will be “switched” so the light “power” will only come from the switch leg of the relay. that is, the pole of the relay that is powered when the ‘signal’ is turned on.

The pole for the wire that powers the switch leg (to the light) will come from the Up fitter bundle located close to the firewall. There are allegedly 2 bundles, one with “power” when the respective up fitter switches are on and a 2nd bundle (not findable on my truck) that are “pass thru”. this bundle is for inside the cab accessories.

You want the powered bundle. ID the up fitter wiring by the Raptor owners manual supplement.

Now, if you are going to try and wire this light to trigger with high beams, you’ll need to do some research but I think a few users have done that here. I have mine wired to up fitter 1.

It finally worked! thanks to you, I found the positively charged wires hidden below some harnesses finally and I hooked Aux 1 (green and blue) to the switch wire (blue in my case). I know that I don't need to waste Aux 1 with its 15A capacity on that but its just the nearest to me.

Next, I will try to tap into the high beam and use a different up fitter probably Aux6.

Thanks a lot for the tip.
 

smurfslayer

Be vewwy, vewwy quiet. We’re hunting sasquatch77
Joined
Dec 16, 2016
Posts
16,300
Reaction score
24,045
Great !

if you do manage to ID the high beam light “wire” please update us.

Good pics so far.
Good luck!
 
OP
OP
A

AJ-Raptor

Active Member
Joined
Sep 5, 2017
Posts
62
Reaction score
14
Great !

if you do manage to ID the high beam light “wire” please update us.

Good pics so far.
Good luck!

I will take a shot at it. I tried to remove the whole head light but it was very difficult to remove. You have to remove the wheel well liner among other things. I will try to find the fuse for the high beam and connect to it as a first step.
 

EricM

FRF Addict
Joined
May 11, 2016
Posts
3,176
Reaction score
2,659
Location
OHIO
Too bad the grille doesn't go up with the hood like a Gen 1. It's one big advantage to 04-14 F150s over all other years.

Good luck with those lights- they might be alright, or they might have water in them after the first rain.
 
OP
OP
A

AJ-Raptor

Active Member
Joined
Sep 5, 2017
Posts
62
Reaction score
14
Too bad the grille doesn't go up with the hood like a Gen 1. It's one big advantage to 04-14 F150s over all other years.

Good luck with those lights- they might be alright, or they might have water in them after the first rain.

So far so good. Been in rain and 2-foot deep water at speed. No water inside.
 
Top