ntm
Full Access Member
I'm just finishing up a brenthel long travel install, and as there's virtually no information out there on these, I thought I'd share a few pics and my experiences so far.
First a little history, I use my truck at work, off road just about every day. I'm usually moving at high speed on what amount to trails and unimproved roads.
I've done the usual Deaver, bumps, 3.0 shocks (both icon and fox) and was pretty happy with it. However, I wore the front end out again, pretty much every component was ready for replacement, including the lower control arms.
So I started pricing out everything from the outlaw/ h&m kit to the stock stuff.
What I found was that by the time I did an aftermarket lca, with the secondary external bypass shock, new uca and an upgraded spindle I was at the same price as the brenthel kit, but without the extra travel. And no loss of turning radius with the lt kit.
So I decided to do a lt kit.
I started comparing the lt kits.
The outlaw/ h&m is undoubtably the king of lt kits and well tested, but pricey at $15,000, and not an easy DIY install due to the extensive amount of welding and fabrication. I was quoted $5000 for the install. $20,000 is over the top for a regular joe like myself.
I went to Arizona on vacation and stopped by sdhq to have a look at their lt setup. It has the advantage of an easier install as there is little welding and the coil buckets are retained. I saw signs of interference on the truck they had it installed on, rubbing of the coil spring/cv/steering rods. That combined with the price (close to $15,000) and use of icon coilovers (I don't like their digressive damping) was enough to shy me away.
The brenthel kit had little to no information out there on it, so I called and picked Jordan Brenthel's brain about the kit. He was very helpful and informative.
Price was right at $10,000 for the kit and king 2.5 coilovers, king 2.5 bypasses, and king bump stops.
The kit arrived in roughly 3-4 weeks, as king needed time to build the shocks, and somehow survived the trip to canada relatively unscathed.
The kit includes lca, uca, spindle, tie rods, straps, bump mounts, strap mounts, brake lines, engine cage, shock mounts, cv axles and all hardware. Everything appeared solid and well built.
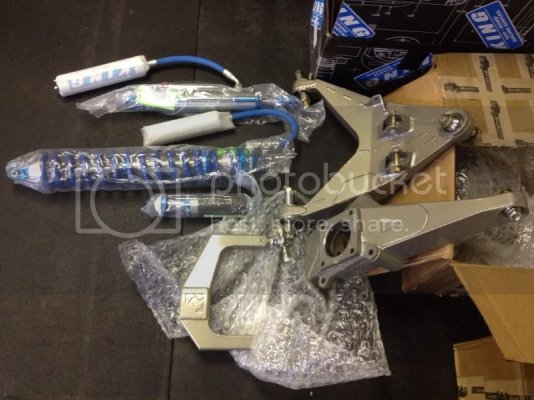
The instruction PDF was pretty basic, it pointed you in the right direction, but the pictures were of an older ford, and lots of stuff that might be second nature to all the fabricators out there was missing. I'll try to include as much info on the unexpected stuff I encountered as possible.
So first step is to strip the truck of all the front suspension and fenders:
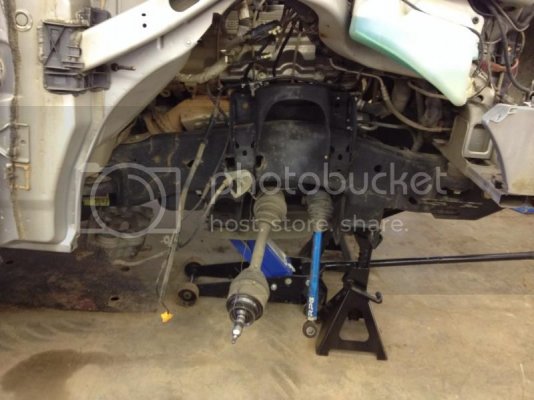
Then cut off the coilover bucket, a small grinder and zip cuts made short work of this. This is what makes this particular kit a fairly stress free install. The new shock mounts are located off of the existing uca mount holes. You can't really get it wrong.
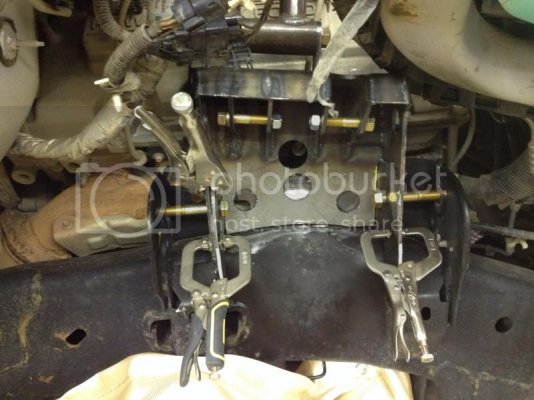
There is a removable engine cage that ties the two shock mounts together.
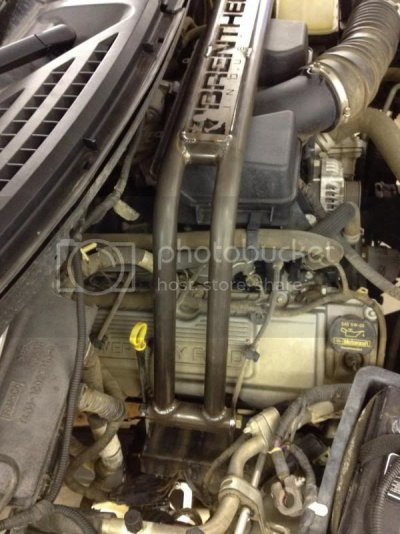
Weld blankets are must haves, and there are a few brake lines and wires to move out of harms way, then welding time.
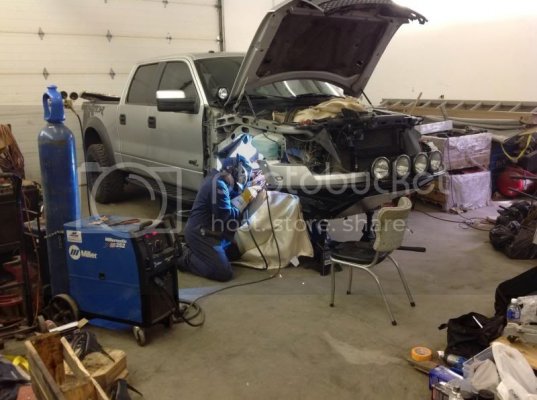
At this point the lca mounting points also get plated in, so that all alignment adjustments are made up top on the uca hiem's. Yay, no more wandering alignment settings !!
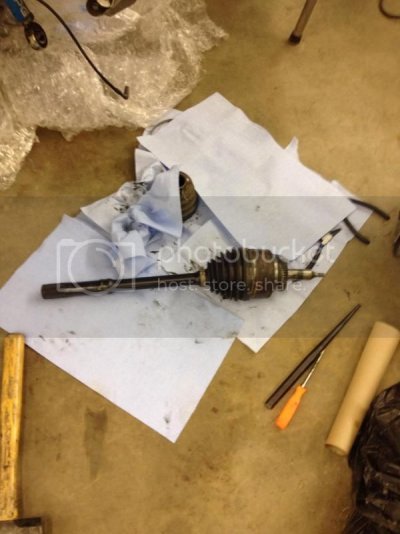
Cv's get torn apart and new longer axles installed. You'll need cv clamp pliers and cv grease. And a lot of paper towel, lol.
Now it's time to bolt everything up, and check clearances, measure travel and cv angles. You'll have to remove the coilover spring and dump it's nitrogen. The wheel hubs also get re clocked to allow abs sensor clearance.
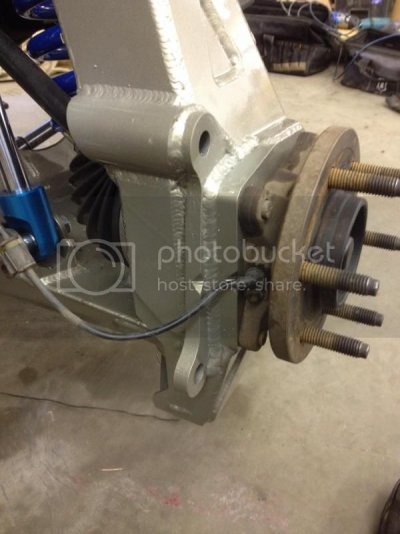
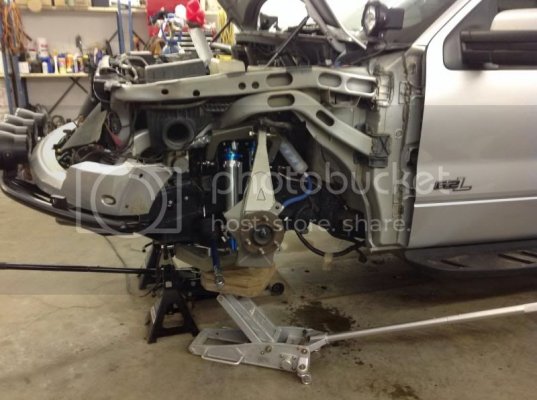
The instructions don't say anything about clearancing the hydro formed rails, but they do mention to set the cv angles at 26 degrees. This measured out at only 12.5 inches of travel before hitting the upper rail with uca.
Out came the sledgehammer and I went to work on the upper rails. In a later conversation with Jordan, I discovered they usually just cut these.
The damn things are tough !
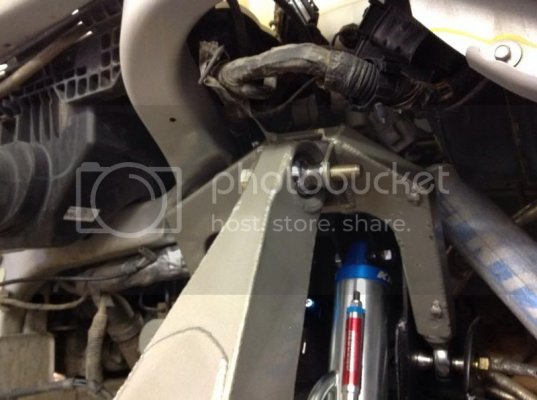
This combined with dropping the cv angles to 30 degrees gave 15.5" of travel, strapped and bumped. The cv's aren't binding there, but their load capacity and boot life would be effected negatively. I only use 4wd for getting unstuck, the truck should never be drooped right out in 4wd, so no problem. Without the cv's limiting things, another inch at least of droop is available.
The passenger side windshield washer tank has to go away. These are only 35" tires.
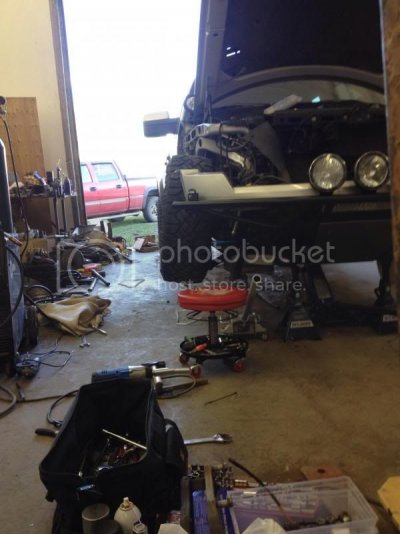
Bump stop fitting is next, it gets kind of inset into the uca mount structure. No way to do this without just cutting and fitting. Plates are included for boxing it in after you have it in the right location. Please ignore the ugly welds on the brake line tabs, those were my doing, I had a friend who is a welder by trade do everything else.
You will have to dump the nitrogen out of the bump of course. The bumps are shortened by king to a 2" stroke.
Also of note, the uca mount sheet metal closest to the external bypass shock must be trimmed back as far as possible. At full droop there is only half a mm of clearance on mine after trimming.
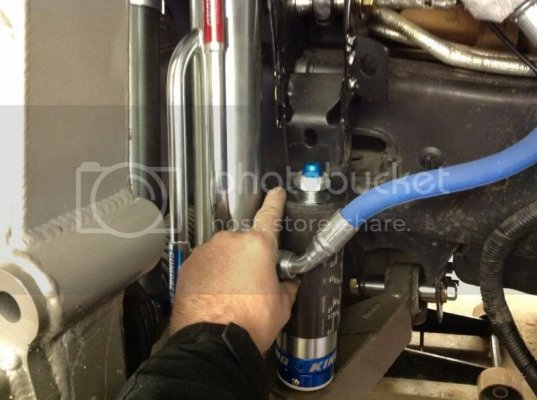
Strapped and bumped. Need to weld mounts to the frame and engine cage yet for reservoirs. These aren't included, but sdhq has you covered.
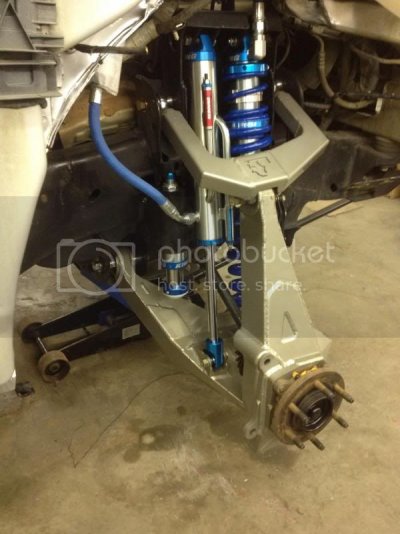
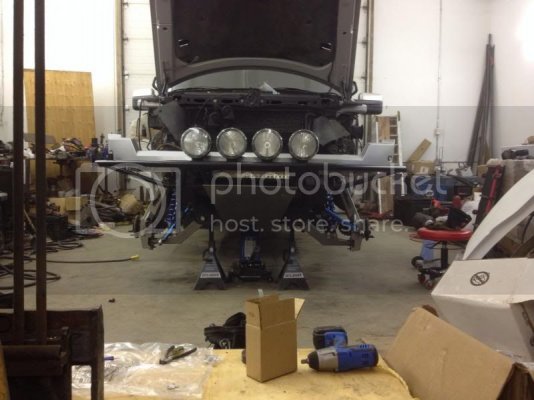
Glass fenders are necessary, svc hooked me up with some glassworks +2".
I'd go for the boatec's next time. The glassworks are okay, but will give you fits if you are somewhat OCD.
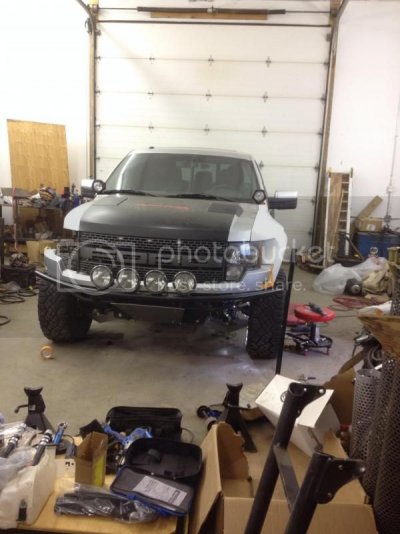
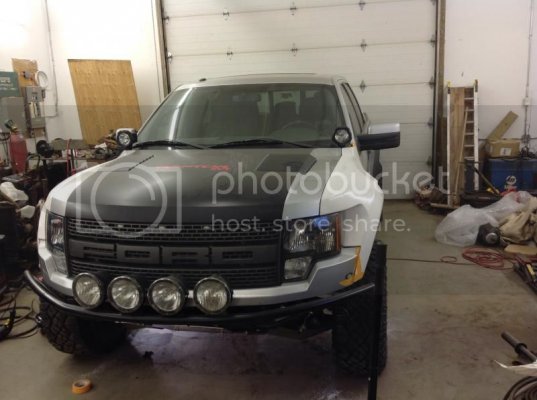
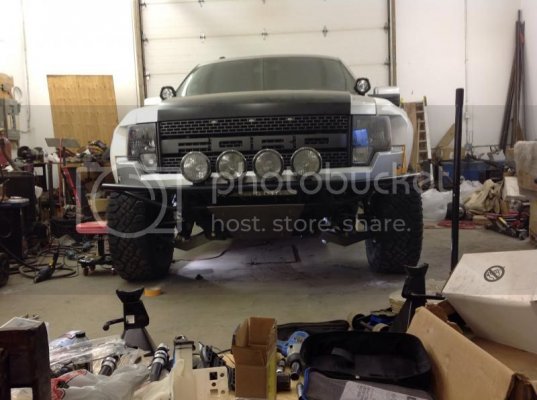
That's about as far as I've gotten so far. The fenders are currently out for paint. And the truck is going in for an alignment.
I'll update after I've done some runs on the same test loops I ran the icon and fox 3.0's on. In initial redneck, no fender testing, the rear end that used to feel pretty much on par with the front, now sucks. It's going to be good...but I can see lots more money being thrown at the rear end soon.
My experience with brenthel has been outstanding. They actually called me to see how the install was going and if I had any questions.
Jordan was taking the time to correspond with me via email, while prerunning the 1000. Excellent customer service.
First a little history, I use my truck at work, off road just about every day. I'm usually moving at high speed on what amount to trails and unimproved roads.
I've done the usual Deaver, bumps, 3.0 shocks (both icon and fox) and was pretty happy with it. However, I wore the front end out again, pretty much every component was ready for replacement, including the lower control arms.
So I started pricing out everything from the outlaw/ h&m kit to the stock stuff.
What I found was that by the time I did an aftermarket lca, with the secondary external bypass shock, new uca and an upgraded spindle I was at the same price as the brenthel kit, but without the extra travel. And no loss of turning radius with the lt kit.
So I decided to do a lt kit.
I started comparing the lt kits.
The outlaw/ h&m is undoubtably the king of lt kits and well tested, but pricey at $15,000, and not an easy DIY install due to the extensive amount of welding and fabrication. I was quoted $5000 for the install. $20,000 is over the top for a regular joe like myself.
I went to Arizona on vacation and stopped by sdhq to have a look at their lt setup. It has the advantage of an easier install as there is little welding and the coil buckets are retained. I saw signs of interference on the truck they had it installed on, rubbing of the coil spring/cv/steering rods. That combined with the price (close to $15,000) and use of icon coilovers (I don't like their digressive damping) was enough to shy me away.
The brenthel kit had little to no information out there on it, so I called and picked Jordan Brenthel's brain about the kit. He was very helpful and informative.
Price was right at $10,000 for the kit and king 2.5 coilovers, king 2.5 bypasses, and king bump stops.
The kit arrived in roughly 3-4 weeks, as king needed time to build the shocks, and somehow survived the trip to canada relatively unscathed.
The kit includes lca, uca, spindle, tie rods, straps, bump mounts, strap mounts, brake lines, engine cage, shock mounts, cv axles and all hardware. Everything appeared solid and well built.

The instruction PDF was pretty basic, it pointed you in the right direction, but the pictures were of an older ford, and lots of stuff that might be second nature to all the fabricators out there was missing. I'll try to include as much info on the unexpected stuff I encountered as possible.
So first step is to strip the truck of all the front suspension and fenders:

Then cut off the coilover bucket, a small grinder and zip cuts made short work of this. This is what makes this particular kit a fairly stress free install. The new shock mounts are located off of the existing uca mount holes. You can't really get it wrong.

There is a removable engine cage that ties the two shock mounts together.

Weld blankets are must haves, and there are a few brake lines and wires to move out of harms way, then welding time.

At this point the lca mounting points also get plated in, so that all alignment adjustments are made up top on the uca hiem's. Yay, no more wandering alignment settings !!
Cv's get torn apart and new longer axles installed. You'll need cv clamp pliers and cv grease. And a lot of paper towel, lol.

Now it's time to bolt everything up, and check clearances, measure travel and cv angles. You'll have to remove the coilover spring and dump it's nitrogen. The wheel hubs also get re clocked to allow abs sensor clearance.


The instructions don't say anything about clearancing the hydro formed rails, but they do mention to set the cv angles at 26 degrees. This measured out at only 12.5 inches of travel before hitting the upper rail with uca.
Out came the sledgehammer and I went to work on the upper rails. In a later conversation with Jordan, I discovered they usually just cut these.
The damn things are tough !

This combined with dropping the cv angles to 30 degrees gave 15.5" of travel, strapped and bumped. The cv's aren't binding there, but their load capacity and boot life would be effected negatively. I only use 4wd for getting unstuck, the truck should never be drooped right out in 4wd, so no problem. Without the cv's limiting things, another inch at least of droop is available.
The passenger side windshield washer tank has to go away. These are only 35" tires.

Bump stop fitting is next, it gets kind of inset into the uca mount structure. No way to do this without just cutting and fitting. Plates are included for boxing it in after you have it in the right location. Please ignore the ugly welds on the brake line tabs, those were my doing, I had a friend who is a welder by trade do everything else.
You will have to dump the nitrogen out of the bump of course. The bumps are shortened by king to a 2" stroke.
Also of note, the uca mount sheet metal closest to the external bypass shock must be trimmed back as far as possible. At full droop there is only half a mm of clearance on mine after trimming.

Strapped and bumped. Need to weld mounts to the frame and engine cage yet for reservoirs. These aren't included, but sdhq has you covered.


Glass fenders are necessary, svc hooked me up with some glassworks +2".
I'd go for the boatec's next time. The glassworks are okay, but will give you fits if you are somewhat OCD.


That's about as far as I've gotten so far. The fenders are currently out for paint. And the truck is going in for an alignment.
I'll update after I've done some runs on the same test loops I ran the icon and fox 3.0's on. In initial redneck, no fender testing, the rear end that used to feel pretty much on par with the front, now sucks. It's going to be good...but I can see lots more money being thrown at the rear end soon.
My experience with brenthel has been outstanding. They actually called me to see how the install was going and if I had any questions.
Jordan was taking the time to correspond with me via email, while prerunning the 1000. Excellent customer service.
Last edited:

