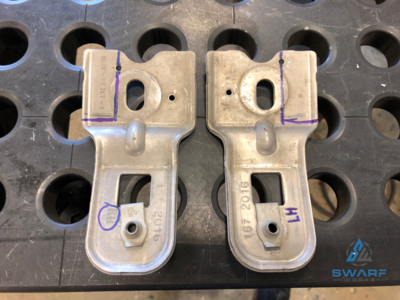
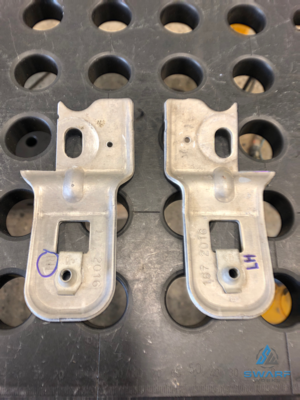
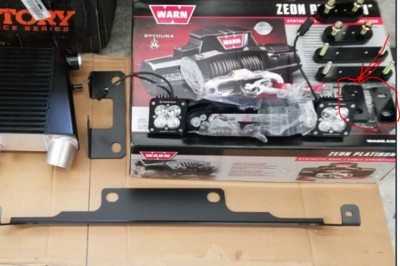
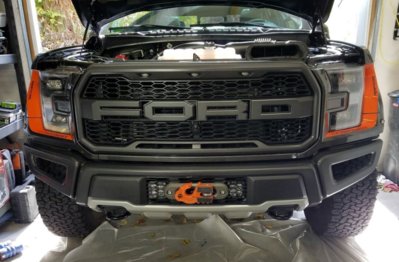
Thought I would do a writeup on my weekends activities, I installed a Warn Zeon 12 S Platinum winch using the original front bumper. This requires that the standard intercooler be replaced as the winch sits where the original intercooler was.
All parts I used:
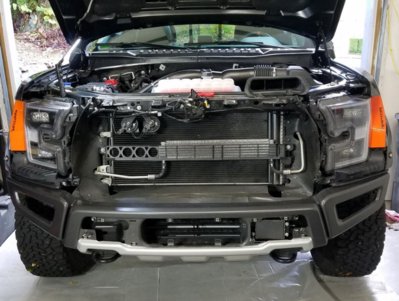
Front end teardown was a little daunting to start with but once I got into it, it was actually not that bad. It is surprising how much of the truck is simply held together with clips and poppers. One thing I did which helped was use the instructions for the full race Intercooler install as well as the ones supplied by SVC. It is clear that the SCV instructions are a work in progress, but good enough to get the job done.
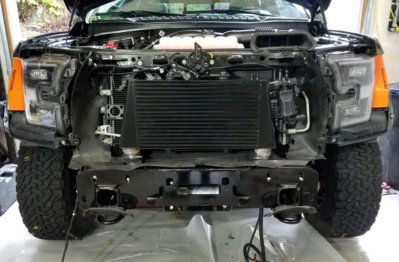
The Intercooler mounting brackets and the intercooler itself are of great quality and fitted precisely with no effort at all. I left the lower plastic shroud in place and cutout holes for the intercooler inlet and outlet rather that cut the entire shroud out as it looks neat and also will help with airflow (not really needed) and helps prevent any dirt getting up to the front of the intercooler.
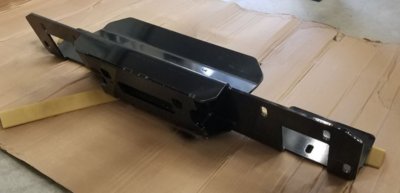
The winch mounting plate is well engineered (and heavy!), once in place it provides a very substantial mount and a very strong front end overall. It is something like 3/16"-1/4" thick steel. Getting the Winch up under the truck on my own was a little fiddly as it too is heavy and you need to ensure the nuts stay in place while lifting it in position, after them falling out a couple of times I just used some masking tape to hold them in while I lined it up and got the bolts started.
The BD lights install was very straight forward as I got the wiring harness from SwarfWorks they connect to the winch Aux output as well as the Upfitter switch. Hardest thing of the entire thing was finding and unwrapping the upfitter wires.
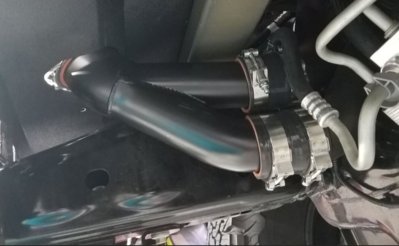
First test drive after installing everything I managed to blow off one of the hose connections as it wasn’t tight enough. That was pretty alarming - a big bang sound followed by lack of power as the turbos vented to air instead of providing boost. I was too cautious with the tightening of the hoses as they are pretty substantial clamps and clamping onto plastic and thin walled aluminum tube so I was weary of over tightening them and crushing the pipes. A quick re tightening and then all was good.
I am happy with the final install and think it looks pretty sleek, for an already capable truck now being super capable off-road and able to get out of a lot more tight spots with or without assistance.
Of note: the stiffening braces to the ends of the bumper are no longer in place as the original intercooler mounting bracket anchored them, I will look into making a new bracket so I can put the braces back on as though they do not move around there is nothing to stop the outer sections of the bumper folding back under just the slightest bump without them.
All parts I used:
- SwarfWorks winch mount
- SwarfWorks Light mount for flush mount lights behind bumper
- Baja Designs flush mount Squadron Sport driving combo lights
- SwarfWorks Wiring harness to connect Lights to Winch/Upfitter
- Factor 55 Fairlead
- Factor 55 Orange Ultrahook
- SVC intercooler (SwarfWorks recommends the Full Race, but I wanted to try the SVC as I like some of the design elements, namely relocated BOV and the angled inlet and outlet ports.)
Front end teardown was a little daunting to start with but once I got into it, it was actually not that bad. It is surprising how much of the truck is simply held together with clips and poppers. One thing I did which helped was use the instructions for the full race Intercooler install as well as the ones supplied by SVC. It is clear that the SCV instructions are a work in progress, but good enough to get the job done.
The Intercooler mounting brackets and the intercooler itself are of great quality and fitted precisely with no effort at all. I left the lower plastic shroud in place and cutout holes for the intercooler inlet and outlet rather that cut the entire shroud out as it looks neat and also will help with airflow (not really needed) and helps prevent any dirt getting up to the front of the intercooler.
The winch mounting plate is well engineered (and heavy!), once in place it provides a very substantial mount and a very strong front end overall. It is something like 3/16"-1/4" thick steel. Getting the Winch up under the truck on my own was a little fiddly as it too is heavy and you need to ensure the nuts stay in place while lifting it in position, after them falling out a couple of times I just used some masking tape to hold them in while I lined it up and got the bolts started.
The BD lights install was very straight forward as I got the wiring harness from SwarfWorks they connect to the winch Aux output as well as the Upfitter switch. Hardest thing of the entire thing was finding and unwrapping the upfitter wires.
First test drive after installing everything I managed to blow off one of the hose connections as it wasn’t tight enough. That was pretty alarming - a big bang sound followed by lack of power as the turbos vented to air instead of providing boost. I was too cautious with the tightening of the hoses as they are pretty substantial clamps and clamping onto plastic and thin walled aluminum tube so I was weary of over tightening them and crushing the pipes. A quick re tightening and then all was good.
I am happy with the final install and think it looks pretty sleek, for an already capable truck now being super capable off-road and able to get out of a lot more tight spots with or without assistance.
Of note: the stiffening braces to the ends of the bumper are no longer in place as the original intercooler mounting bracket anchored them, I will look into making a new bracket so I can put the braces back on as though they do not move around there is nothing to stop the outer sections of the bumper folding back under just the slightest bump without them.


