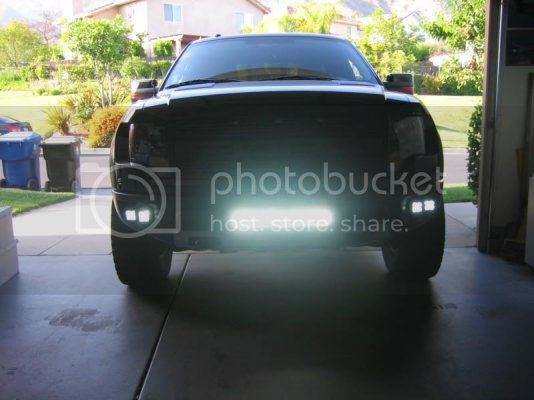
Rigid 20" Lightbar & Duallys - Installation Instructions

Disclaimer: Links on this page pointing to Amazon, eBay and other sites may include affiliate code. If you click them and make a purchase, we may earn a small commission.

OP
OP
M

MagicMtnDan

FRF Addict
Joined
Oct 28, 2011
Posts
7,661
Reaction score
1,793
Location
Magic Mountain
You can see several of the wires have been stripped:
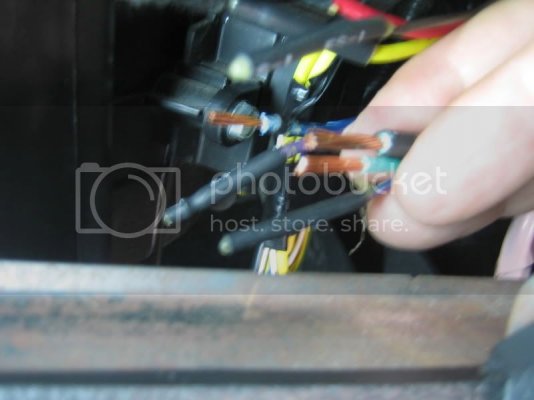
IMG_2945.jpg

Here's a picture of one of the wires after I stripped it. You can see the wire stripper I used (this one is made by Klein, available at Home Depot for about $25 - I like this one a lot more than the one sold at Lowes).
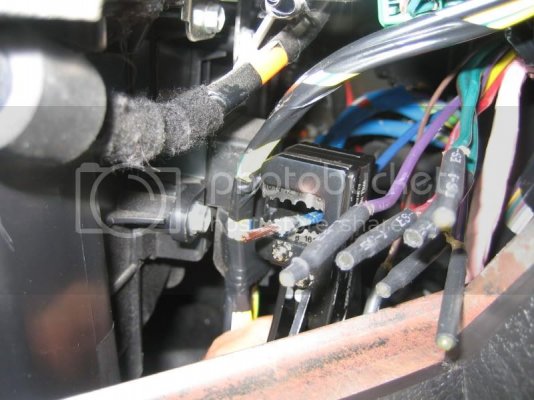
IMG_2943.jpg

You can see how the ends of the wires are covered by the wire end terminations provided from the factory.

This picture is looking through the glovebox opening (glovebox completely removed) - I inserted my hand through the opening in the right end of the IP (instrument panel/dashboard) accessed by removing the panel.

You can see the wires have all been stripped and twisted together ready for soldering. I used heat shrink tubing to cover the 4 wire connections.
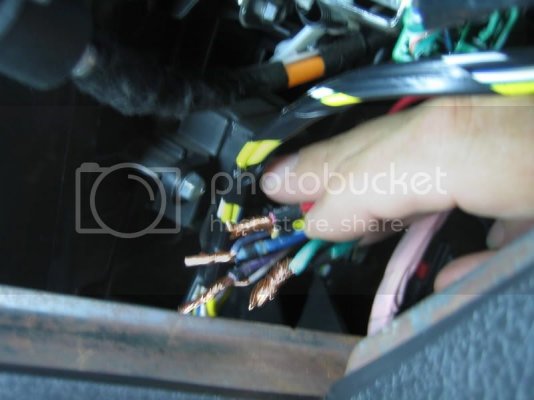
IMG_2949.jpg
 
OP
OP
M

MagicMtnDan

FRF Addict
Joined
Oct 28, 2011
Posts
7,661
Reaction score
1,793
Location
Magic Mountain
Grounding

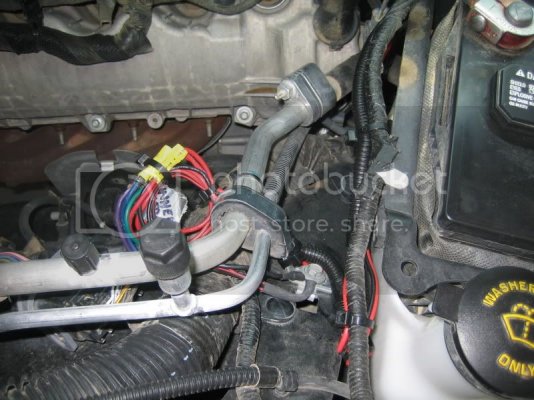
Underhood, close to the location where the 4 wires (Red, Green, Blue, Purple) are located, are two silver color metal tubes/pipes of different size. These appear to be HVAC tubes. Holding them in place is a metal retaining bracket that is screwed to the Raptor body (metal). This was the best and easiest location for me to use as a ground.

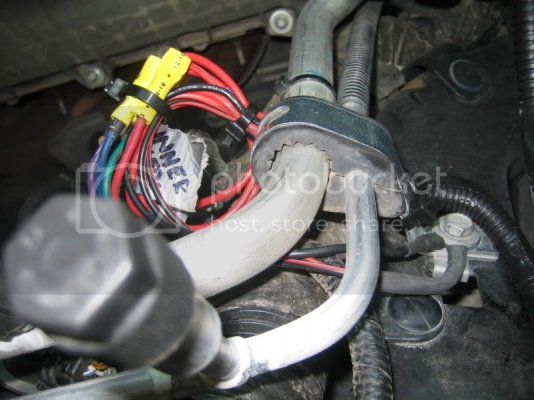
I unscrewed the bolt and removed it. The connectors on the two ground wires provided by Rigid Industries (the Duallys' grounds are connected together so I had two ground wires - one for the Duallys and one for the 20" lightbar) are just big enough (almost too small) to go around the bolt. I screwed the bolt to get the connectors to move up the threads and once they were under the bolt head I reinstalled the bolt in the bracket and tightened it down.

You can see the location of the bolt, the bracket and the two silvery tubes (to the left of (behind) the windshield fluid container) as well as the ground wires:

IMG_2951.jpg

You can see the bolt with the two connectors held securely in place between the bolt head and the metal bracket. I used butt (crimp) connectors (the yellow things) to connect the factory provided underhood switch wires to the lights' wires. You can see a label for the two pairs of Dually lights I made using duct tape and a Sharpie (one says "Inner" and the other says "Outer"):

IMG_2952.jpg
 
OP
OP
M

MagicMtnDan

FRF Addict
Joined
Oct 28, 2011
Posts
7,661
Reaction score
1,793
Location
Magic Mountain
Note regarding the mechanical installation:

This past weekend I redid the hardware on the Dually mounting plates and reinstalled it using 14 x 1 (longer) sheet metal screws I purchased at Lowes. They're the same sheet metal screws as those provided by Rigid but they are longer.

I also installed a lock washer (split washer) on each of the sheet metal screws. To further add security, I used Loctite Blue which will help secure the sheet metal screws yet still allow them to be removed using tools.

As mentioned previously, I also drilled one new hole in each of the Mounting Plates and the Raptor structural member through which I installed a bolt, washer, lock washer and nut (near the end of the tube so I could reach inside and put on the flat washer, lock washer and nut). I also put Loctite Blue on these.
 

LVdezertdawg

Full Access Member
Joined
Jul 13, 2010
Posts
886
Reaction score
83
Location
Henderson, NV
Dan,

Great installation write up. They look great and yes they are bright bright. You will be seen by low circling satellites from the gubermint!!!!
 

SOCOMech

Famous Raptor
Joined
Oct 4, 2010
Posts
1,172
Reaction score
49
Location
Phoenix AZ
I gather you got the answer you were looking for then Dan? Sorry I didn't get back to you on the pm, I've been away for a bit. The light's obviously look great though;)
 
OP
OP
M

MagicMtnDan

FRF Addict
Joined
Oct 28, 2011
Posts
7,661
Reaction score
1,793
Location
Magic Mountain
Thanks Matt! I got the info and figured it out.

Yes, you've obviously been away and based on the pics I've seen (of the behind-the-grill LED lightbar) you continue to be very successful pimping your Raptor to get some outstanding (and FREE) goodies for it! (I am JEALOUS :) )

Matt, the Raptor Pimp. I like that! :mrgreen:

It's probably real hot in AZ when you're wearing your Pimp threads!

Pimp.jpg
 

SOCOMech

Famous Raptor
Joined
Oct 4, 2010
Posts
1,172
Reaction score
49
Location
Phoenix AZ
Thanks Matt! I got the info and figured it out.

Yes, you've obviously been away and based on the pics I've seen (of the behind-the-grill LED lightbar) you continue to be very successful pimping your Raptor to get some outstanding (and FREE) goodies for it! (I am JEALOUS :) )

Matt, the Raptor Pimp. I like that! :mrgreen:


It's probably real hot in AZ when you're wearing your Pimp threads!

Pimp.jpg
Ohhhhh, you saw those pics huh? Lol! We tried that a few weeks back just because we were wondering about it, then I went down there last week because Taylor actually had someone ask about it, so that's where these pics came from. It's really cool like that, verrrry stealth, it fits perfect. You lose just a bit of side light but it still throws plenty out front.
 

SOCOMech

Famous Raptor
Joined
Oct 4, 2010
Posts
1,172
Reaction score
49
Location
Phoenix AZ
Let's see the pics (pics or it didn't happen :mrgreen: )!

Welllll....o.k. :) Take note though, this was just for fitment, I do not still have it in my truck.
545578896_1930680545_0.jpg
[/IMG]
545579127_1930681413_0.jpg
[/IMG]
545578632_1930679564_0.jpg
[/IMG]
IMG_0651.jpg
[/IMG]
IMG_0650.jpg
[/IMG]

There's another version but I'm not sure I have the go-ahead to talk about that one yet.
 
Top