andreb
Full Access Member
I saw these LED's installed in a Raptor at the dealer service center (it had a slide-in camper) and thought they'd be handy for hooking up my trailer at night (when I'm late to the races) and when backing up in the dark.
Here are the lights and harness I bought:
Rigid D-Series Flood - flush mount
D-Series | Flood Pair Flush White Black | Rigid Industries
Starkey Backup/Auxiliary Lighting Wiring & Switch Kit
Backup/ Reverse Lighting Wiring & Switch Kit - Fits any vehicle!
Once I got that installed I figured out the switch Starkey includes is made by Carling but can be ordered custom from OTRATTW
https://otrattw.net/Contura-V-SR/
The Rigid LED's come with a decent harness and switch. It's a very universal kit that would cover most installs. What I liked about the Starkey kit is that it was F-150 specific, includes Deutsch DT Series 2-way connectors that match the Rigid LED's and uses a relay to activate the lights. I know the LED's don't draw much current but I typically over-build electrical systems because who knows what this will power in the future.
The install was pretty straight forward it just took time. I covered cutting and installing the lights here: http://www.fordraptorforum.com/f11/cutting-into-rear-bumper-tough-49872/
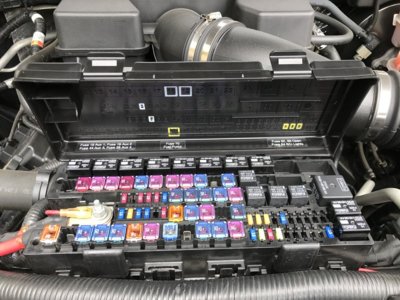
Getting power from the OE fuse box into the Starkey harness is here: http://www.fordraptorforum.com/f12/using-oe-fuse-block-under-hood-power-50161/
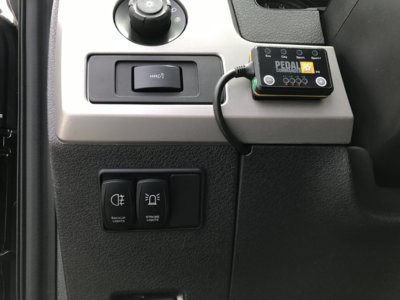
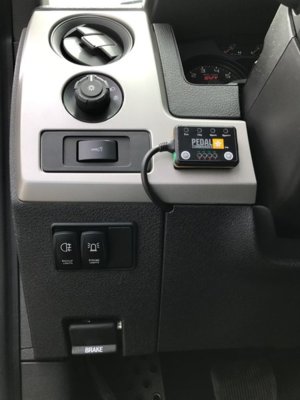
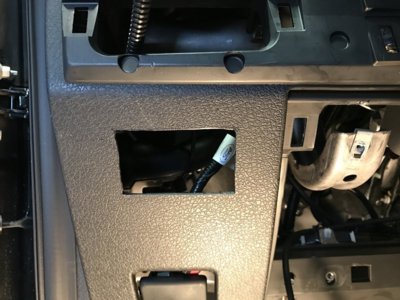
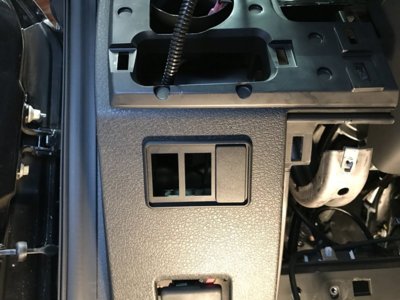
I didn't want to use the OE upfitter switches for this as I have other plans for those. I decided to place the switch directly below the headlight and dimmer switch. Control wise it seems a logical place to operate them from. It was also a spot that didn't require any cutting or modification of the internal dash structure or bracing. Not the easiest to see as the lower panel slope away from you as you sit in the seat but the switch rocker is almost straight up and down when activated.
I had the switches customized so the lower text portion is blue and connected to the dash light dimmer circuit. The upper LED is amber just like the factory switches and illuminates when on. I installed another switch (future project) and blanking plate in a three position switch holder that trims out the cut hole nicely. To wire the switches I replaced the crimped on female spades that came on the Starkey harness with an 8 terminal connector housing and the correct Packard terminals. I can now unplug them easily and never have to worry about the wiring order.
Here are the lights and harness I bought:
Rigid D-Series Flood - flush mount
D-Series | Flood Pair Flush White Black | Rigid Industries
Starkey Backup/Auxiliary Lighting Wiring & Switch Kit
Backup/ Reverse Lighting Wiring & Switch Kit - Fits any vehicle!
Once I got that installed I figured out the switch Starkey includes is made by Carling but can be ordered custom from OTRATTW
https://otrattw.net/Contura-V-SR/
The Rigid LED's come with a decent harness and switch. It's a very universal kit that would cover most installs. What I liked about the Starkey kit is that it was F-150 specific, includes Deutsch DT Series 2-way connectors that match the Rigid LED's and uses a relay to activate the lights. I know the LED's don't draw much current but I typically over-build electrical systems because who knows what this will power in the future.
The install was pretty straight forward it just took time. I covered cutting and installing the lights here: http://www.fordraptorforum.com/f11/cutting-into-rear-bumper-tough-49872/
Getting power from the OE fuse box into the Starkey harness is here: http://www.fordraptorforum.com/f12/using-oe-fuse-block-under-hood-power-50161/
I didn't want to use the OE upfitter switches for this as I have other plans for those. I decided to place the switch directly below the headlight and dimmer switch. Control wise it seems a logical place to operate them from. It was also a spot that didn't require any cutting or modification of the internal dash structure or bracing. Not the easiest to see as the lower panel slope away from you as you sit in the seat but the switch rocker is almost straight up and down when activated.
I had the switches customized so the lower text portion is blue and connected to the dash light dimmer circuit. The upper LED is amber just like the factory switches and illuminates when on. I installed another switch (future project) and blanking plate in a three position switch holder that trims out the cut hole nicely. To wire the switches I replaced the crimped on female spades that came on the Starkey harness with an 8 terminal connector housing and the correct Packard terminals. I can now unplug them easily and never have to worry about the wiring order.
Attachments

Last edited: