Assassin
Active Member
Some of you may love this, and some of you may hate it and would rather stick with the original blue. My reason for doing this was to match my red calipers....and everything else since my exterior accent color is red. It annoyed me how the blue just stuck out like a sore thumb.
Here's a small write up on what to do if you're interested.
This is a rather time consuming mod but easy to do.
Here are the things that you will need for this project.
-Two cans of Rustoleum caliper spray paint with the color of your choice.
-Caliper cleaner.
-Some wide painters tape and thin edging tape.
-Goo Gone.
-Simple Green.
-Vinyl stickers. (I ordered mine from OutlawCustomDesigns.com)
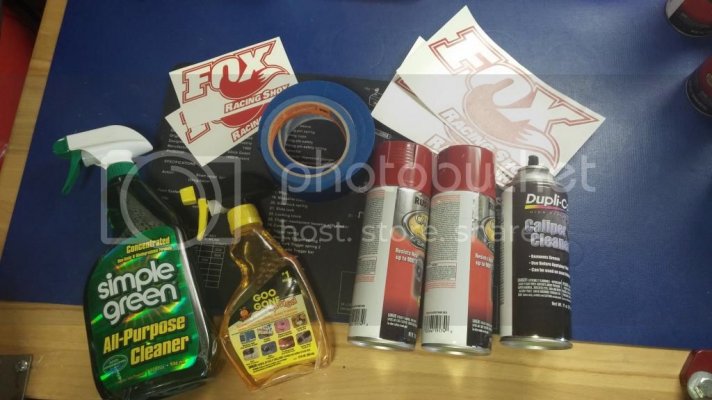
Tools.
-Impact wrench
-3/4 wrench
-5/8 socket
-13/16 deep socket
-Allen wrench
-Floor jack
-Jack stands
-Hammer
-Plastic razor blade
-Exacto knife
These following steps are post wheel removal.
With a 5/8 socket and 3/4 wrench, loosen the top bolt with your impact wrench while using
your 3/4 wrench to hold the back nut in place. DO NOT REMOVE COMPLETELY.
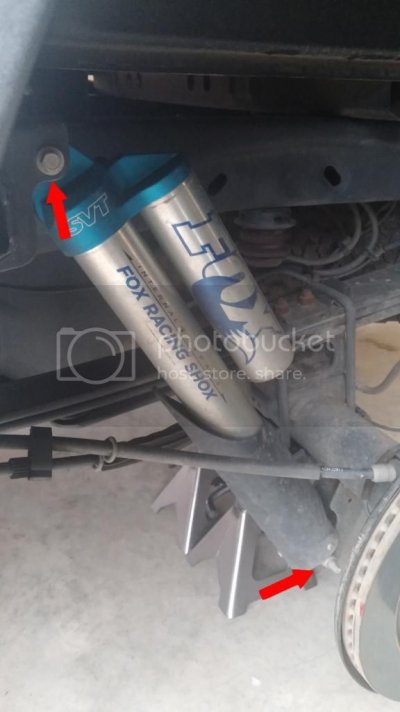
Next remove bottom bolt completely. (You will possibly need to use your hammer to tap the bolt out.)
After the bottom is undone the shock will likely decompress a few inches, don't worry about that. Undo the top bolt and pull out the shock.
I used 4 jack stands just because I like to use extra precaution, but you can get by with 2.
Use your floor jack to raise up your truck off the jack stands, then slide one jack stand under the axle right beside your rotor, and the other jack stand closer to the rear differential case. Put the jack stand on the lowest setting.
Do the same steps on the other side.
Now you're ready to start prepping for the paint.
First spray Carb cleaner* all over it and wipe it down real good.
Next you need to remove the 3 allen bolts on the plastic guard. To remove, just slide it down off the arm.
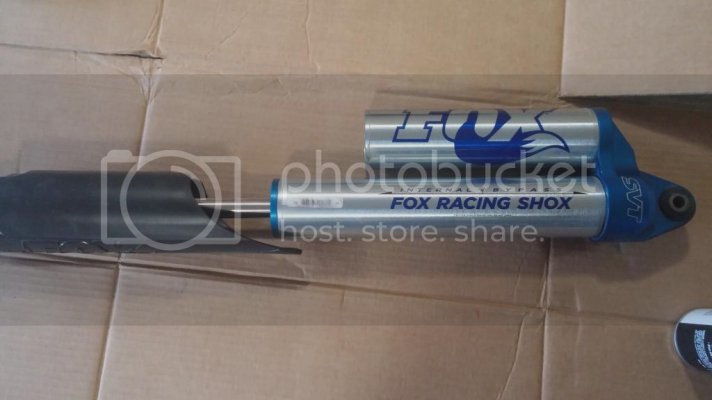
Next use the plastic razor blade* and start peeling the edge of the factory decal. Once you get enough to grab onto you will be able to pull it off by hand.
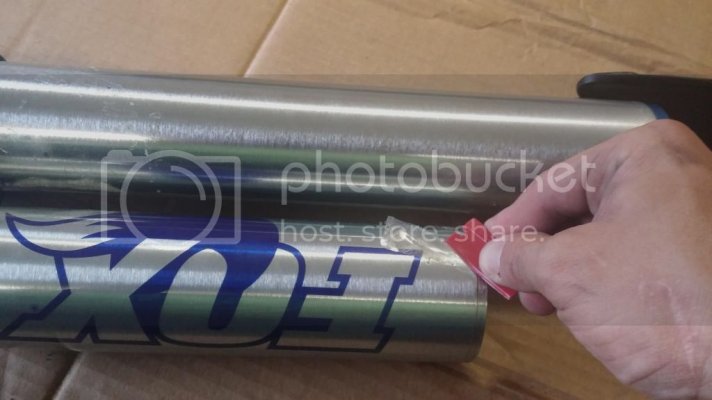
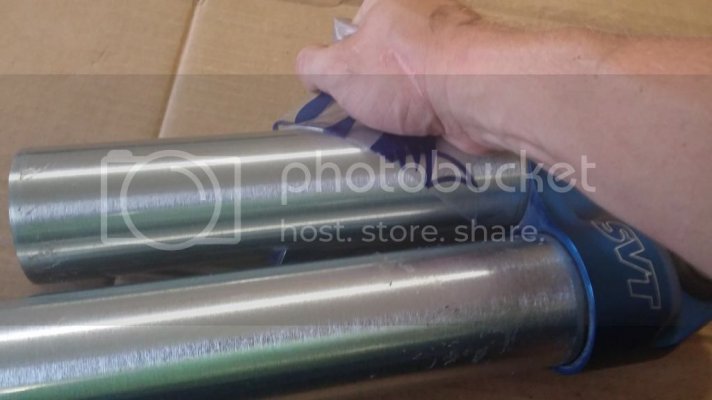
Use Goo Gone* to remove the residue left behind from the factory decal, then use Simple Green* to clean it.
Use the edging tape* to cover the edge and use your plastic razor blade to tuck the tape in.
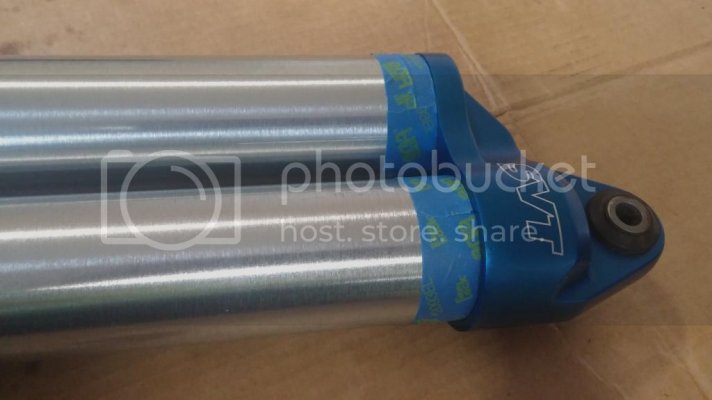
Next, use the painters tape to cover the bolt holes on the top and bottom of the shock. This is where the exacto knife comes in handy.
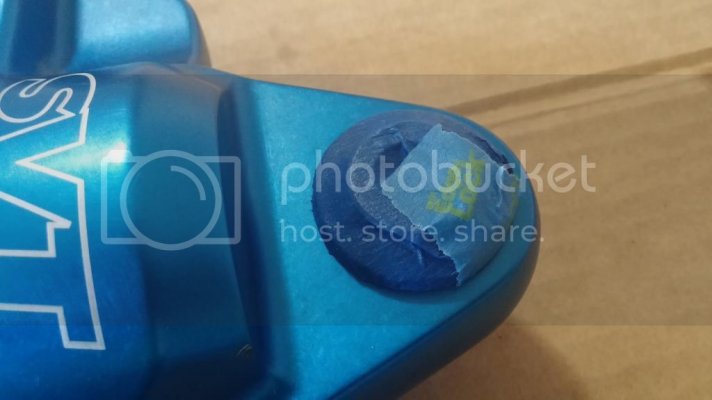
Cover up the screw holes on the lower arm. (doesn't have to be perfect since it wont be seen)
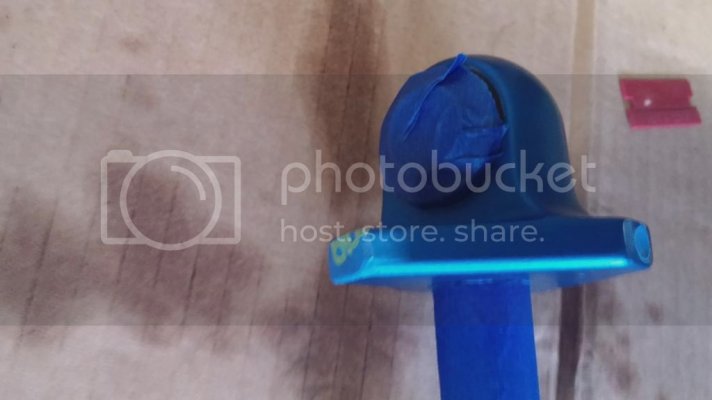
Mask off everything else real good.
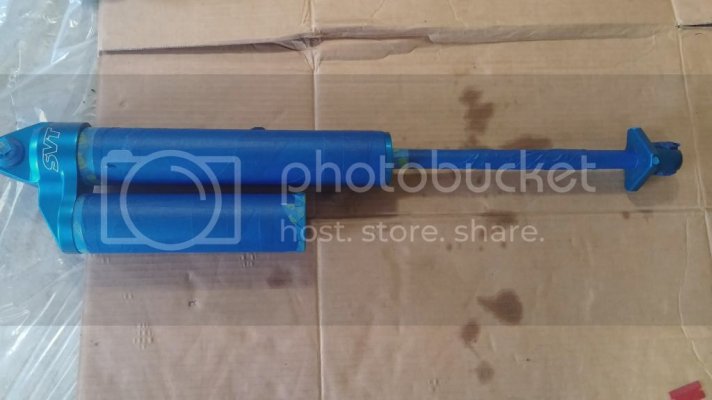
Now it's paint time! Don't forget to put something underneath the shock so the top and bottom won't touch the ground. I sprayed about 5 to 6 coats of paint, then sprayed about 4 to 5 coats of clearcoat.
(if you are applying a decal on the shock like I did with the SVT, then apply the decal before clearcoating.)
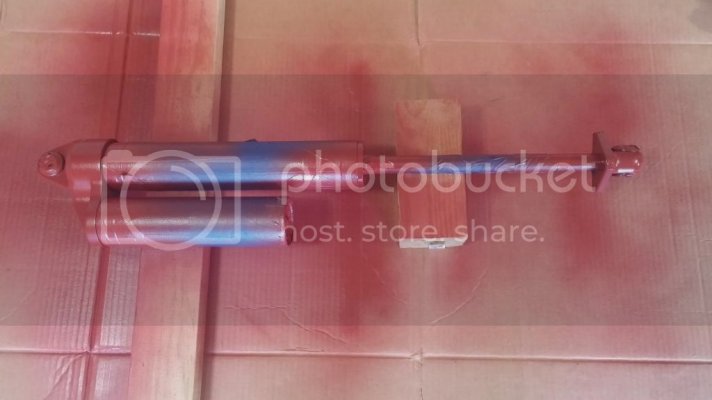
Several hours later and BOOM finished product!
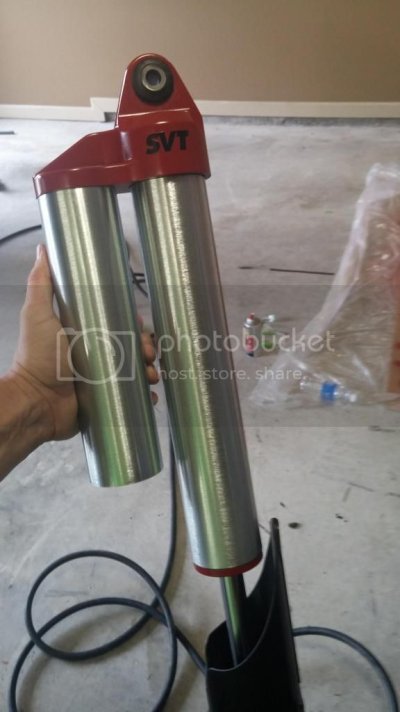
Re-installation.
Place a couple of thick pieces of wood on your jack, then place the jack under the hitch. Make sure your parking break is on and front wheels are scotched. Jack it up as high as you can.
Since the shocks decompressed during disassembly, you will need to raise your truck higher than normal and loosen the U bolts to re-install.
After the U bolts are loosened then you will get enough clearance to install the shocks. I had to put some pressure on the axle to line up the bolt holes.
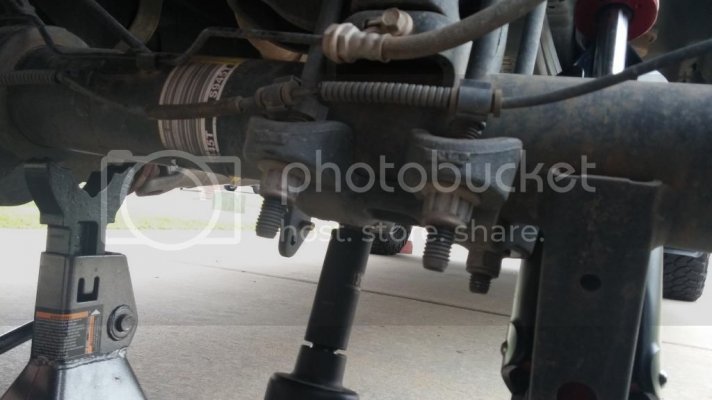
Repeat steps from shock disassembly to re-install.
Mod complete!
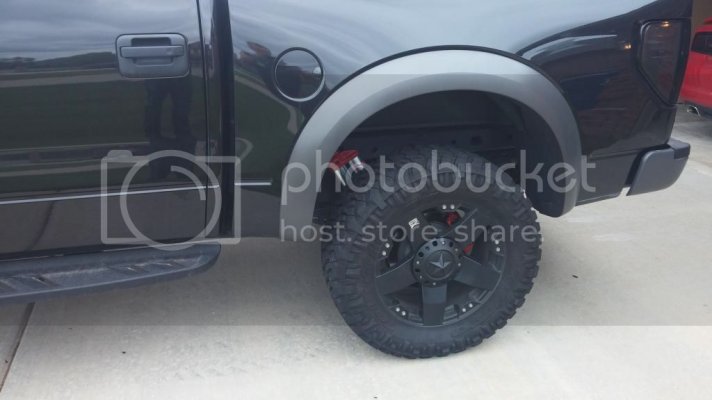
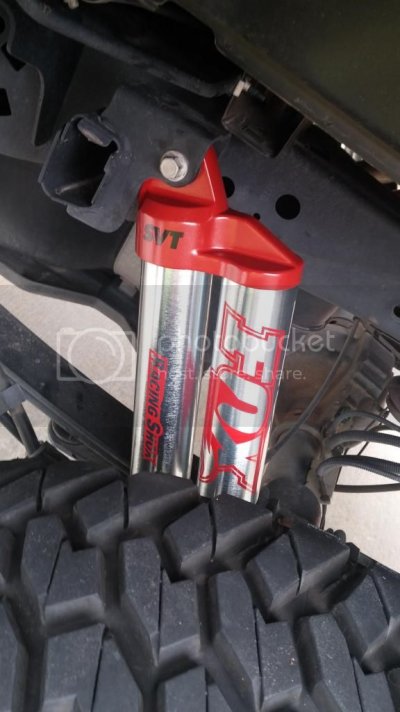
I'm going to do the same with the front coilovers so I will do a write up on that as well.
**Just a side note, I skipped sanding and priming because I was pressed for time. If you want to do it right then I suggest doing these steps, but I've painted metal several times without sanding and priming and its lasted just fine.
*UPDATE*
Since the FOX sticker covered the entire surface of the shock body, I figured I would need to do the same to protect it from corrosion so I installed a clear protective film and it worked great.
Here's a small write up on what to do if you're interested.
This is a rather time consuming mod but easy to do.
Here are the things that you will need for this project.
-Two cans of Rustoleum caliper spray paint with the color of your choice.
-Caliper cleaner.
-Some wide painters tape and thin edging tape.
-Goo Gone.
-Simple Green.
-Vinyl stickers. (I ordered mine from OutlawCustomDesigns.com)

Tools.
-Impact wrench
-3/4 wrench
-5/8 socket
-13/16 deep socket
-Allen wrench
-Floor jack
-Jack stands
-Hammer
-Plastic razor blade
-Exacto knife
These following steps are post wheel removal.
With a 5/8 socket and 3/4 wrench, loosen the top bolt with your impact wrench while using
your 3/4 wrench to hold the back nut in place. DO NOT REMOVE COMPLETELY.

Next remove bottom bolt completely. (You will possibly need to use your hammer to tap the bolt out.)
After the bottom is undone the shock will likely decompress a few inches, don't worry about that. Undo the top bolt and pull out the shock.
I used 4 jack stands just because I like to use extra precaution, but you can get by with 2.
Use your floor jack to raise up your truck off the jack stands, then slide one jack stand under the axle right beside your rotor, and the other jack stand closer to the rear differential case. Put the jack stand on the lowest setting.
Do the same steps on the other side.
Now you're ready to start prepping for the paint.
First spray Carb cleaner* all over it and wipe it down real good.
Next you need to remove the 3 allen bolts on the plastic guard. To remove, just slide it down off the arm.

Next use the plastic razor blade* and start peeling the edge of the factory decal. Once you get enough to grab onto you will be able to pull it off by hand.


Use Goo Gone* to remove the residue left behind from the factory decal, then use Simple Green* to clean it.
Use the edging tape* to cover the edge and use your plastic razor blade to tuck the tape in.

Next, use the painters tape to cover the bolt holes on the top and bottom of the shock. This is where the exacto knife comes in handy.

Cover up the screw holes on the lower arm. (doesn't have to be perfect since it wont be seen)

Mask off everything else real good.

Now it's paint time! Don't forget to put something underneath the shock so the top and bottom won't touch the ground. I sprayed about 5 to 6 coats of paint, then sprayed about 4 to 5 coats of clearcoat.
(if you are applying a decal on the shock like I did with the SVT, then apply the decal before clearcoating.)

Several hours later and BOOM finished product!

Re-installation.
Place a couple of thick pieces of wood on your jack, then place the jack under the hitch. Make sure your parking break is on and front wheels are scotched. Jack it up as high as you can.
Since the shocks decompressed during disassembly, you will need to raise your truck higher than normal and loosen the U bolts to re-install.
After the U bolts are loosened then you will get enough clearance to install the shocks. I had to put some pressure on the axle to line up the bolt holes.

Repeat steps from shock disassembly to re-install.
Mod complete!


I'm going to do the same with the front coilovers so I will do a write up on that as well.
**Just a side note, I skipped sanding and priming because I was pressed for time. If you want to do it right then I suggest doing these steps, but I've painted metal several times without sanding and priming and its lasted just fine.
*UPDATE*
Since the FOX sticker covered the entire surface of the shock body, I figured I would need to do the same to protect it from corrosion so I installed a clear protective film and it worked great.
Last edited:


