

Aksubiedubie
Member
Hey Everyone,
Some brief info about me:
My name is Isaac and live up in Alaska currently. Moving to Washington state next fall (2017) to go to pharmacy school; have a M.S. in chemistry (2017) and B.S. in chemistry (2014). I used to be a pipefitter - welder's helper for the plumbers and pipefitters union so I "know how to weld".
I always loved turbos and I built a ****** turbo setup for my 1997 5.4L F150 right out of high school. It worked OK for what it was (modeled after the STS kits) and I did my own tuning to an extent. I got a 2004 STI as I decided to go to college, blew it up, learned how to actually tune, and I had a ~600awhp STI for a couple years.
- Had a 2010 5.4L raptor and sold it since hptuners did not support the trans at the time (2015)
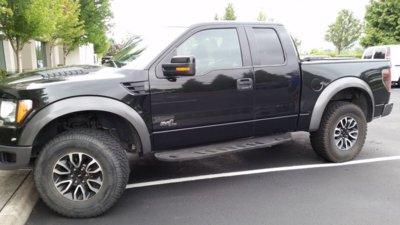
- Have a 2012 SCAB tuxedo black raptor that I'm currently building.
Formalities aside, I'll give a rundown of my do-it-yourself twin turbo build.
I wanted to do a tri-y turbo header config due to packaging and better pulse separation.
First thing is first: I rebuilt the shocks since the old ones started leaking during our crappy -40f weather. I stopped using it as a DD after seeing the shock seals leak in the cold.
Specs
Material: Schedule 10 1.5" 304L stainless primaries and secondaries into a 2" schedule 10 304L stainless merge.
- Borgwarner EFR 7163 turbos with V-band turbine inlet
* 3" downpipes to Y pipe and into 4" MBRP/magnaflow exhaust (added
magnaflow straight thru muffler since the MBRP was loud as f*ck)
* Turbos will have blankets and everything near will be wrapped with some high temp aerogel wrap.
* I opened up the hood vents a bit to increase ventilation. Turbine housings are direcdtly under the vents - maybe 6
inches of clearance if I had to guess
- Garrett 1000hp liquid to air core for intercooler
- Intercooler right before a blow through MAF of either 3.5 or 4" OD (have not decided yet)
* Lingenfelter varimax brushless water pump
- FoMoCo 47lb units (was going with ID1050x... maybe later)
- Turbosmart EBoost2 boost controller
- Aquamist HFS-3 water injection
- Hptuners nGauge
- Hptuners tuning software (tuned by me)
- Aluminum valve covers with oil drain fittings.
Pictures:
1) truck
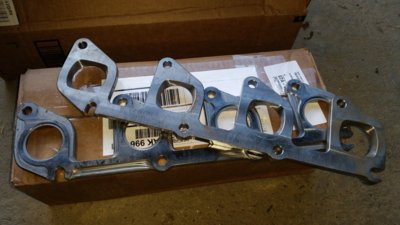
2) exhaust flangles - 0.5" thick mild steel
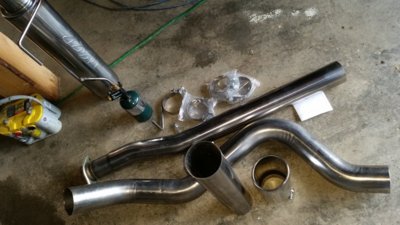
3) MBRP 4" exhaust (for ecoboost - "modified")
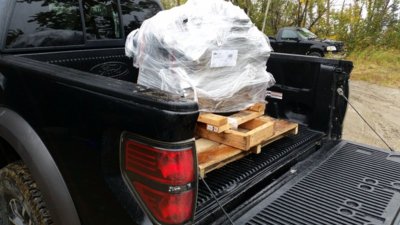
4) Spare 6.2L longblock and mockup motor
5) Box of macaronis to become turbo headers
Some brief info about me:
My name is Isaac and live up in Alaska currently. Moving to Washington state next fall (2017) to go to pharmacy school; have a M.S. in chemistry (2017) and B.S. in chemistry (2014). I used to be a pipefitter - welder's helper for the plumbers and pipefitters union so I "know how to weld".
I always loved turbos and I built a ****** turbo setup for my 1997 5.4L F150 right out of high school. It worked OK for what it was (modeled after the STS kits) and I did my own tuning to an extent. I got a 2004 STI as I decided to go to college, blew it up, learned how to actually tune, and I had a ~600awhp STI for a couple years.
- Had a 2010 5.4L raptor and sold it since hptuners did not support the trans at the time (2015)
- Have a 2012 SCAB tuxedo black raptor that I'm currently building.
Formalities aside, I'll give a rundown of my do-it-yourself twin turbo build.
I wanted to do a tri-y turbo header config due to packaging and better pulse separation.
First thing is first: I rebuilt the shocks since the old ones started leaking during our crappy -40f weather. I stopped using it as a DD after seeing the shock seals leak in the cold.
Specs
Material: Schedule 10 1.5" 304L stainless primaries and secondaries into a 2" schedule 10 304L stainless merge.
- Borgwarner EFR 7163 turbos with V-band turbine inlet
* 3" downpipes to Y pipe and into 4" MBRP/magnaflow exhaust (added
magnaflow straight thru muffler since the MBRP was loud as f*ck)
* Turbos will have blankets and everything near will be wrapped with some high temp aerogel wrap.
* I opened up the hood vents a bit to increase ventilation. Turbine housings are direcdtly under the vents - maybe 6
inches of clearance if I had to guess
- Garrett 1000hp liquid to air core for intercooler
- Intercooler right before a blow through MAF of either 3.5 or 4" OD (have not decided yet)
* Lingenfelter varimax brushless water pump
- FoMoCo 47lb units (was going with ID1050x... maybe later)
- Turbosmart EBoost2 boost controller
- Aquamist HFS-3 water injection
- Hptuners nGauge
- Hptuners tuning software (tuned by me)
- Aluminum valve covers with oil drain fittings.
Pictures:
1) truck
2) exhaust flangles - 0.5" thick mild steel
3) MBRP 4" exhaust (for ecoboost - "modified")
4) Spare 6.2L longblock and mockup motor
5) Box of macaronis to become turbo headers
Attachments

Last edited:


