You are using an out of date browser. It may not display this or other websites correctly.
You should upgrade or use an alternative browser.
You should upgrade or use an alternative browser.
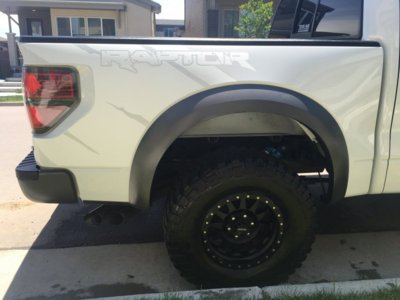
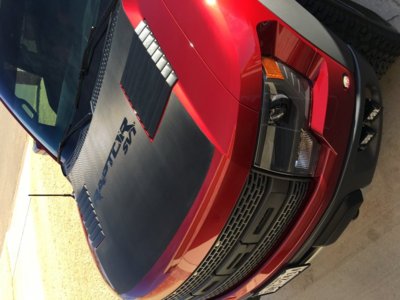
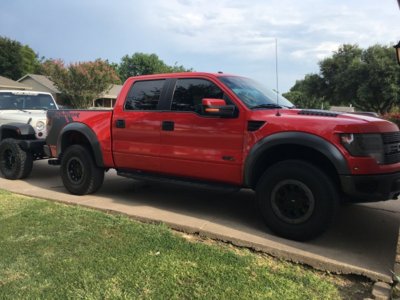
GEN 1 Graphics install
- Thread starter RSVT
- Start date
Disclaimer: Links on this page pointing to Amazon, eBay and other sites may include affiliate code. If you click them and make a purchase, we may earn a small commission.
Zeke555
FRF Addict
I got a hood decal from them. I did not install it but they do excellent work.
Mick VT
Full Access Member
- Joined
- Jan 17, 2016
- Posts
- 192
- Reaction score
- 91
There are some fairly good youtube vids on techniques for installing graphics. I have found them helpful before, but never done anything that big myselfI ordered my graphics from rappy graphics. Has any one installed themselves? I plan on doing it this weekend
Robb0h
Member
- Joined
- Mar 12, 2016
- Posts
- 35
- Reaction score
- 26
Rappy Graphics has a few videos on their YouTube channel of installs. No side graphics but there are two hood install vids. There's no instructions, more of a "fly on the wall" style vids, but I felt like after watching them you can get an idea of the process.
Sent from my iPhone using Tapatalk
Sent from my iPhone using Tapatalk
Robb0h
Member
- Joined
- Mar 12, 2016
- Posts
- 35
- Reaction score
- 26
Couldn't sleep so I found myself surfing for vids on YouTube. Looks like the channel called "Arlon Graphics" has some informative videos.
Here is a great one on squeegee technique that looks like it would be applicable to installing side graphics:
https://youtu.be/TpMTAr4Rd00
Here is one on installing large (a hood) graphics with one person. I think I'll still bribe a friend to help haha...
https://youtu.be/i67u-Nkubws
Fixing wrinkles & bubbles (this will probably be the video I get the most use out of) lol
https://youtu.be/BtLk6vt4EPo
Rob
Sent from my iPhone using Tapatalk
Last edited:
I installed mine by myself. Took at lot longer than described in those videos, but it's definitely doable. Just keep the graphic damp until you have it in position. Once you start applying pressure and squeegeeing, work from top to bottom or from one side to the other. I was nervous when I started, but it's really easier than it looks. Good luck and let's see the pics.
Attachments
MaTm
Active Member
- Joined
- Mar 9, 2016
- Posts
- 56
- Reaction score
- 95
I put mine on myself. It would have been straight forward, but the box came out of the mail almost completely smashed flat.
It had many wrinkles that needed to be worked out and I still need to take a hair dryer to some parts to work out the kinks. It helps quite a bit to have an extra set of hands.

It had many wrinkles that needed to be worked out and I still need to take a hair dryer to some parts to work out the kinks. It helps quite a bit to have an extra set of hands.

I installed mine by myself. Took at lot longer than described in those videos, but it's definitely doable. Just keep the graphic damp until you have it in position. Once you start applying pressure and squeegeeing, work from top to bottom or from one side to the other. I was nervous when I started, but it's really easier than it looks. Good luck and let's see the pics.
Where did you buy your hood graphic from?
---------- Post added at 11:55 PM ---------- Previous post was at 11:36 PM ----------
Anyone buy graphics from the the ford raptor store? Their hood graphic is abit closer to what I wanted, almost the same as a stock hood graphic
Where did you buy your hood graphic from?
---------- Post added at 11:55 PM ---------- Previous post was at 11:36 PM ----------
Anyone buy graphics from the the ford raptor store? Their hood graphic is abit closer to what I wanted, almost the same as a stock hood graphic
Rappy Graphics. He'll make anything you want from stock look to what you can dream up. Much better material quality than stock.
Similar threads
- Replies
- 6
- Views
- 421
- Replies
- 4
- Views
- 261
- Replies
- 3
- Views
- 877
Members online
- kevo_lo
- furioussphinx
- LibertyDNP
- ksgries
- hyrepower
- NC59
- Rednose
- taquitos
- GreenGoblin
- DougDimmadome
- Solidred
- skillathon2002
- veritas
- JDizzle93
- Telecaster480
- wazatataza
- dinero_wey
- jeepster1031
- Zach Gen3
- lukengo
- austinoutdoors
- thatJeepguy
- RRR22
- Sparda1123
- njhummer18
- FoxNotch
- wyomingraptor
- Rabel376
- HOLLYWOOD 1
- Crywolf4
- MIK3
- gsxraptor
- encyphered
- ZO6FL
- Haydel53
- DaveInMn
- Ever
- JAYL1985
- Diverdown3
- Specialtyperformanceparts
- BadWRP
- DFS
- chularaptor
- -Ryan-
- RaptorVette
- wesleywest
- Butterz
- cuts
- 8202632
- WetDirt
Total: 1,782 (members: 65, guests: 1,717)
Forum statistics
Latest posts
-
801A package can you fit a 37" spare under the bed?
- Latest: skillathon2002
-
-
-


