Radio Installs

Disclaimer: Links on this page pointing to Amazon, eBay and other sites may include affiliate code. If you click them and make a purchase, we may earn a small commission.
RotorOver

Full Access Member
Joined
Jun 28, 2021
Posts
434
Reaction score
686
Location
Greater Atlanta
I did a dual band radio install on my truck and thought we could have a thread to share our installs and help inspire others with ideas.
 
OP
OP
RotorOver

RotorOver

Full Access Member
Joined
Jun 28, 2021
Posts
434
Reaction score
686
Location
Greater Atlanta
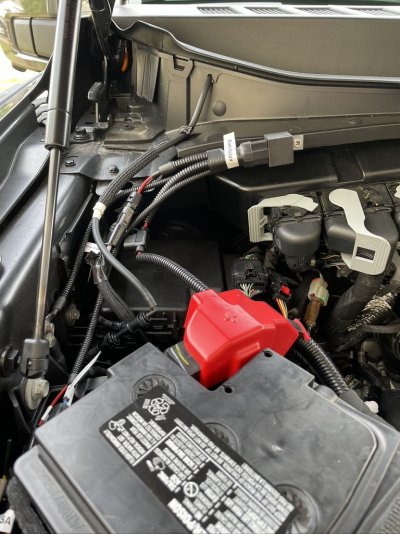
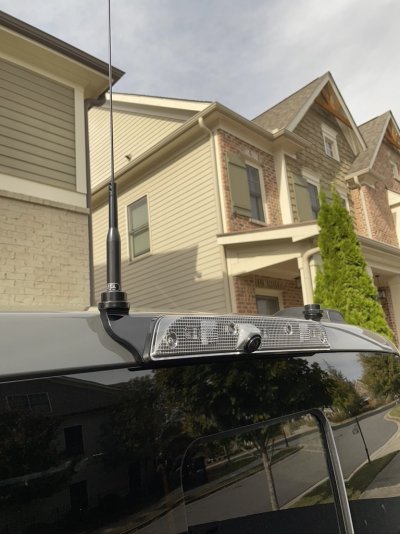
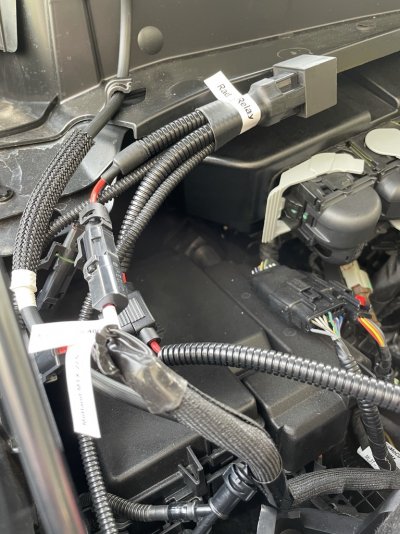
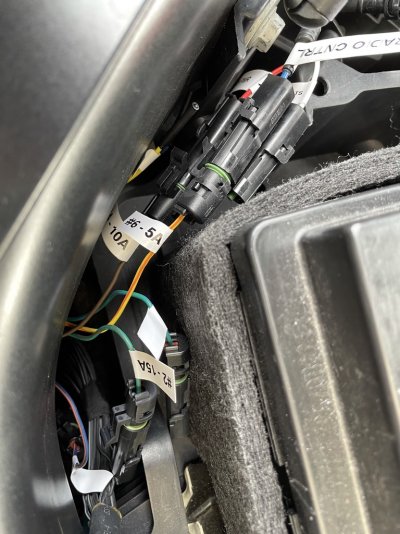
I installed a Yaesu FTM-400XDR radio and Bullet Proof Diesel Third Brake Light dual antenna mount. I also pre-wired power for a Midland MXT-275 GMRS radio that I have coming. I decided to run a seperate relay to power both radios and control power to both simultaneously through one of the AUX switches. Since I loved the idea of the weather pack connections to the upfitter and switch wires and have already used a @Specialtyperformanceparts harness to wire in one of their Rigid Radiance Scene light kits, I went in that direction. I actually picked up one of their 30 amp relays to do this as it is a very nice piece of kit and mates with the WP connectors. Here's some shots of the installed relay and upfitter wires with WP connectors installed.
63F4654E-4CD3-437A-8033-1F4BB5B05C83_1_105_c.jpeg
E8AB310B-07C2-438B-9BE1-A04D8D90C202_1_105_c.jpeg
9B2D0B3B-B456-4598-BBB4-2171092B3B00_1_105_c.jpeg

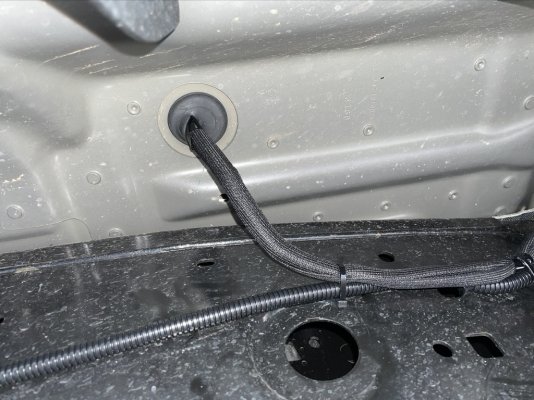
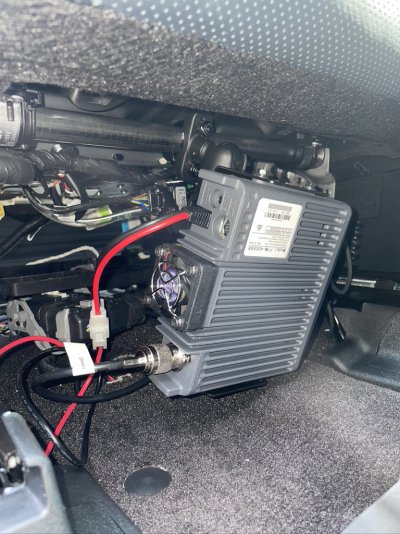
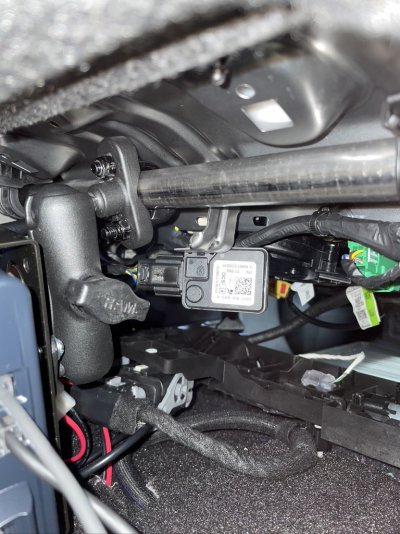
I decided to mount the radio under the passenger seat using a RAM mount U-bolt to secure it to the seat, so it actually moves with the seat, staying clear of the deck in case of water intrusion. I grounded the radio to the ground next to the fuse box in the passenger footwell, running it under the carpet. I routed the power cable under the carpet and out of the floor penetration under the passenger seat running it along the frame with my reverse light wiring up to the engine bay to the relay. I also pre-ran some wire for the GMRS radio in this loom. To install this radio, I'll split the power coming off of the relay and connect this radio as well. Control power for both then will be on the #6 AUX switch, which is 5 amp and plenty for this function and saves the use of another switch.

2349D961-169D-4A64-8340-E4C47FBC497E_1_105_c.jpeg

(Continued)
 
Last edited:
OP
OP
RotorOver

RotorOver

Full Access Member
Joined
Jun 28, 2021
Posts
434
Reaction score
686
Location
Greater Atlanta
Here are some shots of the radio mounted under the passenger seat. The second picture shows the RAM mount attached to a cylindrical bar under the passenger seat and the supplied radio bracket. I had to drill an an additional hole in the bracket to connect the RAM ball. There is enough slack in the control head cord that it can also be unmounted and held in hand to enter data and manipulate controls. The mic is also close enough that a mic extension is not required.

F71DC661-0026-4278-9FA0-4F7AA627F913_1_105_c.jpeg
78BEE9D0-DFB6-4D71-B690-76EF844D053F_1_105_c.jpeg

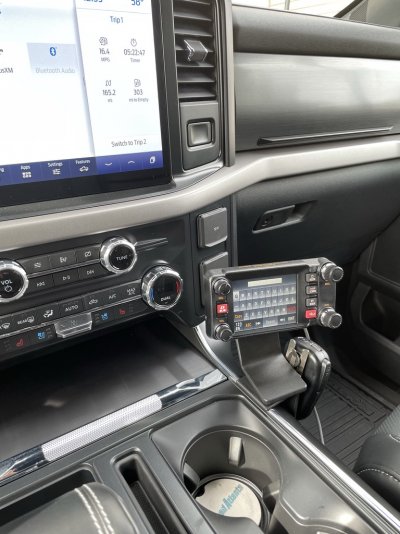
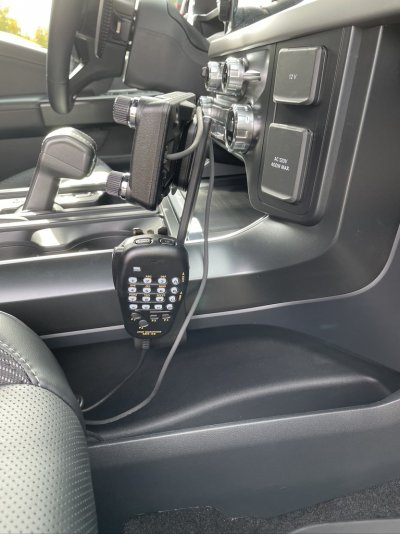
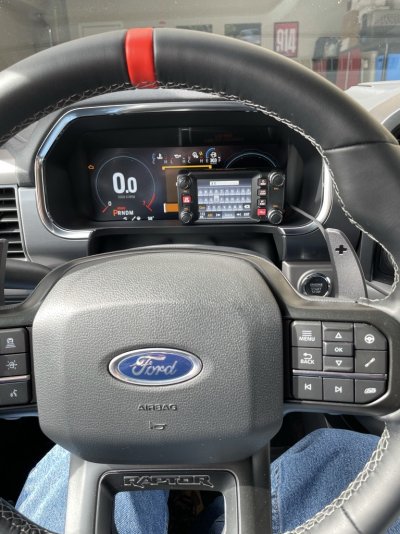
The FTM-400XDR has a remote control head. I mounted that using a ProClip right hand console mount (item 835678) and a MagicMount Pro XL with a rare earth magnet (item 100362) that way the control head can be detached and stowed for security. I mounted the mic to the ProClip mount.

1878912B-6330-4972-A23C-B97872A3984C_1_105_c.jpeg
82D9B8F3-825C-4624-8BFF-DD0AEECDE496_1_105_c.jpeg
C5F1EB63-1C8F-4A8E-A6DD-645461B8C741_1_105_c.jpeg

(Continued)
 
OP
OP
RotorOver

RotorOver

Full Access Member
Joined
Jun 28, 2021
Posts
434
Reaction score
686
Location
Greater Atlanta
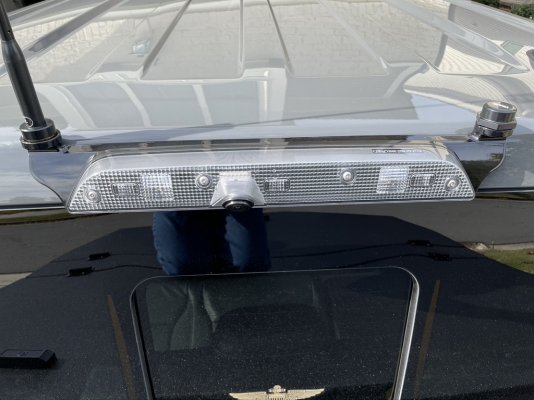
The Bullet Proof Diesel dual antenna mount was also installed. It comes with two NMO mounts with 15' antenna cables and PL-259 connectors installed. The mount works great even the version with the camera in the light, not a problem. It just uses a bigger connector.

The BPD instructions are not great, so I'll add you put the provided pan head screws through the middle set of holes in the mount and align with the factory holes in the body. You use the top set of holes to drill out the bracket support holes and the smaller bottom holes are used after remounting the light and securing it with the provided fasteners.

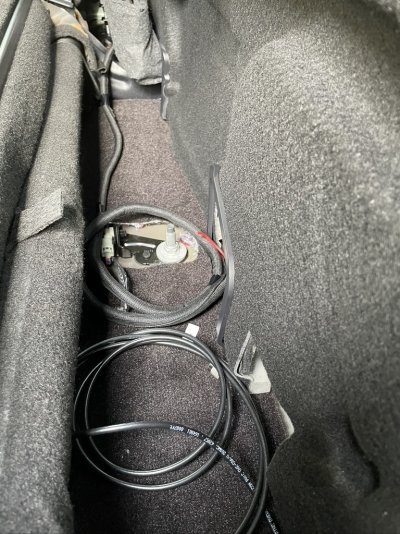
I routed the antenna cables along the headliner and down behind the trim on the back corners by the rear seat belts. You can get into the channel along the trim below the doors from there. I routed the power for the GMRS radio back from the passenger seat floor penetration this way. You can see the cables behind the seat in the last pic. I plan on mounting the GMRS radio under the back seat. There appears to be a ground behind the rear seats that I'll use.

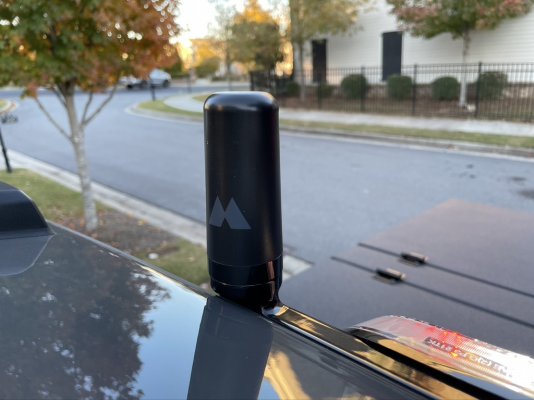
I park in a garage with a seven foot ceiling at work, so a folding antenna is necessary or I'll remove it for dailying. I measured about 6.5" of clearance, so not much room for a dual band. The shortest I've found is 7.5", but a GMRS phantom antenna should be able to be left on. I also have to fold the antenna to get into and out of the garage, so hopefully I remember!

D7DEB284-36FF-472B-B72D-971F84D4CE50_1_105_c.jpeg
E58EF516-BDD5-44B3-9927-532CFCBF2B9A_1_105_c.jpeg
219334EA-6533-4178-BBD0-46F27714A23E_1_105_c.jpeg
 
Last edited:
OP
OP
RotorOver

RotorOver

Full Access Member
Joined
Jun 28, 2021
Posts
434
Reaction score
686
Location
Greater Atlanta
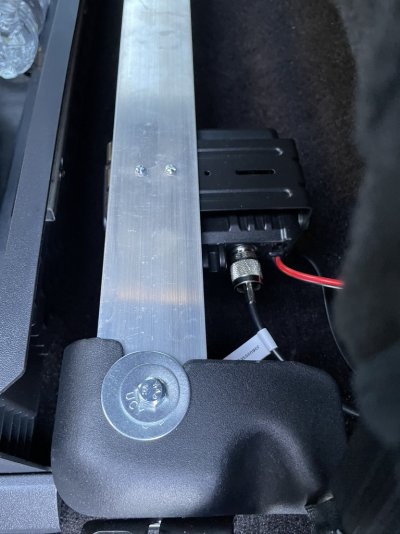
Got the second of the two planned radios installed. Did an under the rear seat install of a Midland MTX-275 GMRS radio.

C7E93472-2745-4549-85DC-5C4CC6B1468B_1_105_c.jpeg

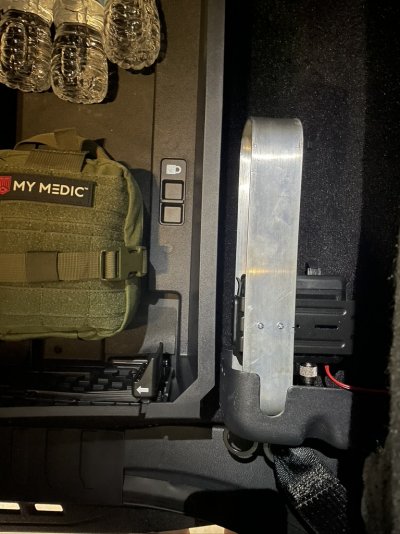
Used a piece of 3" x 36" aluminum stock cut down by a couple of inches to route between the two driver side rear seat mounts to use as a mounting bracket. I used a fender washer, a and couple of smaller washers to pinch the aluminum bracket against the seat mount on both ends. Unfortunately, the hardware is just barely interfering with the rear seat causing a gap of about a 1/4" between the seat and the underseat compartment at the front. It still functions and locks, but I'd rather have a 100% solution. I will try bending a piece to form a square with a height lower than the seat mount top to prevent interfering and plan on bolting it in to the factory seat mount bolt, which secures the seat bracket.

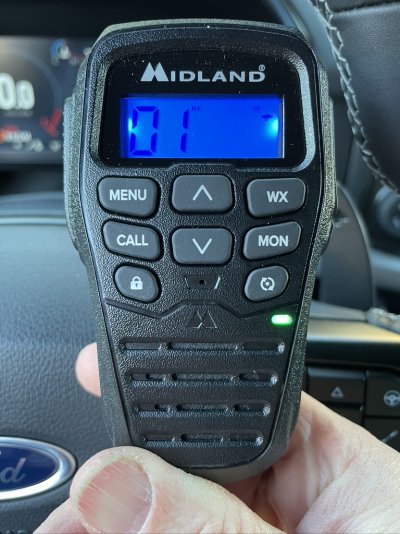
Used the Midland MXTA31 microphone extension to get the mic/control head to the front seats, routing it along the channel under the driver's door trim to the slit in the carpet under the driver seat.

221D0F90-D958-48CD-96F5-559A5CA2872B_1_105_c.jpeg

I previously pre-wired power from a relay that is supporting the installed VHF/UHF radio as well, which also routes control to the #6 upfitter switch. There is a ground conveniently located behind rear bulkhead insulation. The passenger side antenna cable from the Bulletproof Diesel Dual Antenna Mount was previously routed to that spot and now just needs to be trimmed and PL-259 re-installed. I installed a 3db gain Midland MXTA25 Ghost Antenna. The short 3" height is necessary as I tested the folding Comet SBB-5 for the VHF/UHF radio and even folded the antenna was bouncing off of the 7' ceiling at the work parking garage. For the daily I installed a Laird Phantom UHF antenna, which is 3.4" tall and keep the Comet in the truck.

F0770001-EDCD-49A8-8EFB-365CB0A871CB_1_105_c.jpeg
 
OP
OP
RotorOver

RotorOver

Full Access Member
Joined
Jun 28, 2021
Posts
434
Reaction score
686
Location
Greater Atlanta
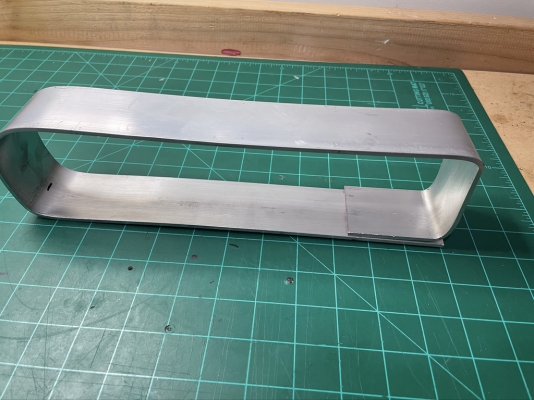
Created a solution to solve the issue with the GMRS mount hardware interfering with the rear seat when in the down position using another piece of aluminum stock. The solution gets the mount below the rear seat bracket, eliminating the issue. The rectangular shape also makes the mount stronger while leaving room for another radio to be installed. It uses the rear seat mount bolt to secure it, so no drilling required. Bent it by hand just using my vice and a few strokes with a mallet!

9FEF8682-710B-41E3-AF98-3177564B971D_1_105_c.jpeg

6A486D36-5474-4C85-91EE-957CAF146EEA_1_105_c.jpeg
 

dirtlvr

Full Access Member
Joined
Jun 22, 2021
Posts
338
Reaction score
437
Location
Fletcher, North Carolina
The Bullet Proof Diesel dual antenna mount was also installed. It comes with two NMO mounts with 15' antenna cables and PL-259 connectors installed. The mount works great even the version with the camera in the light, not a problem. It just uses a bigger connector.

The BPD instructions are not great, so I'll add you put the provided pan head screws through the middle set of holes in the mount and align with the factory holes in the body. You use the top set of holes to drill out the bracket support holes and the smaller bottom holes are used after remounting the light and securing it with the provided fasteners.

I routed the antenna cables along the headliner and down behind the trim on the back corners by the rear seat belts. You can get into the channel along the trim below the doors from there. I routed the power for the GMRS radio back from the passenger seat floor penetration this way. You can see the cables behind the seat in the last pic. I plan on mounting the GMRS radio under the back seat. There appears to be a ground behind the rear seats that I'll use.

I park in a garage with a seven foot ceiling at work, so a folding antenna is necessary or I'll remove it for dailying. I measured about 6.5" of clearance, so not much room for a dual band. The shortest I've found is 7.5", but a GMRS phantom antenna should be able to be left on. I also have to fold the antenna to get into and out of the garage, so hopefully I remember!

View attachment 328473
View attachment 328474
View attachment 328475
Thanks for this post. Very helpful! I'm getting ready to mount a VHF radio in my truck for Raptor runs. The guys at PCI (where I ordered my radio) said to make sure I do not coil up the coax cable as it creates an antenna of sorts at that spot and can and usually does create interference noise/signal loss. They did say it's OK to zig-zag it to take up the extra length. Just passing along in case you were not aware. And thanks again, great write up and pictures.
 
OP
OP
RotorOver

RotorOver

Full Access Member
Joined
Jun 28, 2021
Posts
434
Reaction score
686
Location
Greater Atlanta
Thanks for this post. Very helpful! I'm getting ready to mount a VHF radio in my truck for Raptor runs. The guys at PCI (where I ordered my radio) said to make sure I do not coil up the coax cable as it creates an antenna of sorts at that spot and can and usually does create interference noise/signal loss. They did say it's OK to zig-zag it to take up the extra length. Just passing along in case you were not aware. And thanks again, great write up and pictures.
Glad it helped! That was my hope for this thread! Post up your install once you get in done.

Yeah, I was able to trim up all the excess coax eventually, but needed to get my hands on the right crimpers. I ended up borrowing some from a buddy. But, you are exactly right!
 
Top