MAMiller44's 2019 Performance Blue

Disclaimer: Links on this page pointing to Amazon, eBay and other sites may include affiliate code. If you click them and make a purchase, we may earn a small commission.

OP
OP
MAMiller44

MAMiller44

Full Access Member
Joined
Apr 15, 2020
Posts
458
Reaction score
628
Location
Tampa, FL
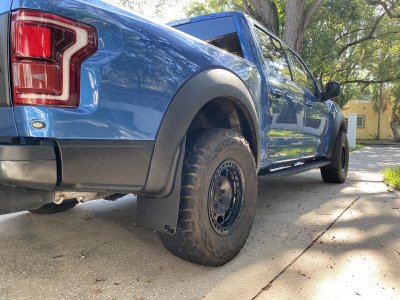
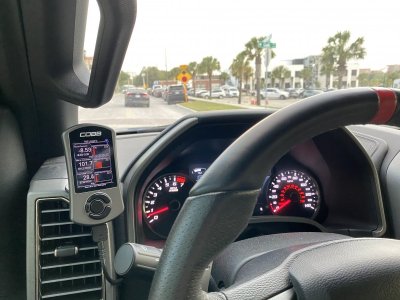
RokBlokz mud flaps went on yesterday. Also did some OCD cable management and mounted my Cobb Accessport on the dash. Used a Scoche magnetic mount which is pretty badass.

Still patiently waiting on Mishimoto catch cans to ship from back order. Also have KHC bed supports on the way. Oh and waiting for front runner to send me a quote for the rack setup I’m going with.

12A3B44C-472B-4F25-AFFB-C18DF34B16C8.jpeg

B24415A2-634F-42E0-B2D3-A97AF329B8A8.jpeg
 
OP
OP
MAMiller44

MAMiller44

Full Access Member
Joined
Apr 15, 2020
Posts
458
Reaction score
628
Location
Tampa, FL
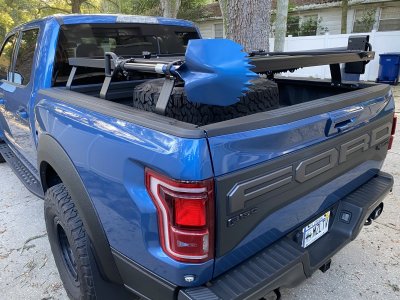
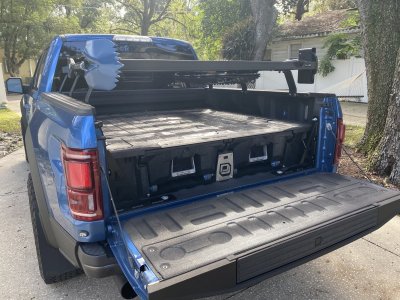
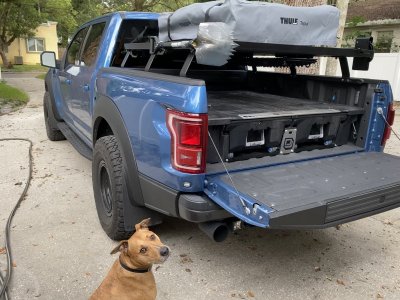
Front runner rack is in with most accessories already mounted. This system is awesome! I did a setup that I haven’t seen anywhere on here using the load bed tracks on the inside wall of the bed rails. Why? I love the decked drawers and the ability to still have a flat bed surface even loaded up with gear. I’ve been flipping a house and intend to do more so being able to still use the bed for full sheets of plywood, drywall, etc is a big plus. Now if I ever want to take the rack of it can slide off and still Have a good factory look to it. The rails allow it to sit slightly lower than mounting on top of retrax so I can easily put my spare up there when off-roading, or slide kayaks in between the drawers and the rack.

I bought a brand new Tepui Baja 2 tent that they just started remaking. I was waiting months before pulling the trigger on an Explorer 2 and was bummed that I could only find pics of this fabled Baja series (it is much lighter weight and basically has a full mesh roof if you take the rain screen off). Then bam, one day I jumped on Tepui to pull the trigger and they brought back the Baja. The tent cover itself is delayed due to a derailed train somewhere in Cali but I at least got the frame up.

I wanted to get the tent up there to basically mount other accessories around it. Currently have the quick release tent mounts, axe, shovel (painting murder spork Performance Blue right now), max trax mounts under the rack, and of course the bottle opener. I also have a fork bike mount for when my Trek Marlin 5 comes in. Jerry can and/or rotopax is next and I should be good to go there.

Up next:
- JLT catch can came in this weekend so that’ll get installed sometime this week.
- SDHQ A-Pillar mounts and Rigid DXL Pro’s came in but one of the Rigid lights was missing a bushing, waiting for that before installing.
- Icon leaf springs and RPG adjustable perch collars are on the way and I’ll be bringing those to get installed as soon as they arrive.
BDED509E-9AEE-4A0B-BE22-172348B5A644.jpeg
 
OP
OP
MAMiller44

MAMiller44

Full Access Member
Joined
Apr 15, 2020
Posts
458
Reaction score
628
Location
Tampa, FL
Krazy House Customs bed supports are in. Went with these because the decked drawers clear over them. I think the only other supports that would clear is the BajaMod but that’s been out of stock for forever.

61B9C692-CDEA-4232-A161-C8A8F60F79B4.jpeg
 
OP
OP
MAMiller44

MAMiller44

Full Access Member
Joined
Apr 15, 2020
Posts
458
Reaction score
628
Location
Tampa, FL
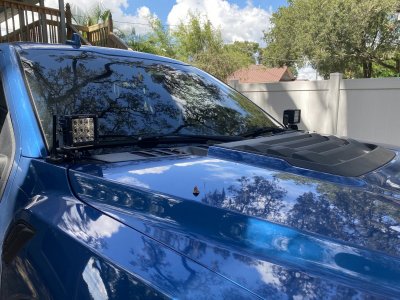
Actually last weekend, but got Rigid DXL ditch lights installed on SDHQ brackets. Officially done with lighting on the stock bumper setup. When a new bumper eventually goes on the lower lights will likely get swapped out for a 40” bar.

7D954613-BF0F-4365-8CDD-4D36D83212E2.jpeg
 
OP
OP
MAMiller44

MAMiller44

Full Access Member
Joined
Apr 15, 2020
Posts
458
Reaction score
628
Location
Tampa, FL
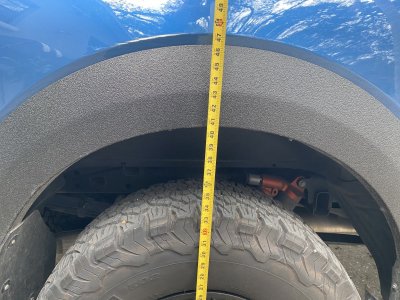
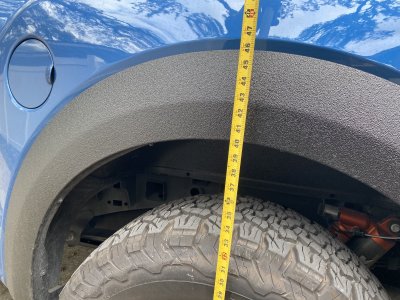
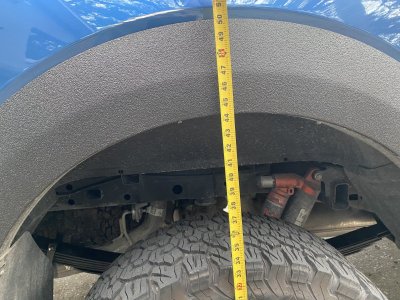
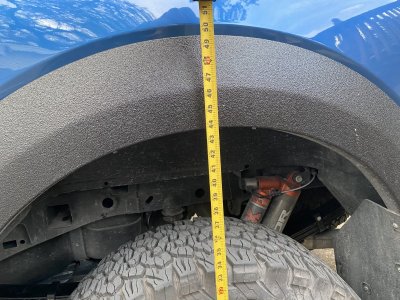
So last week I had Icon leaf springs and RPG adjustable perch collars installed. Went with Option 3 because I have the overland setup in the back. On a regular day I’ll have about 400-450 pounds back there and fully loaded up with the tent and camping gear maybe upwards of 700-800. According to icon:
Option 2 should be 2.25” lift unloaded or 1.00” with 400lbs.
Option 3 should be 3.00” unloaded or 0.50” with 800lbs.

I was expecting it to sit at around 2.00” with my daily driving setup and got 3.50” in the rear. So yea, it looks terrible.

I think the shop I had it done at may have torqued everything while on the lift so getting that checked out next Monday. If it’s still that high after loosening up the leafs, and re-torquing on the ground then I’ll go with Option 2. Icon support was pretty worthless with this.

Before and after in the rear.

1E46D2F8-3F7B-4557-8E9B-17F46D01E44B.jpeg

11E8829F-B187-4C77-8F5A-94F8AE5D383B.jpeg

25AE565A-9ADE-4D53-B95C-7FA02254340B.jpeg

FD0C13FA-91F7-4453-A758-6DB91BCF2D99.jpeg
 
OP
OP
MAMiller44

MAMiller44

Full Access Member
Joined
Apr 15, 2020
Posts
458
Reaction score
628
Location
Tampa, FL
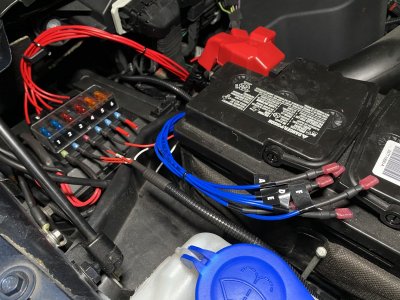
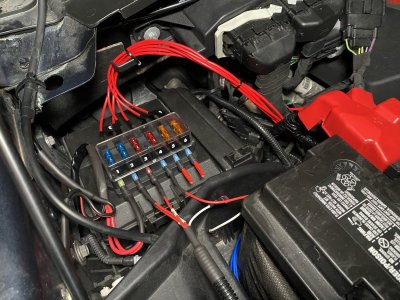
Also, cleaned up auxiliary wiring yesterday. I soldered in extended red wires under the hood for the aux power and blue for the pass-thru wires. Quick connects on all ends of wires and labels including under the passenger dash. A small fuse block from Amazon makes shifting anything around super easy as I make changes in the future. Right now I have:
1 - Two Rigid DX-L Pro Ditch Lights
2 - Four Rigid Radiance Scene in Fog Pockets
3 - Two Rigid Radiance in Fog Pockets for street legal-ish fog lights.
4 - Two Rigid Radiance Scene rear fogs.
5 - Future ARB Compressor
6 - TBD

Future plan will be:
1 - Keep Ditch Lights
2 - Rigid Radiance Scene 40” in ADD Stealth Fighter Winch Bumper
3 - Rigid 10” Amber for fogs in ADD Bumper
4 - Keep Rear Fogs
5 - When I install the ARB I’ll be able to just quickly connect one of the pass they wires since I’ll put it under the rear seat with Bajamod mount and connect the relay to that pass thru wire.
6 - When I’m done with practical stuff I’ll probably tinker around with a completely ridiculous, but awesome mod, that is probably mildly illegal. Maybe involving fireworks for this button. It’s currently labeled as Ejector Seat.

E673EE63-4561-4647-9D7D-38592579212C.jpeg

C091E8DC-D470-4B05-84A3-04583EF55FE9.jpeg
 
OP
OP
MAMiller44

MAMiller44

Full Access Member
Joined
Apr 15, 2020
Posts
458
Reaction score
628
Location
Tampa, FL
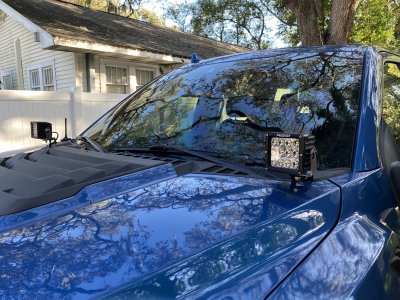
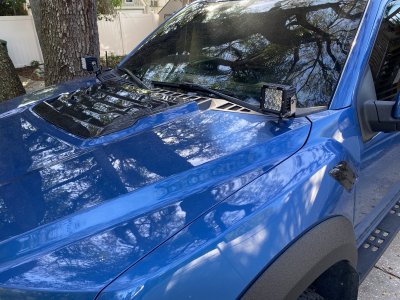
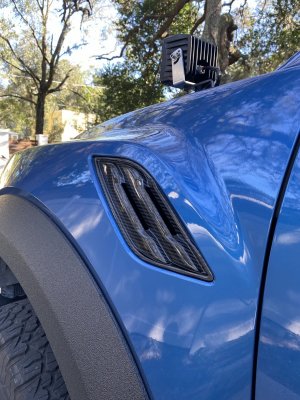
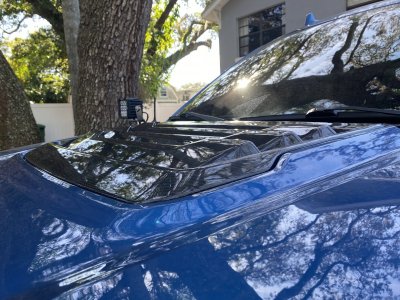
Switched to Alternative Offroad A pillar light mounts (took off SDHQ). Thanks you @4x4TruckLEDs.com for turning me on to these.

Guys, if you are in the market, I would not entertain other brands. These are the easiest to install, one of the least expensive, branding free, lowest profile, and in my opinion the best located as the lights are sightly farther forward and closer in than all other options that mount in the corners of the fenders. Just make sure you watch 4x4’s video explaining to only loosen one bolt at a time and swing the mounts in so your hood stays aligned.

Personally, I didn’t like SDHQ because the white on black branding was too in your face. They are also so tight that they push up against your fenders and you have to put a little pad of something in between, it just looks cheap to me. All photos from SDHQ show a piece of cardboard on there. Lastly, install is a bitch. Arguably the most annoying install I’ve done on my Raptor. I would rather have just removed them knowing I never had to deal with it again than potentially have to adjust or tighten in the future.

CEF54D6F-5DBC-4F1A-8E5B-A1E4BE66C2E6.jpeg
 
Last edited:
Top