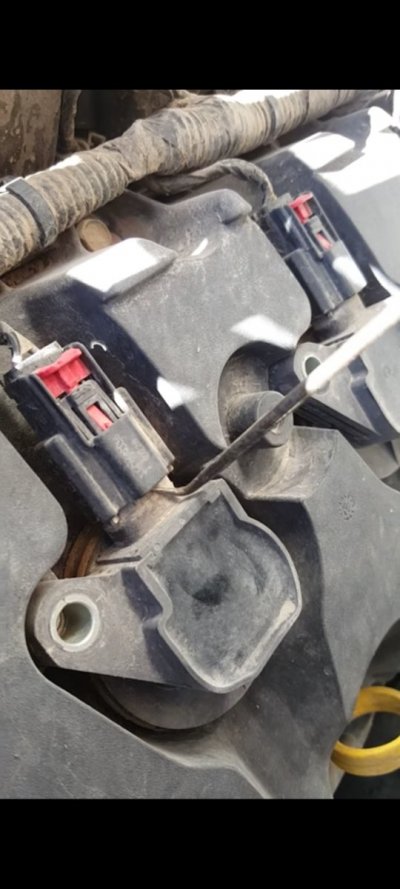
Same thing with my bolts but it was the number 6 cylinder. Glad you were successful!Well the good news is, I got all 8 coils disconnected and unbolted, just the 2nd bolt from the drivers front was rusted in place a bit, so will be putting a little dab of never seize on these before I put them back on. Now I can finish detailing the engine and get started on changing the plugs.
View attachment 323104


Ignition coil replacement problem
- Thread starter CoronaRaptor
- Start date
Disclaimer: Links on this page pointing to Amazon, eBay and other sites may include affiliate code. If you click them and make a purchase, we may earn a small commission.


Similar threads
Members online
- Hambone
- msharpe08
- ten_blade
- Wristdoc
- eljefe_tx
- WhiskeyTangoGTFO
- Haydel53
- brettmess24
- ScottS23
- 3Dog
- wrangler98
- CenCstRptr
- BBLV
- billy8
- khildebr
- Rednose
- Booth9999
- Lucas_Arg
- shigman
- 1BAD454SSv2
- daytona1783
- RaptorFun
- Osmar
- peeweeman250
- fordrat
- DinoNuggets
- jekyll537
- RiskTkr
- Littlefx4
- Powerlies
- Braaaaptor
- tjs_22807
- Winchester30
- Blakelabate
- simplerex
- Hard R
- Justbob
- MattC1996
- relic217
- Arizona Free
- Edski
- juniorg929
- Keith88
- debauch
- Jepper84
- chopn8r
- ReddingRaptor
- JayB
- TK-421
- RedMBaron