Wichadicha
Full Access Member
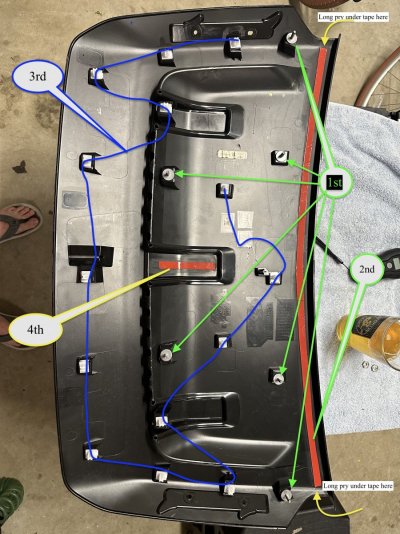
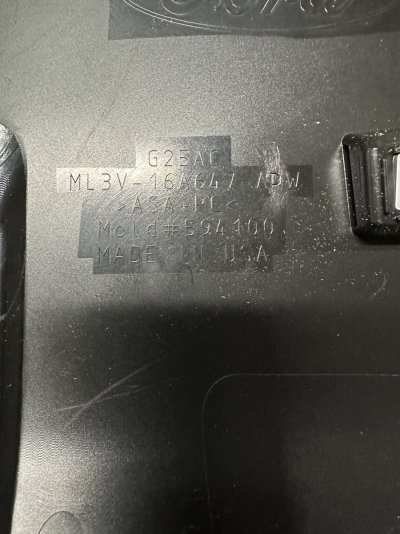
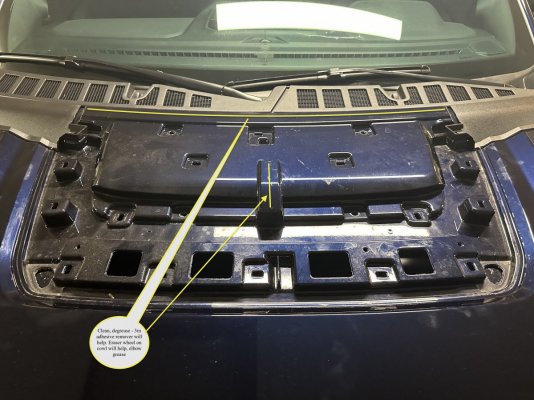
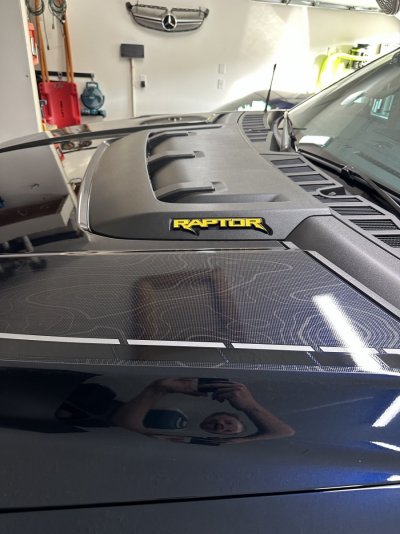
Not the best at write ups but want to add some value for those that like to DIY. I searched (decent effort) to find a how to on removing the ********* hood vent but came up with nothing helpful . Note: I had a previous post asking for tip on removal and got one reply stating there are two nuts that you have to remove. Turns out that reply was not only NOT helpful but actually made it take longer. (additionally, that thread did not show up in my search which is why I'm starting this new one) My goal was to get the Raptor Logos off and fill them with liquid enamel paint (stickers did not work well for me). The raptor logos needed to be flat while the paint cured. Anyway, I'm attaching photos of the hood vent removed so everyone can see the clips, fasteners and location of where the double sided tape is attached. This thing, for me, was quite difficult to remove and I'm an avid DIY'er! Had I had these photos, it would have been much easier. Couple notes: 1) where you see the red 3m tape, is where you will have lots of fun removing the old tape residue from both the cowl and the fiberglass hood. Lot's of tips and tricks on the internet on help with this part. 2) First things is to remove the heat shield under the hood, remove the 4 rubber grommet covers under the hood closest to the wipers, and then carefully remove all 6 nuts. You will want a nice trim removal tool to get the plastics heat shield fasteners off without gouging the part. 3) You will want a long, plastic tool of some sort where you can slide under the double sided tape and slowly pry it up off the hood along the wiper edge, Note: come at it from both sides. The center small piece of double sided tape will be one of the last things to let go. 4) work your way around the hood popping all the white clips. See photos, and then with pry tool try and get to the center of the cowl and pop the tape. NOTE: my entire hood has PPF on it so I had that layer of protection as I went around popping clips. Don't pay attention to what looks like scratches etc., there are none, every blemish you see around that area is just residue that all wiped right off. Hope this help and reinstall took like 10 min! Attached a few close ups for anyone that may want/need part number