Mjolnir
FRF Addict
Okay latest Mod. this was was cheap and simple. My old Gen 1 had a cool outlaw offroad under hood LED, but with the Gen 2 redesign it really wouldn't work, so I did a bit of looking to figure out a clean solution for Gen 2's and my Starbucks Raptor. KC Hilites sells an $80 set of circular underhood lights, and with a few hardware changes and some extra loom (about $6) I managed to mount the whole thing up in about 90 minutes for $100, if you count the six pack that went with it. Here are the photos and description:
View media item 15741
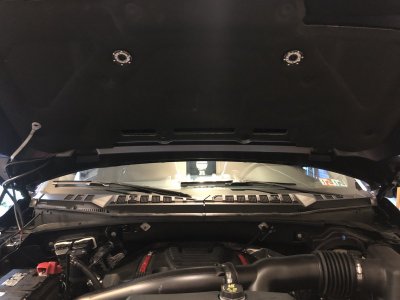
So, first thing is that they provide self tapping screws. Self tapping & fiberglass=BAD. I moved the lights so they just cleared the heat shield on this nice angled in bit of the hood, which is also conveniently close to a vent hole. I drilled a 1/8" hole and then got my own stainless bolt and threaded it into the hole. I used long needle nose pliers to place a lock washer and then thread the bolt on. This was the by far the biggest PITA part of the mod. Don't drop the bolt, it has nowhere to fall out, so you'll be fishing it forever. I got lucky and got them both on first time.
View media item 15733
view of driver side mount. Make sure to measure radius of light and then use that to mark your hole with heat shield in place so you clear it when final install is done. Also, go SLOW with the drill as you don't want to add extra vent holes on top of your hood.
View media item 15739
Light installs very nicely, comes with the top washer, I used about 1" long bolts with lock washer and nut on other side.
View media item 15738
Here is a view of the bolt and washer through the vent hole. it is a bit rough, but not like trying to change back two plugs on Gen 1 bad...
View media item 15737
Amazingly the positive wires were just about perfect in length. I did double it back for the passenger side one by about 5 inches or so in the looming I did. For the ground I did cut all the wires and resolder. There really isn't anything to hook the wires to, so I ran them through the vent holes on the scoop.
View media item 15734
You can see the splice I did for the ground wires.
View media item 15736
wiring almost finished.
View media item 15730
Very conveniently, Ford provided this very nice ground point on the actual hood that you can tie into. saves running extra wires.
View media item 15731
All the wires tuck pretty neatly under the heat shield. I loomed everything, and then replaced the heat shield.
View media item 15735
The on/off switch I mounted to an existing ground point just in front of the washer reservoir. It turned out super nice.
View media item 15732
You have to leave some slack for the hood to open/close, I angled the connections on the looming so that it accordions inward and won't snag on hood mounts.
View media item 15740
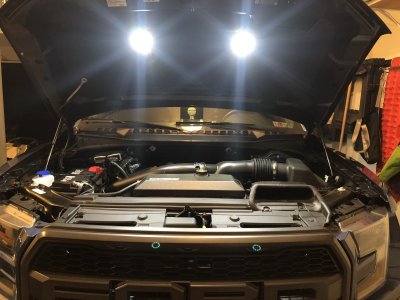
Lights are very bright for how small they are.
View media item 15729
Finished product. You can see the hood switch in lower left part of photo by blue wash cap.


