2013 raptor:
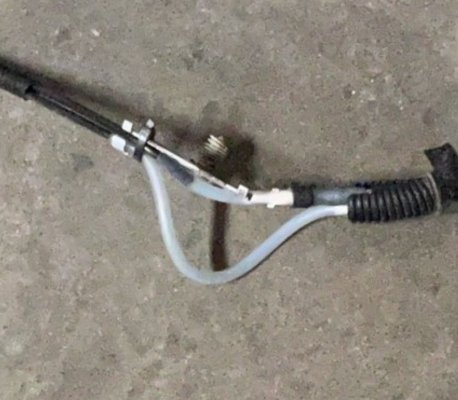
A few nights ago, when we were working on the spark plugs, apparently we snapped the stock IWE vacuum line on the passengers side as we were working through the wheel well. I didn't know a whole lot about how the IWE system worked, so I did some research and learned myself some things. For those who don't know, basically, when vacuum is supplied by the engine running, while in 2wd, it is routed down to the IWE (integrated wheel end) via a solenoid up by the drivers firewall next to the booster. This vacuum supply disconnects the IWE actuator and allows the wheels to spin freely of the axles. So, if you are driving around in 2wd, the front axle shafts are not spinning. Once you engage 4wd or shut off the truck, the IWE solenoid releases the vacuum, locking the IWE actuators to the hubs and now the axle shafts are connected to the wheels.
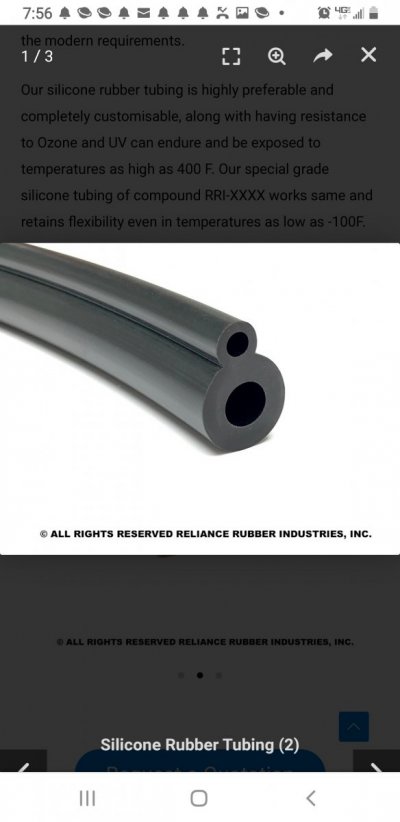
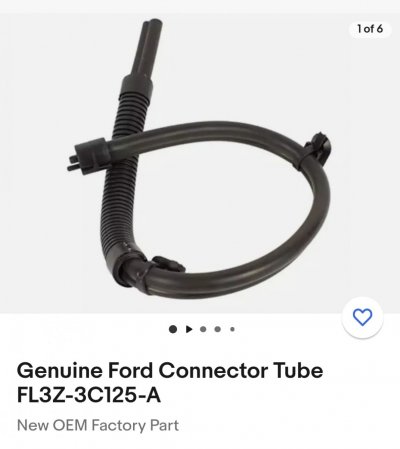
Moving on... I patched up the line with some supplies I had in the shop, and went online to look up a stock replacement. I also looked up aftermarket solutions and found the Forged Offroad silicone harness. It addressed my fear of the same brittle issues that occured on the factory line. Although a little pricey, I liked the overall idea. So... I ordered it and it came in today, so I went out into the garage after dinner and installed it. I wanted to make a post of my initial opinions of the product, the install, how I did it, what I learned, etc...
I laid out the harness and took note of what side was the passenger and driver, etc... The silicone is "sticky", so be prepared for it to collect all of the dust from your working surface under the truck, as well as from the truck itself. This is a plus, however, as the dust makes the silicone less sticky, and allows you to route it easier! I would just take care to keep the connection ends clean and clear of any debri that may have been picked up to keep the vacuum lines clean.
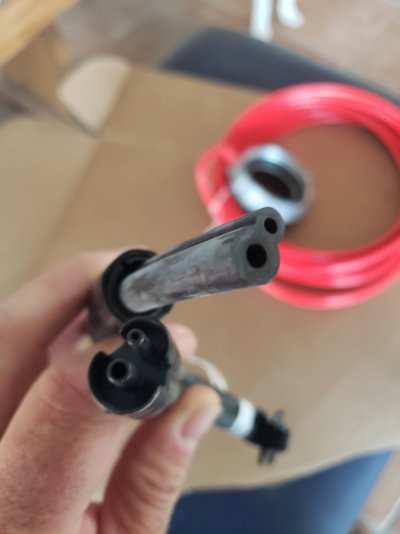
You will also notice that the supplied connection ends are smaller than the factory ends that go to the IWE actuators. This is okay, as the silicone is pliable and they will stretch right over with some gentle force and some back and forth wiggling. I was going to use some alcohol based window cleaner to spray on as a lube, as it would dry up, but it wasn't necessary.
I decided to start on the passenger side and work my way over to the drivers side. This choice was purely a guess, and I am not 100% sure if it would have been easier to go the opposite route, but this is just the one I chose. As I removed the old line, I installed the new line in its place. I just kept routing the old hose up and replacing it with the new. This allowed me to make sure I was routing it in the exact same path as the stock line.
The plastic "Christmas tree" connections, push rivets, whatever you want to call them, were pretty much spot on with location on the new harness, it truly was plug and play. I may have made a few adjustments at the wheels to ensure free play for steering, but that was just my OCD and not the fault of the harness. And... routing it will cause a little flex and slip at the connections, so slight adjustment is to be expected. The PITA parts for me were really whenever I had to route from under the truck, up the strut towers, or back down from the strut towers, mainly because I had to keep getting up from the floor back under the hood, and then back down onto the floor, and those push rivets snag on EVERYTHING!!! I did do it by myself, so it can be done, but it would be more helpful with a buddy under the hood or on the floor, vice versa. I also did not use any kind of lift, jack stand, ramp, or remove the tires, It wasn't necessary IMO and would have just been more work for me to set up/take down.
Both of the connections for the push rivets, at my steering knuckles, were already snapped off. So, I took a 3/16 drill bit and gently worked it around inside the hole, being careful not to bore the hole out, I just wanted the drill bit to clean out the plastic rivet and eject the material. It worked very well! for any other rivet that broke, i just used a small flat blade screw driver to push it out, or a pair of needle nose pliers. Having a push rivet removal tool here really helps! I think they are called trim removal tools... looks like a wide, flat bladed screw driver, but it's angled for leverage and has a notch in the middle that fits around the base of the push rivet. Other than a work light, and some snips (dikes), thats all the tools that were required!
Once I made it over to the drivers side, I finally got tired of all of the excess old harness getting in the way, and having to continue to thread it throughout the truck, so I finally found a good spot to cut it in two, right on top of the drivers strut tower.
Overall, I liked the aftermarket harness from Forged Offroad. I think it's definitely an overkill repair, as the stock replacement would also do the job, but routing the pliable silicone hose was probably much easier than the stock stiff material, which is probably nylon or something. And, I believe the silicone is going to last a lot longer. I am also the type of person who prefers to beef up, or problem solve, when I replace, as long as it is cost efficient.
If I was going to do it again, I would probably find several good spots to cut the old harness, so I didn't have to route it out and take it with me as I was routing in the new. I would probably have also pulled it up on my rhino ramps, just to give me a little more working room. I also had my skid plates already off as I have been working in that area, and still have some work to do with engine accessories, so I would also add removing that skid plate, to the list of things you are going to want to do. A buddy would help here too, as I stated above.
All in all, it wasn't difficult, took me maybe an hour total, with interruptions...so don't be afraid to tackle it. I liked the upgraded hose, and I would install it again if I had the choice.
Here are some pics of my old harness if you were curious how long it is, or whatever... you can also see my beautiful patch job LOL. Feel free to ask me any questions you may have. Sorry for not taking installed pics, I didn't have my phone on me under the truck, and it's cold out there.
View attachment 387262View attachment 387263