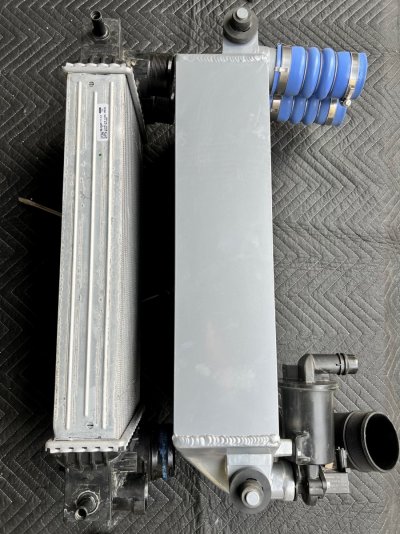
I installed the Titan v2 on my Gen3 today. The information and tips in this thread were extremely helpful, and I'll add a few notes below that might help folks. As others have mentioned, it's a very tight fit. CVFab used every millimeter of available space for cooling volume. The front of it sits right against the shutters, and there's barely room in the back for the fans. I was very impressed with the quality and finish of the Titan -- it's thick, beefy and robust (that's what she said). The OEM, on the other hand, is rinky-****, thin crap.
I started at 10am and finished it up around 3pm, but that included two parts shopping trips (more on this below) and I took my time and took a few breaks (coffee in the morning, some lunch, and a beer or two in the afternoon).
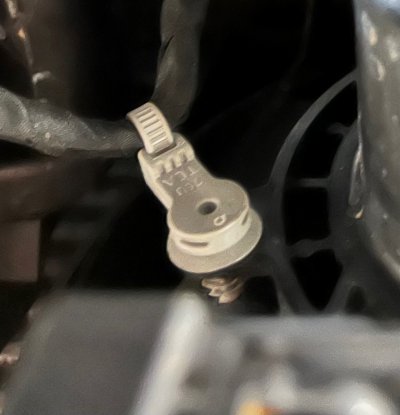
1. The tear-down and removal of the OEM intercooler and fans was very straightforward, again thanks to the info in this thread. The only struggle I had was the two retainer clips on the BOV cable (as mentioned by others), which attach the cable to the top of the BOV. I've attached a pic of the type of retainer. It was impossible for me to remove these retainers in a way that I could re-use them, so I just cut them off, but I concluded they're not needed.
2. Removal of the top side of the shroud -- remove the bottom and sides first (which is easy), then with both hands, stick your fingers all the way over the top/front, and pull/peel back and down, and the top clips will come right off.
3. When moving the hot side hoses and cold side pipe over to the Titan, be careful not to over-tighten the hose clamps. I over-tightened and stripped one of the hot-side hose clamps, so had to go buy a replacement. If, like me, you tend to over-tighten stuff, I recommend using a screwdriver instead of a socket.
4. The posts above recommend putting the fans in place first, but if you do that, you pretty much need to have a helper because there's nothing to hold the fans in place while you raise the intercooler -- you have to hold them up there while raising the Titan into place. Since I was flying solo, I raised the Titan into place first and slid both hot side hoses and cold side pipe on, and as others have noted, once you do that it will sort of dangle/hang in place loosely. Don't tighten anything yet, and the intercooler will be loose and movable enough that you can maneuver the fans into place.
5. If you place your jack toward the front of the Titan, you can leave it there while you start the bolts on the bottom bracket. This keeps you from having to bench press and manhandle the Titan and fans while you re-install the bracket. At one point, I cracked my cheap Harbor Freight creeper while struggling and pushing everything in place.
6. Like others, I had a quarter inch or so of vertical play in the fans. I went to the hardware store to get a couple of washers for each side to eliminate this. You'll need washers with 1-1/4" (one and a quarter inch) inside diameter.
GooseTune Stage 2 is next.


")