Husky Wheel Liners 95 Bucks on Amazon

Disclaimer: Links on this page pointing to Amazon, eBay and other sites may include affiliate code. If you click them and make a purchase, we may earn a small commission.

jimmyjamm

Full Access Member
Joined
Dec 12, 2019
Posts
253
Reaction score
231
Location
Bend, OR
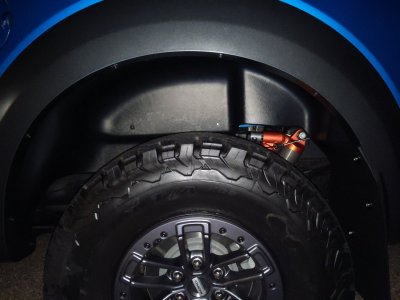
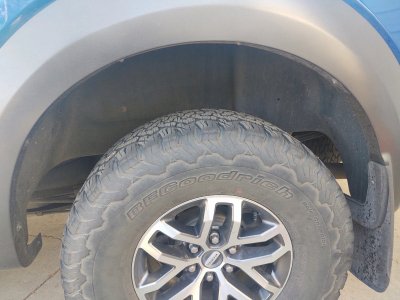
Install was straight forward, just gotta flex them into place. Here are pics of mine installed, i like that they cover most of the upper shock body, but also the metal wheel wheel and inside of bed-as i drive a lot of desert and gravel roads. I was able to catch just a glimpse of the shock on the passenger side pic.

IMG_20200821_095458023.jpg

IMG_20200821_095514652.jpg
 

two24studios

Full Access Member
Joined
Oct 7, 2019
Posts
73
Reaction score
39
Location
Denver, CO
Something that worked well for me when installing these was to leave them out in the hot sun for an hour or so prior to install. Made them a lot more flexible and easier to bend into place. Definitely undo the fender flare bolts before you get started. They can be a bit of a pain, but if you take your time it's not too bad.
 

RaptorRnr

Active Member
Joined
May 27, 2020
Posts
99
Reaction score
119
Location
Northern California
Ditto on the hot sun. I did the first one without leaving it in the sun but it was a warm day. The second one was much easier after leaving it in the sun. Mine didn’t come with the parts bag. I reached out to Husky and they quickly rushed them to me. Note that on my 2020 the holes didn’t line up. I had to go to the hardware store to get a second set of the clips the screws thread in to. I still need to install the second screws.

I installed the Ford factory set on my previous F-150 (Ford doesn’t offer these for the Raptor). I found that on a rocky road, it significantly reduces the noise from rocks flipped up from the tires in the bare-metal wheel wells. I recommend ‘em.
 

BroncoAZ

Full Access Member
Joined
Sep 27, 2019
Posts
964
Reaction score
734
Location
Cape Cod, MA
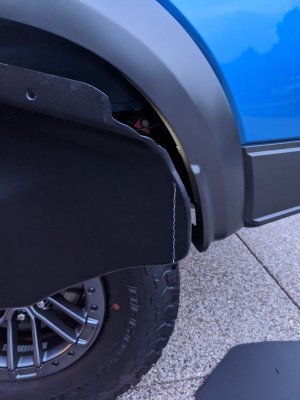
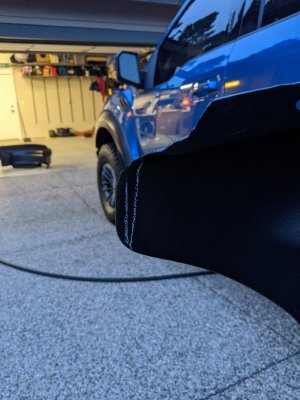
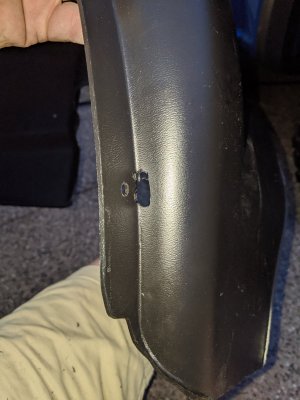
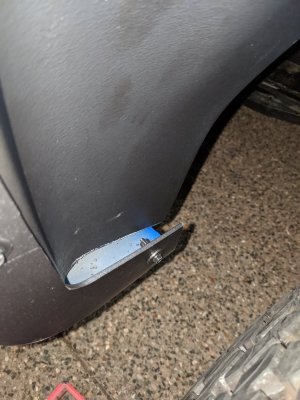
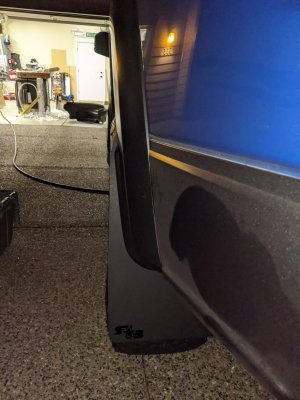
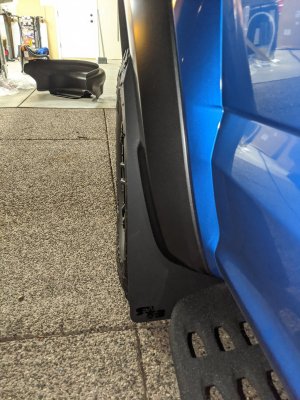
Ok, I installed one side this evening and I was installing the Rokblokz mud flaps at the same time. It was cold and the plastic was not very pliable. First off, I had to trim the lower edges as shown in the pictures, actually the rear one needed another 1/4" from the first picture. The pieces were too long no matter how I tried to fit them. I was focused on lining up the rear hole first. I had to clearance near the rear hole to clear the metal nut for the middle hole of the mud flaps (third picture). I also had to open up the front edge hole some to get it to line up right. I only use the front hole with the slot nut on the inside, I don’t want to drill for the second hole. Others have said they had to redrill this hole, I just pushed the inner part of the guard around until I could put the screw in. The last pic shows the front fit with my cut, there is a 3/16" gap there.

For fitting the top between the fender and flare, on the second one I won't be fully removing the screws to keep from pushing the speed nuts back. If I ever take these off (for air bumpstops) I will notch the liner around each of the fender flares screws so the lip could slide in farther. I did do some cutting on that outer edge prior to install to level it out, there were some sections that were significantly longer on that outer edge.

IMG_20200822_191116.jpg IMG_20200822_191122.jpg IMG_20200822_192151.jpg
15981522391067939239911203249650.jpg
IMG_20200822_201140.jpg
 
Last edited:

BroncoAZ

Full Access Member
Joined
Sep 27, 2019
Posts
964
Reaction score
734
Location
Cape Cod, MA
I did the second liner today with the same end cuts as pictured above and finally figured out exactly what they need. The outer edge that goes between the fender and the fender flare is left uneven and too long. I used a belt sander and shaved it down to 1-1/8” except for the ends where it needs to taper near the screw holes. When I have time I will remove them and sand that edge down to 1 inch. On the other side I cleaned it up some, but didn’t realize that dimension is somewhat critical for a good fit, so the liners aren’t as flush with the outside of the inner fender area as the second attempt. Once they are trimmed the install isn’t bad. Another tip on the install, don’t fully remove the factory flare screws across the top, that will keep their speed nuts from being pushed out of place when forcing the plastic in there. I used a plastic wedge to pull out the flare and get the lip slid in. I skipped the second screw on the inside that requires drilling, they are plenty solid without it.

Also, these will be very easy to trim for bump stops when the time comes. The pocket in the back is almost a perfect template. One could probably bolt a piece of metal or even a carpenters square to the two holes as a cutting guide.
 
Last edited:
Top