I took out the B&O and built a moderate system
NavTV ZEN a2b
Audiocontrol D-6.1200
Audio frog GS690 front doors
Audio frog GB10 tweeters
Some pioneer components rear doors
(already installed)
Pioneer GMDX971 running at 1ohm
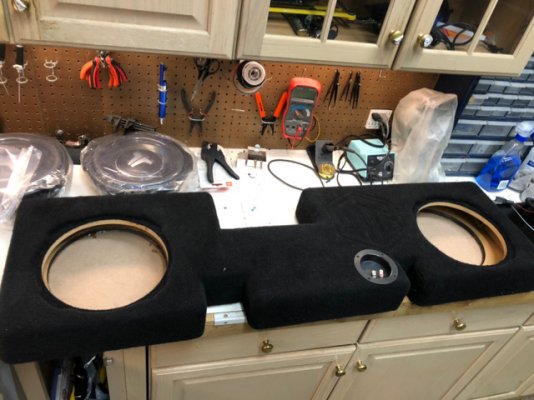
MTI Acoustics behind seat 2x10
JL audio 10TW3-D4 (x2 wired to 1ohm)
1/0 AWG power run down passenger side
16g tweeter wire run down drivers side
Butyl rubber on all doors, rear floor, rear cab
Closed cell foam over the Butyl and sealed doors with 1/4in ABS
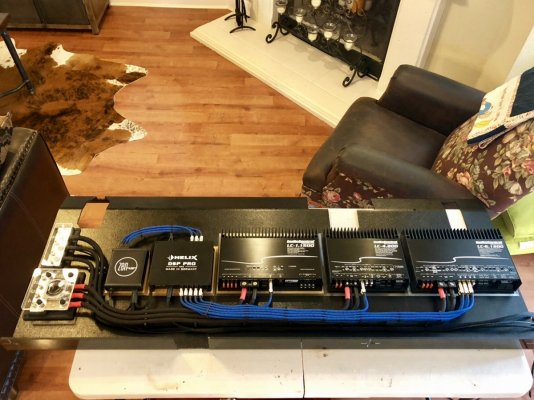
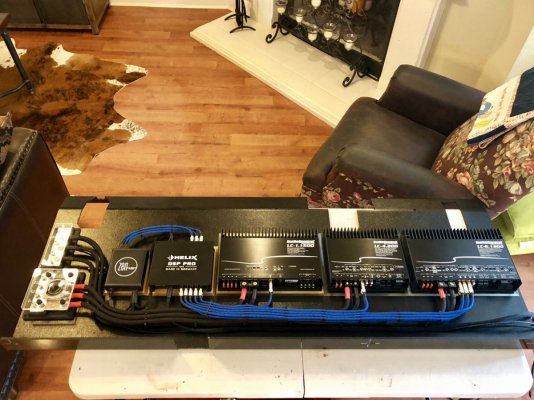
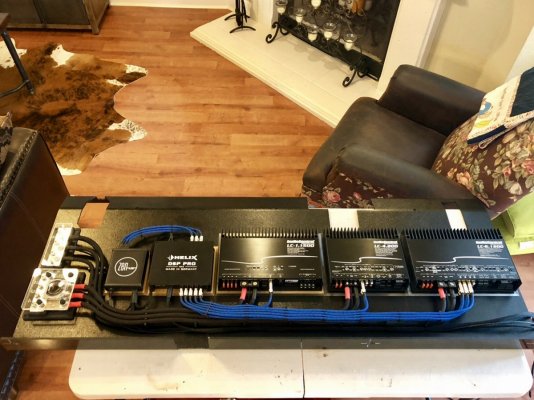
Custom under seat amp rack
Wow it sounds great without any tuning! I'm going to install a Pheonix Audio android head unit and then start tuning it. I HIGHLY reccomend taking the time to dampen and seal the doors. I have some rattles to chase in the center console at some point. Super happy!
Rear floor
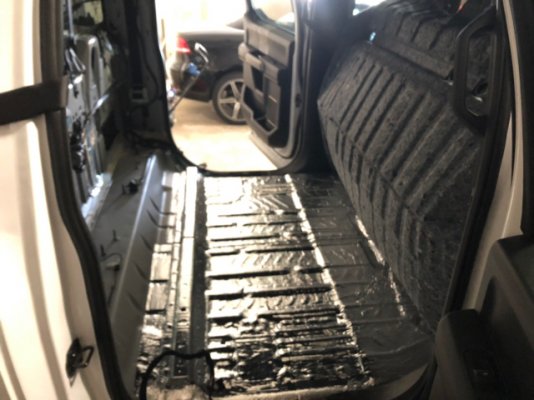
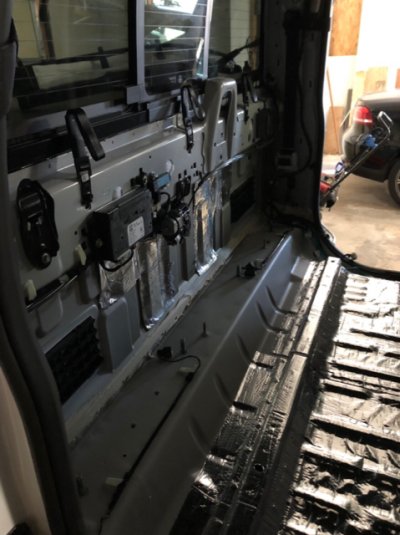
Rear cab
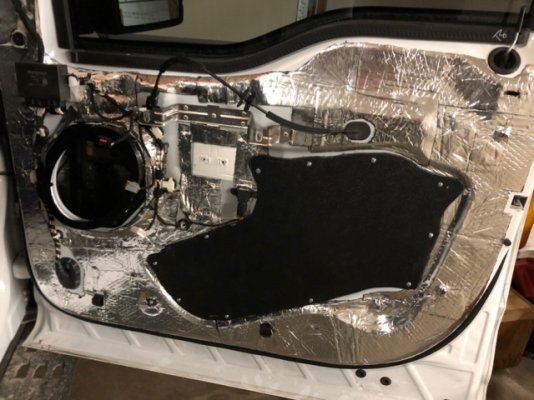
Door with 1/4in ABS cover. I used M4 rivnuts then covered with foam and screwed it down
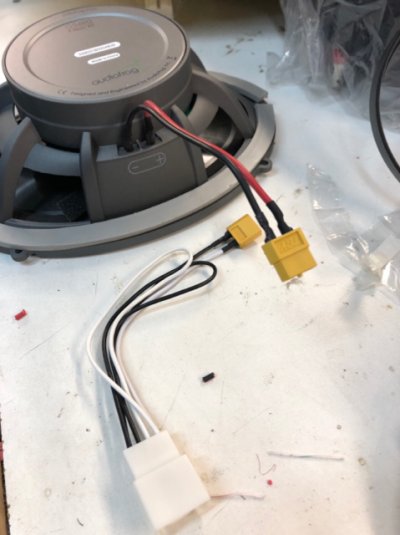
Changed speakers and tweeters to XT60 connectors
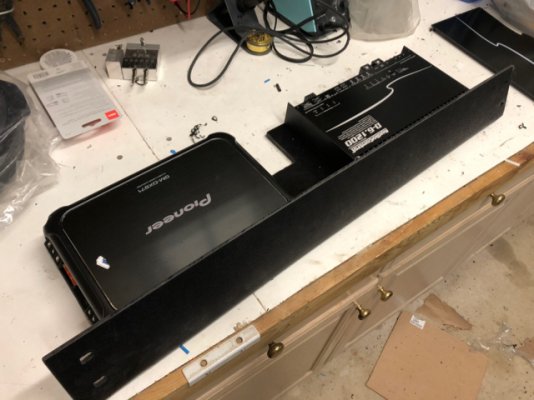
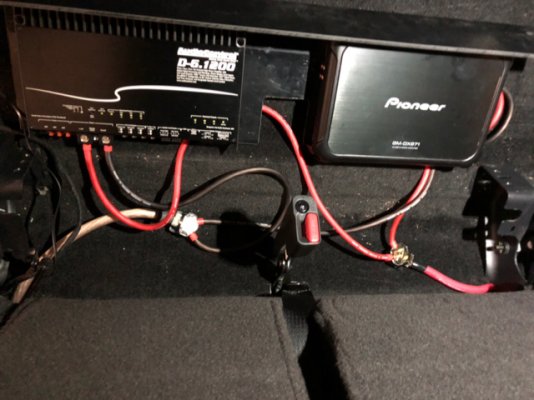
Amp rack is just bent ABS and bolts to the piece under the passenger seat and sits in that little storage area. Be careful with your amp height as my pioneer is a tight fit!
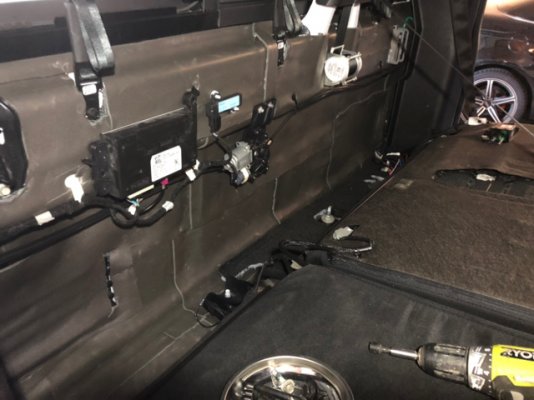
I sealed up most of the cab vents and will see how it goes. Noticeable reduction in road noise
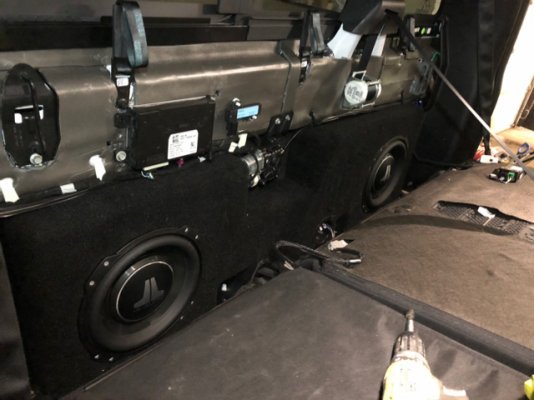
The MTI behind seat amp. Stuffed about 1lb of poly fill and wired it for 1ohm. Very good quality and fit was easy
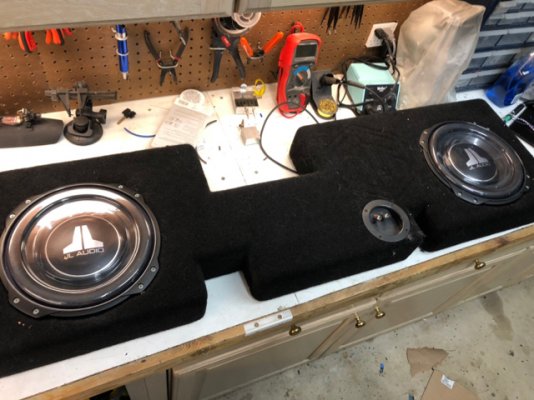
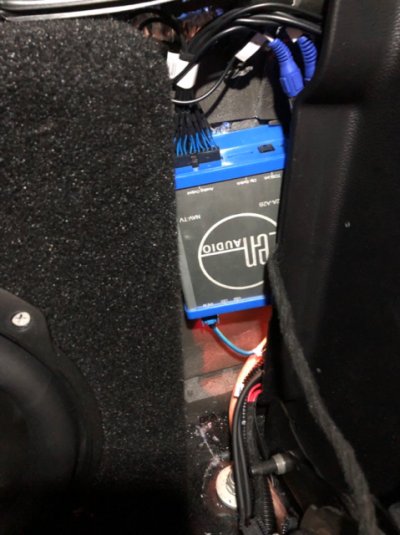
I soldered speaker wires to the Zen A2B connector which worked out well
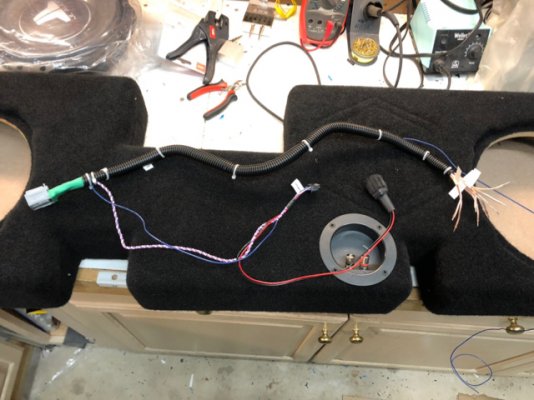
1/0 AWG power and ground into 4g distribution blocks. It all hides under the rack
Subs installed
I removed the mounting bracket for this and simply used the large bolts the previously went through the bracket to bolt directly through the box. Super easy
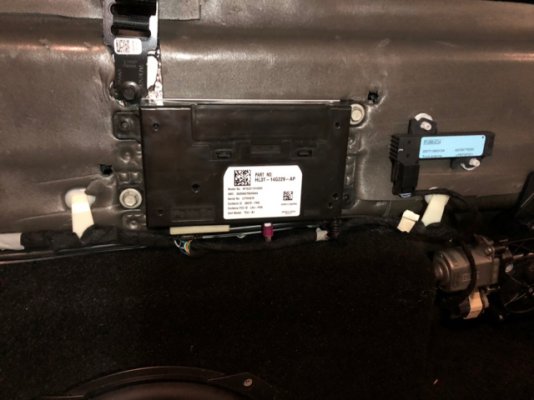
I don't love the location of the ZEN but you are limited by the blue USB connector so I just tucked it back here behind passenger side.
An organized rats nest. It all tucks nicely under the rack and allows you to pull the whole thing out onto the floor and keep the connections intact
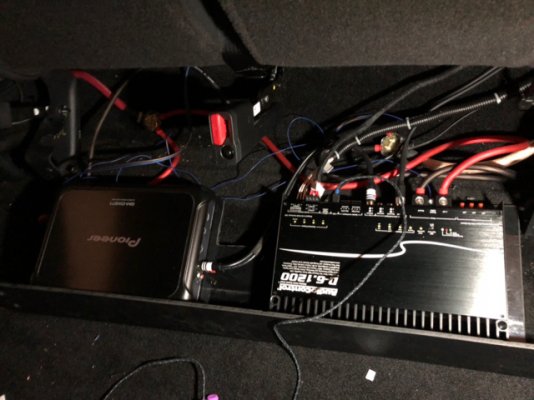
All tucked away
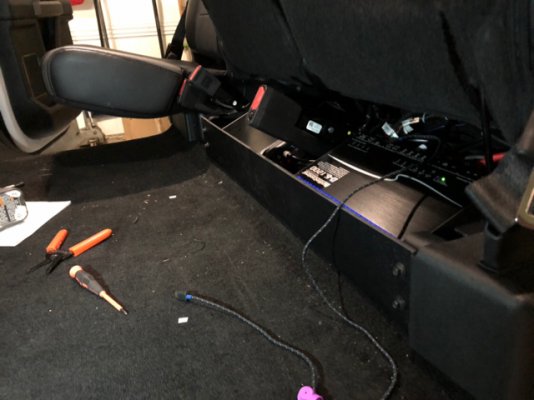
AC3 control for on the fly level adjustments and profile selection
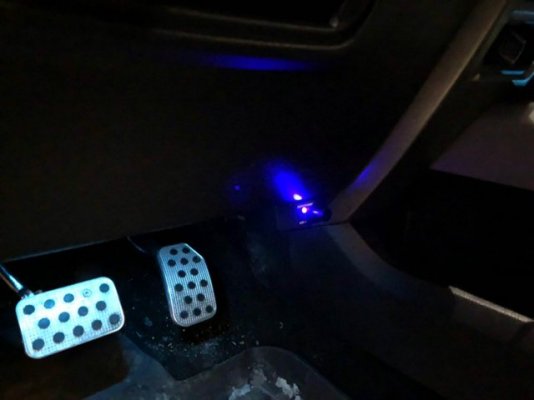
NavTV ZEN a2b
Audiocontrol D-6.1200
Audio frog GS690 front doors
Audio frog GB10 tweeters
Some pioneer components rear doors
(already installed)
Pioneer GMDX971 running at 1ohm
MTI Acoustics behind seat 2x10
JL audio 10TW3-D4 (x2 wired to 1ohm)
1/0 AWG power run down passenger side
16g tweeter wire run down drivers side
Butyl rubber on all doors, rear floor, rear cab
Closed cell foam over the Butyl and sealed doors with 1/4in ABS
Custom under seat amp rack
Wow it sounds great without any tuning! I'm going to install a Pheonix Audio android head unit and then start tuning it. I HIGHLY reccomend taking the time to dampen and seal the doors. I have some rattles to chase in the center console at some point. Super happy!
Rear floor

Rear cab

Door with 1/4in ABS cover. I used M4 rivnuts then covered with foam and screwed it down

Changed speakers and tweeters to XT60 connectors

Amp rack is just bent ABS and bolts to the piece under the passenger seat and sits in that little storage area. Be careful with your amp height as my pioneer is a tight fit!

I sealed up most of the cab vents and will see how it goes. Noticeable reduction in road noise

The MTI behind seat amp. Stuffed about 1lb of poly fill and wired it for 1ohm. Very good quality and fit was easy


I soldered speaker wires to the Zen A2B connector which worked out well

1/0 AWG power and ground into 4g distribution blocks. It all hides under the rack

Subs installed

I removed the mounting bracket for this and simply used the large bolts the previously went through the bracket to bolt directly through the box. Super easy

I don't love the location of the ZEN but you are limited by the blue USB connector so I just tucked it back here behind passenger side.

An organized rats nest. It all tucks nicely under the rack and allows you to pull the whole thing out onto the floor and keep the connections intact

All tucked away

AC3 control for on the fly level adjustments and profile selection


