Jefftopgun
Member
- Joined
- Feb 8, 2018
- Posts
- 6
- Reaction score
- 4
Ok I'm sorry I'm having issues, I've read all 28 pages so here goes.
Picked up a used set to rebuild, ordered all my parts, have tanked nitrogen and regulator I can being home from work. Threw the used rears on just to test em out. I installed them by hand which should have been my first indication, but didn't have my needles or anything yet, so I wanted to see how bad they were. Wellllll.....
They've got some bounce to them, rear end doesn't just pop back to center, its like it hunts ever so slightly.
Alright lets pull em off and adjust the precharge. I noticed if I put shaft on ground and lean onto the body, it compresses through about half of its travel pretty easily. Then I feel like I'm getting into the precharge and it has some pretty stout resistance. But if I push it all the way in, it gets a little stiffer and then stays in. They're is minimal pressure to push shaft back out, I kind of have to help slide it back out. And it only goes half way or so. I can pull it the rest of the way with some force, but there's almost a bubbling gurgling sound coming from the shock.
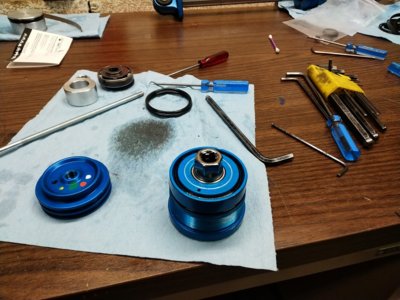
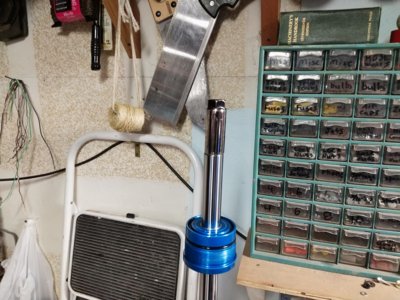
My take on this is im low on oil? Shocks turned out to have schraders on them so someone's been inside them. Again assuming they botched the rebuild. Building my spanner and t handles tomorrow so we'll see.
So aside from that.
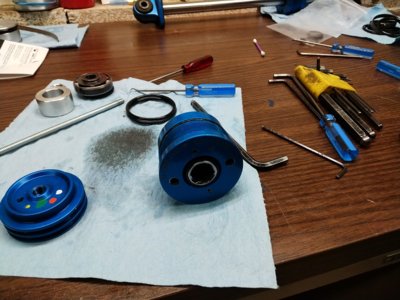
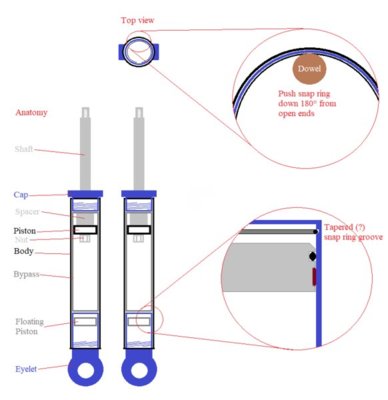
Trying to make sure I've got the floating piston setup right.
So you have shock mounted in vice, everything removed 2 holes facing up. Fill the piggyback up (which will fill about half of shock tube up). Install floating piston (this to ensure no air gets in under the piston). Push this piston all the way down (which will nearly fill main body). Retract 1/4 inch or so from bottomed out (this being 1/4 inch from bottomed out on the crossover housing linking piggyback resivoir to shock body). Pour in the remainder of your shock oil. Should be nearly full on the shock body side. Install shaft and cap. Ensure bleed screws are open, add nitrogen, and close when any air is removed.
Making sure I have this so at full droop/extension, there should be between 1/4 and 1/8 inch of travel the floating piston has before bottoming out. At full compression the fluid is forced into the resivoir/piggyback section, which compresses the floating piston against the precharge, which is why it pops back out so quickly, and why its a bugger to install.
Picked up a used set to rebuild, ordered all my parts, have tanked nitrogen and regulator I can being home from work. Threw the used rears on just to test em out. I installed them by hand which should have been my first indication, but didn't have my needles or anything yet, so I wanted to see how bad they were. Wellllll.....
They've got some bounce to them, rear end doesn't just pop back to center, its like it hunts ever so slightly.
Alright lets pull em off and adjust the precharge. I noticed if I put shaft on ground and lean onto the body, it compresses through about half of its travel pretty easily. Then I feel like I'm getting into the precharge and it has some pretty stout resistance. But if I push it all the way in, it gets a little stiffer and then stays in. They're is minimal pressure to push shaft back out, I kind of have to help slide it back out. And it only goes half way or so. I can pull it the rest of the way with some force, but there's almost a bubbling gurgling sound coming from the shock.
My take on this is im low on oil? Shocks turned out to have schraders on them so someone's been inside them. Again assuming they botched the rebuild. Building my spanner and t handles tomorrow so we'll see.
So aside from that.
Trying to make sure I've got the floating piston setup right.
So you have shock mounted in vice, everything removed 2 holes facing up. Fill the piggyback up (which will fill about half of shock tube up). Install floating piston (this to ensure no air gets in under the piston). Push this piston all the way down (which will nearly fill main body). Retract 1/4 inch or so from bottomed out (this being 1/4 inch from bottomed out on the crossover housing linking piggyback resivoir to shock body). Pour in the remainder of your shock oil. Should be nearly full on the shock body side. Install shaft and cap. Ensure bleed screws are open, add nitrogen, and close when any air is removed.
Making sure I have this so at full droop/extension, there should be between 1/4 and 1/8 inch of travel the floating piston has before bottoming out. At full compression the fluid is forced into the resivoir/piggyback section, which compresses the floating piston against the precharge, which is why it pops back out so quickly, and why its a bugger to install.