ExpeditionFatherhood
Full Access Member
Decided to take on my first ever shock rebuild so I decided to do an additional DIY First Timers edition! I am using m3dragons DIY rebuild page as my guide, it is pretty well detailed and doesn’t leave much to question, however never rebuilding a shock before, you question yourself at every step… OEM shocks are at 100,000 miles now, top perch. Will be set to mid-perch with rebuild and remove fox stickers.. to be replaced possibly.
Parts and Tools I had to buy
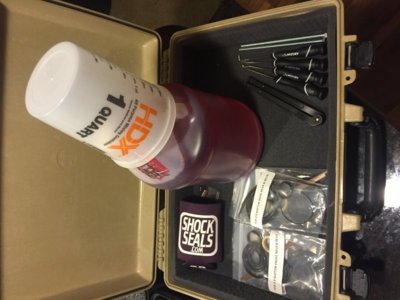
-1 Gallon of fox JM 92 shock fluid: $74 shipped- SDHQoffroad.com
-Front/Rear shock seals: $80 shipped- Shockseals.com
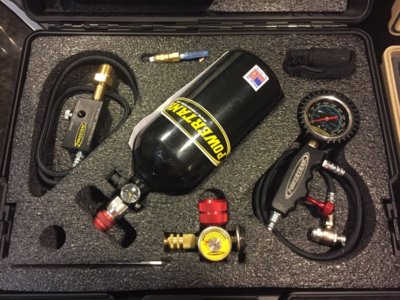
-Powertank nitrogen shock kit- $500 (bought on FRF for $220 with fill needle)
-Shock inflator tool
-Regulator
-N2 Bottle with sling
-N2 power filler(to refill tank)
-Pin spanner wrench: $24 Suncoasttools.com (got the 3/16x1/4pin length)
-Towels, measuring cup, cleaners, misc.- $30 home depot
-1/4-20 bolt (6” length)- $2 Home depot
-3/8-24 bolt: $1 – Home depot
-DIYautorepair in Denver, CO - 442 piece hand tool set, spring compressor, lift, workbench/vice, air tools, fluid disposal: $30hr (If you need a tech to help or assist you- $50hr)
Additional Tools Needed (taken from m3dragon DIY page)
- 17 MM socket
- 19 MM Socket
- Spring Compressor (recommend wall mount but if not available harbor fright works, just be EXTREMELY cautious.)
- Clean work surface
- Vice
- Measuring Container
- Lots of clean towels
- Wooden dowel about 16 inches long
- Small Allen key
- Medium Allen key
Custom Tools – I bought 6” length bolts.
- 1/4 by 20 thread bolt with extension and T about 9 inches long
- 1/4 by 20 thread bolt with extension and T about 4 inches long
DIY instructions (credit to ROC)
Front shock PDF- http://raddrives.com/builds/Raptor/shocks/FRONT SHOCKS.pdf
Rear shock PDF- http://raddrives.com/builds/Raptor/shocks/REAR SHOCKS.pdf
The rebuild will be done on 11/7/2015 and will post problems I ran into along with any helpful advice I can provide as someone doing it for your first time.. (jokes will be made). Any advice you want to give prior to me starting the project would be great as well! Semper Fi.
---------- Post added at 02:43 PM ---------- Previous post was at 02:41 PM ----------
Reserved for front shock details
---------- Post added at 02:44 PM ---------- Previous post was at 02:43 PM ----------
Reserved for rear shocks
Attachments
Last edited:


