RaptorScrew
FRF Addict
Well - After much deliberation about "Do I need more light or don't I" - I fell into the crevasse of thinking I needed more light!!! Why? Don't ask me - it's like a ******* addiction or something...
Anyway, I told @sal313 that I would purchase his setup and do a write-up on it so here goes:
I originally purchased Rigid's setup for the Fog Light area with two lights per side and their mount. I sold it quickly as I noticed the brackets that Rigid supplied didn't line up properly and stuck out farther on one side then the other. My OCD was not having any of that! - I sold the setup!
"Disclaimer: I have 11 Rigid lights on my rig and swear by them! I love Rigid - just hated the bracket they provided."
After much deliberation (and prodding) I purchased this setup from @sal313. I was told that these would line up better and be less of a problem on the install portion of the setup... That's to be determined...
1. Purchase - After purchase these items arrived in two different shipments due to warehouse locations. I'm good with that.
As you can see, they arrived in three packages and were packaged as expected direct from the factory.
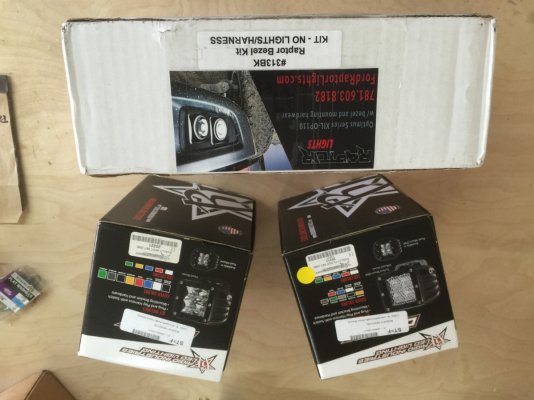
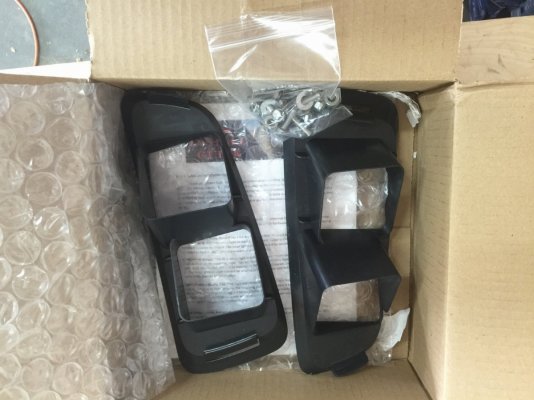
2. I then opened them up for inspection; All was good. I pulled them out to verify content.
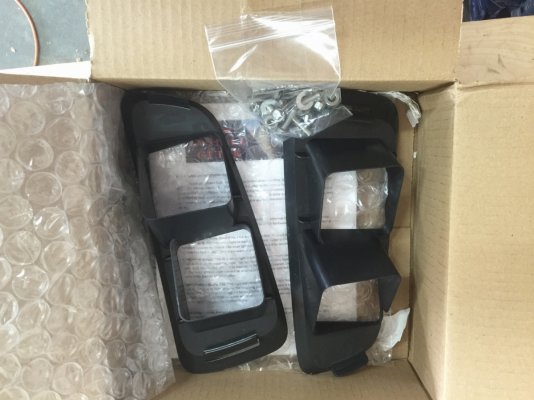
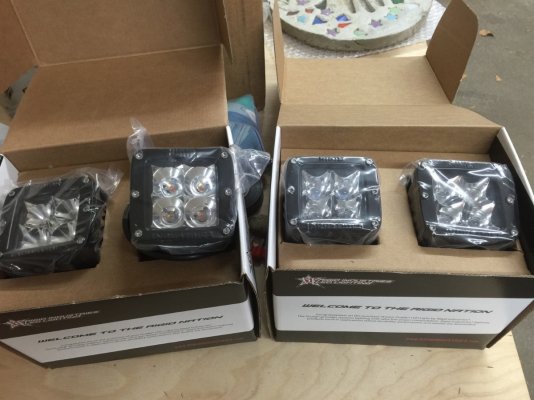
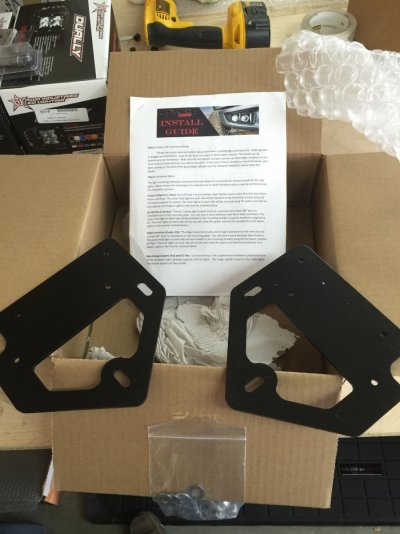
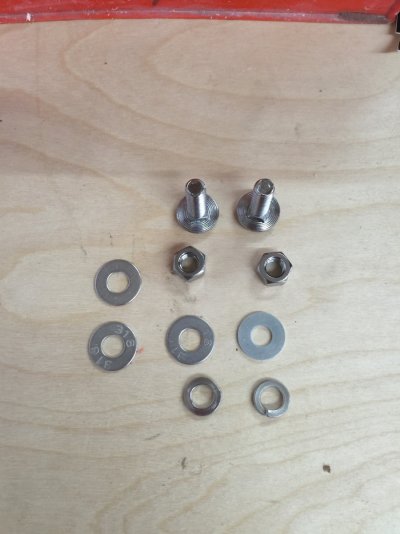
3. I pulled out the brackets and oriented them to how they would be placed on the truck.
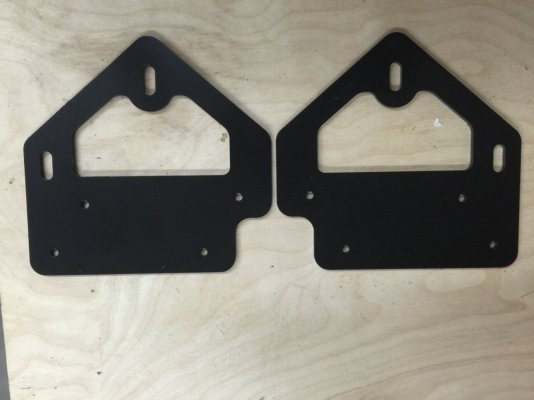
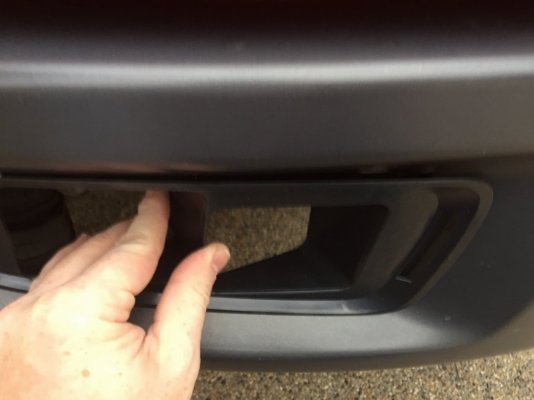
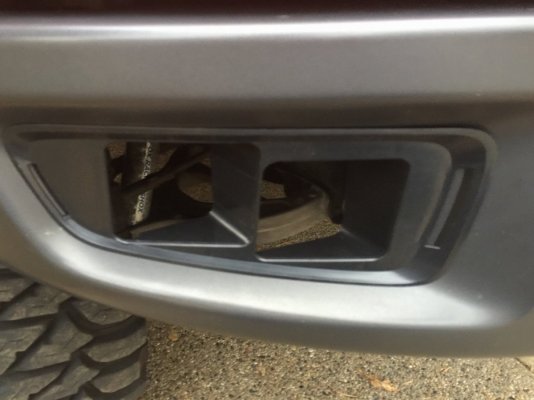
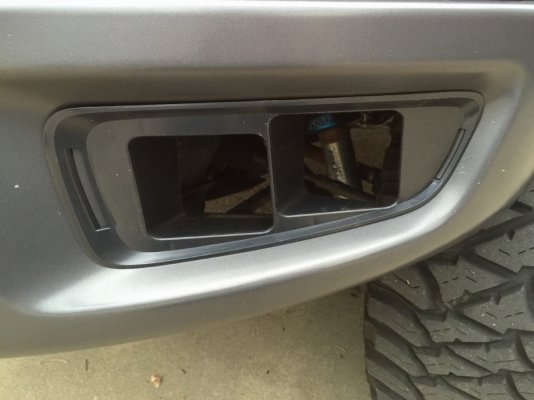
4. I installed the face plates into the fog light area. I noticed that there was a little bit of play with the plates once they "CLICKED" into place - Please notice this "play" will disappear later during the install. No need to worry/panic.
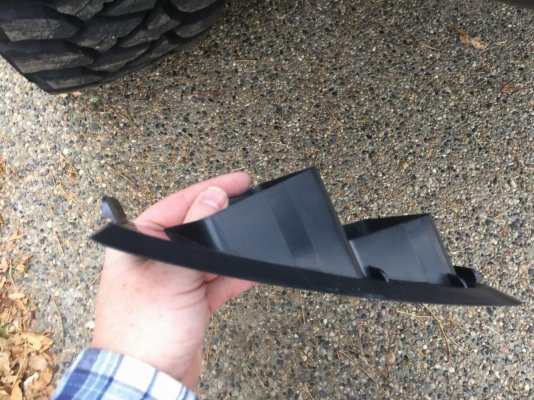
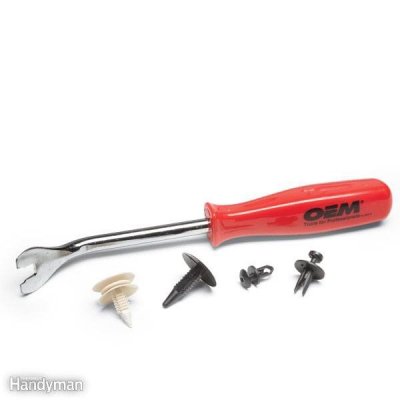
5. I removed the inner wheel well liner from the area which is going to hold the mounting bracket. I ran to NAPA an purchased an Interior Trim Remover to remove the plastic bolts that held the liner on as to not damage the plug.
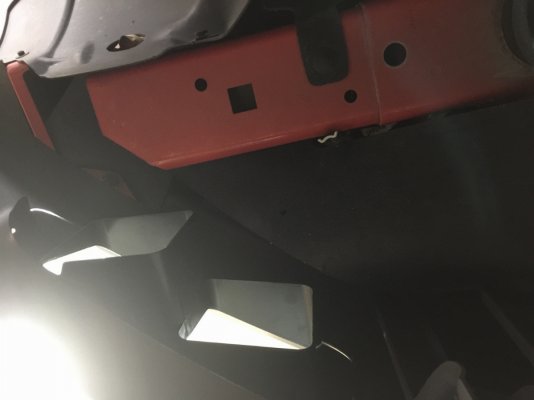
6. I did a dry mount on the truck prior to mounting the lights to make sure I'm in the correct location for install. I used a KREG clamp (use whatever clamp you choose) to dry install the mount. This allows me both hands to drill and mount. You will need/want both hands so you can hold the nut AND tighten the bold at the same time.
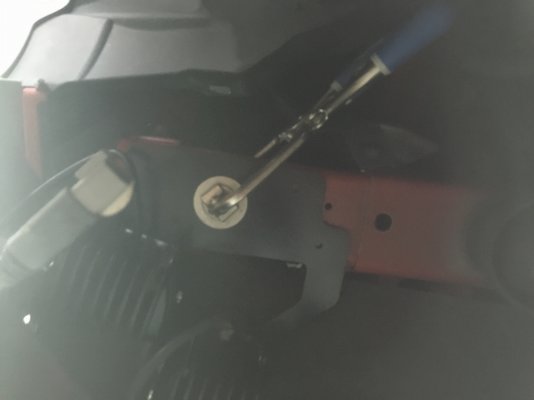
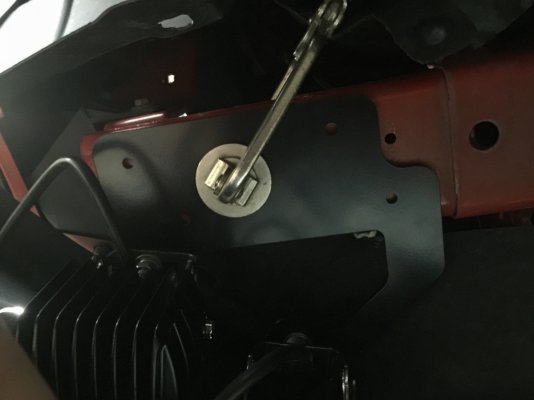
7. I installed the lights on the brackets. Note 1: BE SURE TO LOOSEN THE NUTS AND BOLTS HOLDING THE FOUR RIGID LIGHTS IN PLACE. THIS WILL ALLOW YOU TO ADJUST THEM INTO THE HOLES OF THE FOG LIGHT PLATE TO INSURE A FLAT PLACEMENT OF THE MOUNTING PLATE.
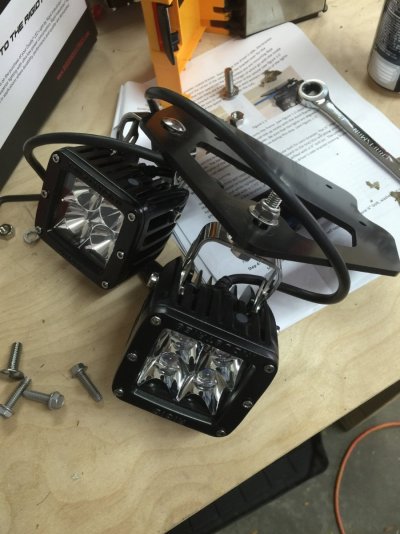
If the lights are loose enough the mounting plate WILL fit flat against the frame of the truck.
8. I installed both brackets and tightened EVERY bolt down in place. CAUTION: The outer most bolt will be VERY close to a screw on the INSIDE of the frame tube (Not sure of proper terminology but hopefully you will understand based on the pictures. Leave enough room to get your wrench in that area to hold the nut as you tighten the bolt.
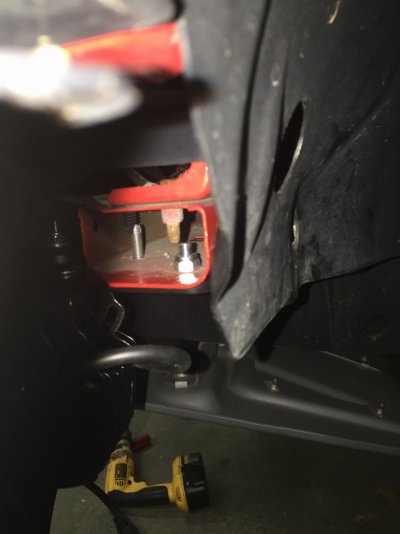
9. Once both sides are installed there is ZERO movement with the faceplates.
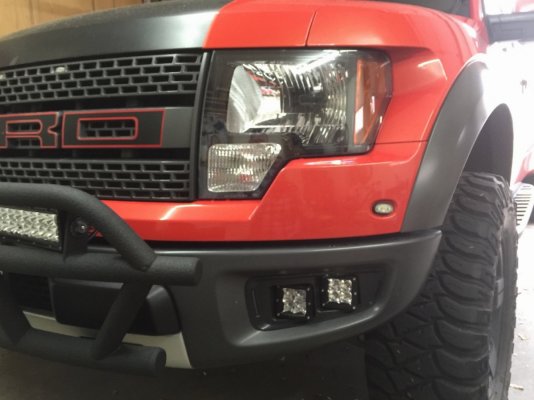
WIRING TIME!!!!
I have outer Flood AMBERs and inner Spot WHITEs. I have my ambers connected to Aux 3 and whites connected to Aux 4.
JUST AN FYI ON MY AUX SWITCH LOCATION/ACTION
Aux 1 - Amber C-Clamps (Raptor Retrofit)
Aux 2 - Amber Evil Eyes (Raptor Retrofit)
Aux 5 - Rigid Combo Outer Amber Floods
Aux 6 - Rigid Combo Inner White Spot
Aux 7 - 5 VisionX 8.7" HID Extreme Lamps
Aux 8 - 2 Rigid Amber Duallies Floods (Rear Facing)
Aux 9 - 2 Rigid Duallies Amber Spots (Rear Facing)
Aux 10 - 2 Rigid Flush Mount Amber Floods (Bumper Mount)
Aux 5-10 are Overhead Mounted courtesy @Kmandoske EXCELLENT SETUP!!!!! THANX KEITH!!!
I purchased two rolls of 16 gauge wire (Red & Black)
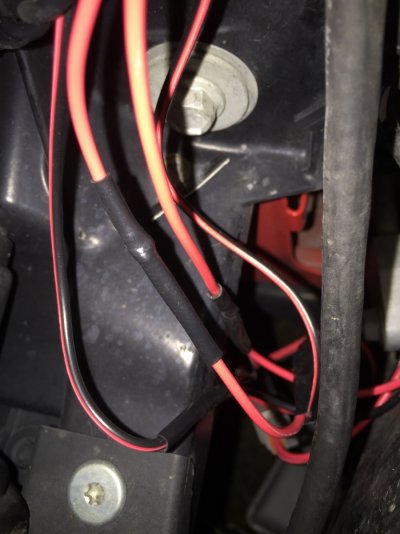
1. I cut off the switches provided by Rigid and ran the wiring from the passenger side through a plastic tubing and zip tied it to the front of the inside of the bumper. This will keep the look clean and organized.
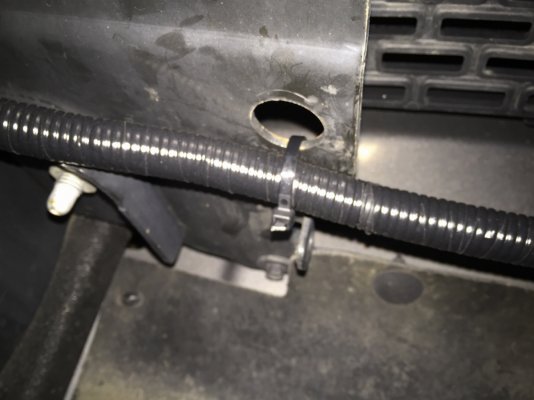
I was sure to SOLDER all wire connections to make sure they NEVER come lose later in life and then shrink-wrap over the top of the solder. (Lesson learned Keith - No more Wire Nuts!
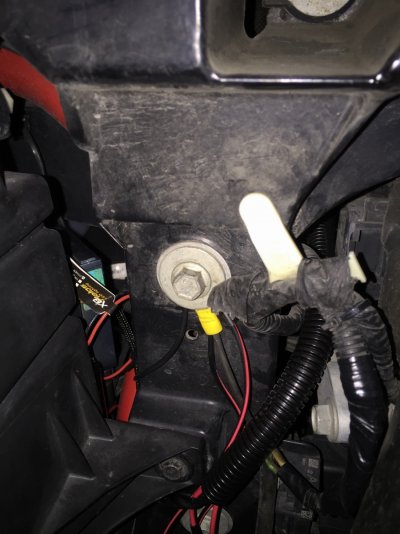
2. I duplicated the driver's side and merged with the passenger side. I ran the ground to the bolt just to the left upper portion of the radiator location and ran the positive to my designated AUX switches.
FINAL COMMENTS:
Follow the instructions that @sal313 provides with his setup and all will be great! Zero issues came about and all went well. I love the setup and no problems.
Worth the purchase and will not be disappointed. Thanx SAL313.
Anyway, I told @sal313 that I would purchase his setup and do a write-up on it so here goes:
I originally purchased Rigid's setup for the Fog Light area with two lights per side and their mount. I sold it quickly as I noticed the brackets that Rigid supplied didn't line up properly and stuck out farther on one side then the other. My OCD was not having any of that! - I sold the setup!
"Disclaimer: I have 11 Rigid lights on my rig and swear by them! I love Rigid - just hated the bracket they provided."
After much deliberation (and prodding) I purchased this setup from @sal313. I was told that these would line up better and be less of a problem on the install portion of the setup... That's to be determined...
1. Purchase - After purchase these items arrived in two different shipments due to warehouse locations. I'm good with that.
As you can see, they arrived in three packages and were packaged as expected direct from the factory.

2. I then opened them up for inspection; All was good. I pulled them out to verify content.


3. I pulled out the brackets and oriented them to how they would be placed on the truck.

4. I installed the face plates into the fog light area. I noticed that there was a little bit of play with the plates once they "CLICKED" into place - Please notice this "play" will disappear later during the install. No need to worry/panic.


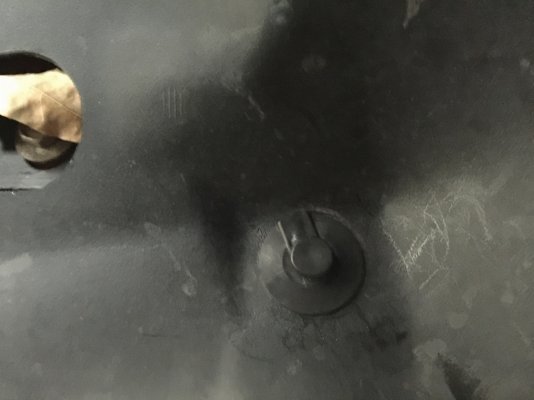
5. I removed the inner wheel well liner from the area which is going to hold the mounting bracket. I ran to NAPA an purchased an Interior Trim Remover to remove the plastic bolts that held the liner on as to not damage the plug.


6. I did a dry mount on the truck prior to mounting the lights to make sure I'm in the correct location for install. I used a KREG clamp (use whatever clamp you choose) to dry install the mount. This allows me both hands to drill and mount. You will need/want both hands so you can hold the nut AND tighten the bold at the same time.


7. I installed the lights on the brackets. Note 1: BE SURE TO LOOSEN THE NUTS AND BOLTS HOLDING THE FOUR RIGID LIGHTS IN PLACE. THIS WILL ALLOW YOU TO ADJUST THEM INTO THE HOLES OF THE FOG LIGHT PLATE TO INSURE A FLAT PLACEMENT OF THE MOUNTING PLATE.

If the lights are loose enough the mounting plate WILL fit flat against the frame of the truck.
8. I installed both brackets and tightened EVERY bolt down in place. CAUTION: The outer most bolt will be VERY close to a screw on the INSIDE of the frame tube (Not sure of proper terminology but hopefully you will understand based on the pictures. Leave enough room to get your wrench in that area to hold the nut as you tighten the bolt.

9. Once both sides are installed there is ZERO movement with the faceplates.

WIRING TIME!!!!
I have outer Flood AMBERs and inner Spot WHITEs. I have my ambers connected to Aux 3 and whites connected to Aux 4.
JUST AN FYI ON MY AUX SWITCH LOCATION/ACTION
Aux 1 - Amber C-Clamps (Raptor Retrofit)
Aux 2 - Amber Evil Eyes (Raptor Retrofit)
Aux 5 - Rigid Combo Outer Amber Floods
Aux 6 - Rigid Combo Inner White Spot
Aux 7 - 5 VisionX 8.7" HID Extreme Lamps
Aux 8 - 2 Rigid Amber Duallies Floods (Rear Facing)
Aux 9 - 2 Rigid Duallies Amber Spots (Rear Facing)
Aux 10 - 2 Rigid Flush Mount Amber Floods (Bumper Mount)
Aux 5-10 are Overhead Mounted courtesy @Kmandoske EXCELLENT SETUP!!!!! THANX KEITH!!!
I purchased two rolls of 16 gauge wire (Red & Black)
1. I cut off the switches provided by Rigid and ran the wiring from the passenger side through a plastic tubing and zip tied it to the front of the inside of the bumper. This will keep the look clean and organized.

I was sure to SOLDER all wire connections to make sure they NEVER come lose later in life and then shrink-wrap over the top of the solder. (Lesson learned Keith - No more Wire Nuts!

2. I duplicated the driver's side and merged with the passenger side. I ran the ground to the bolt just to the left upper portion of the radiator location and ran the positive to my designated AUX switches.

FINAL COMMENTS:
Follow the instructions that @sal313 provides with his setup and all will be great! Zero issues came about and all went well. I love the setup and no problems.
Worth the purchase and will not be disappointed. Thanx SAL313.

