If you saw my Auxbeam thread, this set of lights was the partner to the lightbar behind the grille.
I tow a boat quite a bit and we usually end up putting it into storage late at night. The storage area has decent lighting but not enough to get fine details when trying to back a boat into tight spaces. After being inspired by another forum member's post, I decided to provide my own to discuss this particular light set.
Like everything else I purchase, I picked these up here.
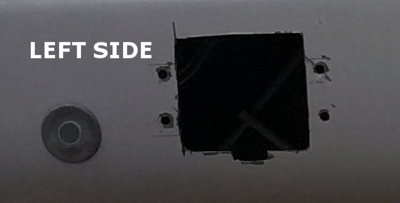
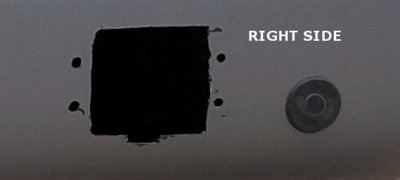
I took even longer to install these because I knew I would have to cut my bumper. That in itself took quite a bit of convincing for not only myself but for the wife. Eventually we decided to attempt this and I enlisted her help. I had her painters tape the bumper and use the rubber surround for the flush mount as a drawing template. Once we had the area marked, I grabbed my tools.
Here is where I was woefully unprepared. I have a corded, variable speed Dremel and about 20 reinforced cutting wheels. I figured these would be sufficient and they got the job done but not as clean as I would have liked.
First observation...get a better tool for the job. The other gent recommended a cut-off wheel and I'll second that. The Dremel worked but it could have been done faster IMHO.
Second observation...get a damn welders mask. I had eye and ear protection but there were sparks all metal shavings everywhere. I had enough after a couple of minutes and got an old gas mask out which worked wonders!
Third observation...have touch-up paint available. My hand slipped twice and I ended up with two marks on the bumper that are not covered by the fascia of the light. I used grill paint after I finished cutting to inhibit rust/corrosion but before I removed the painters tape so I did not have to re-mask the area. In the end, there are two small spots that are not covered by the light and are black in color due to the spraypaint. I will fix this eventually but it is not noticeable at all.
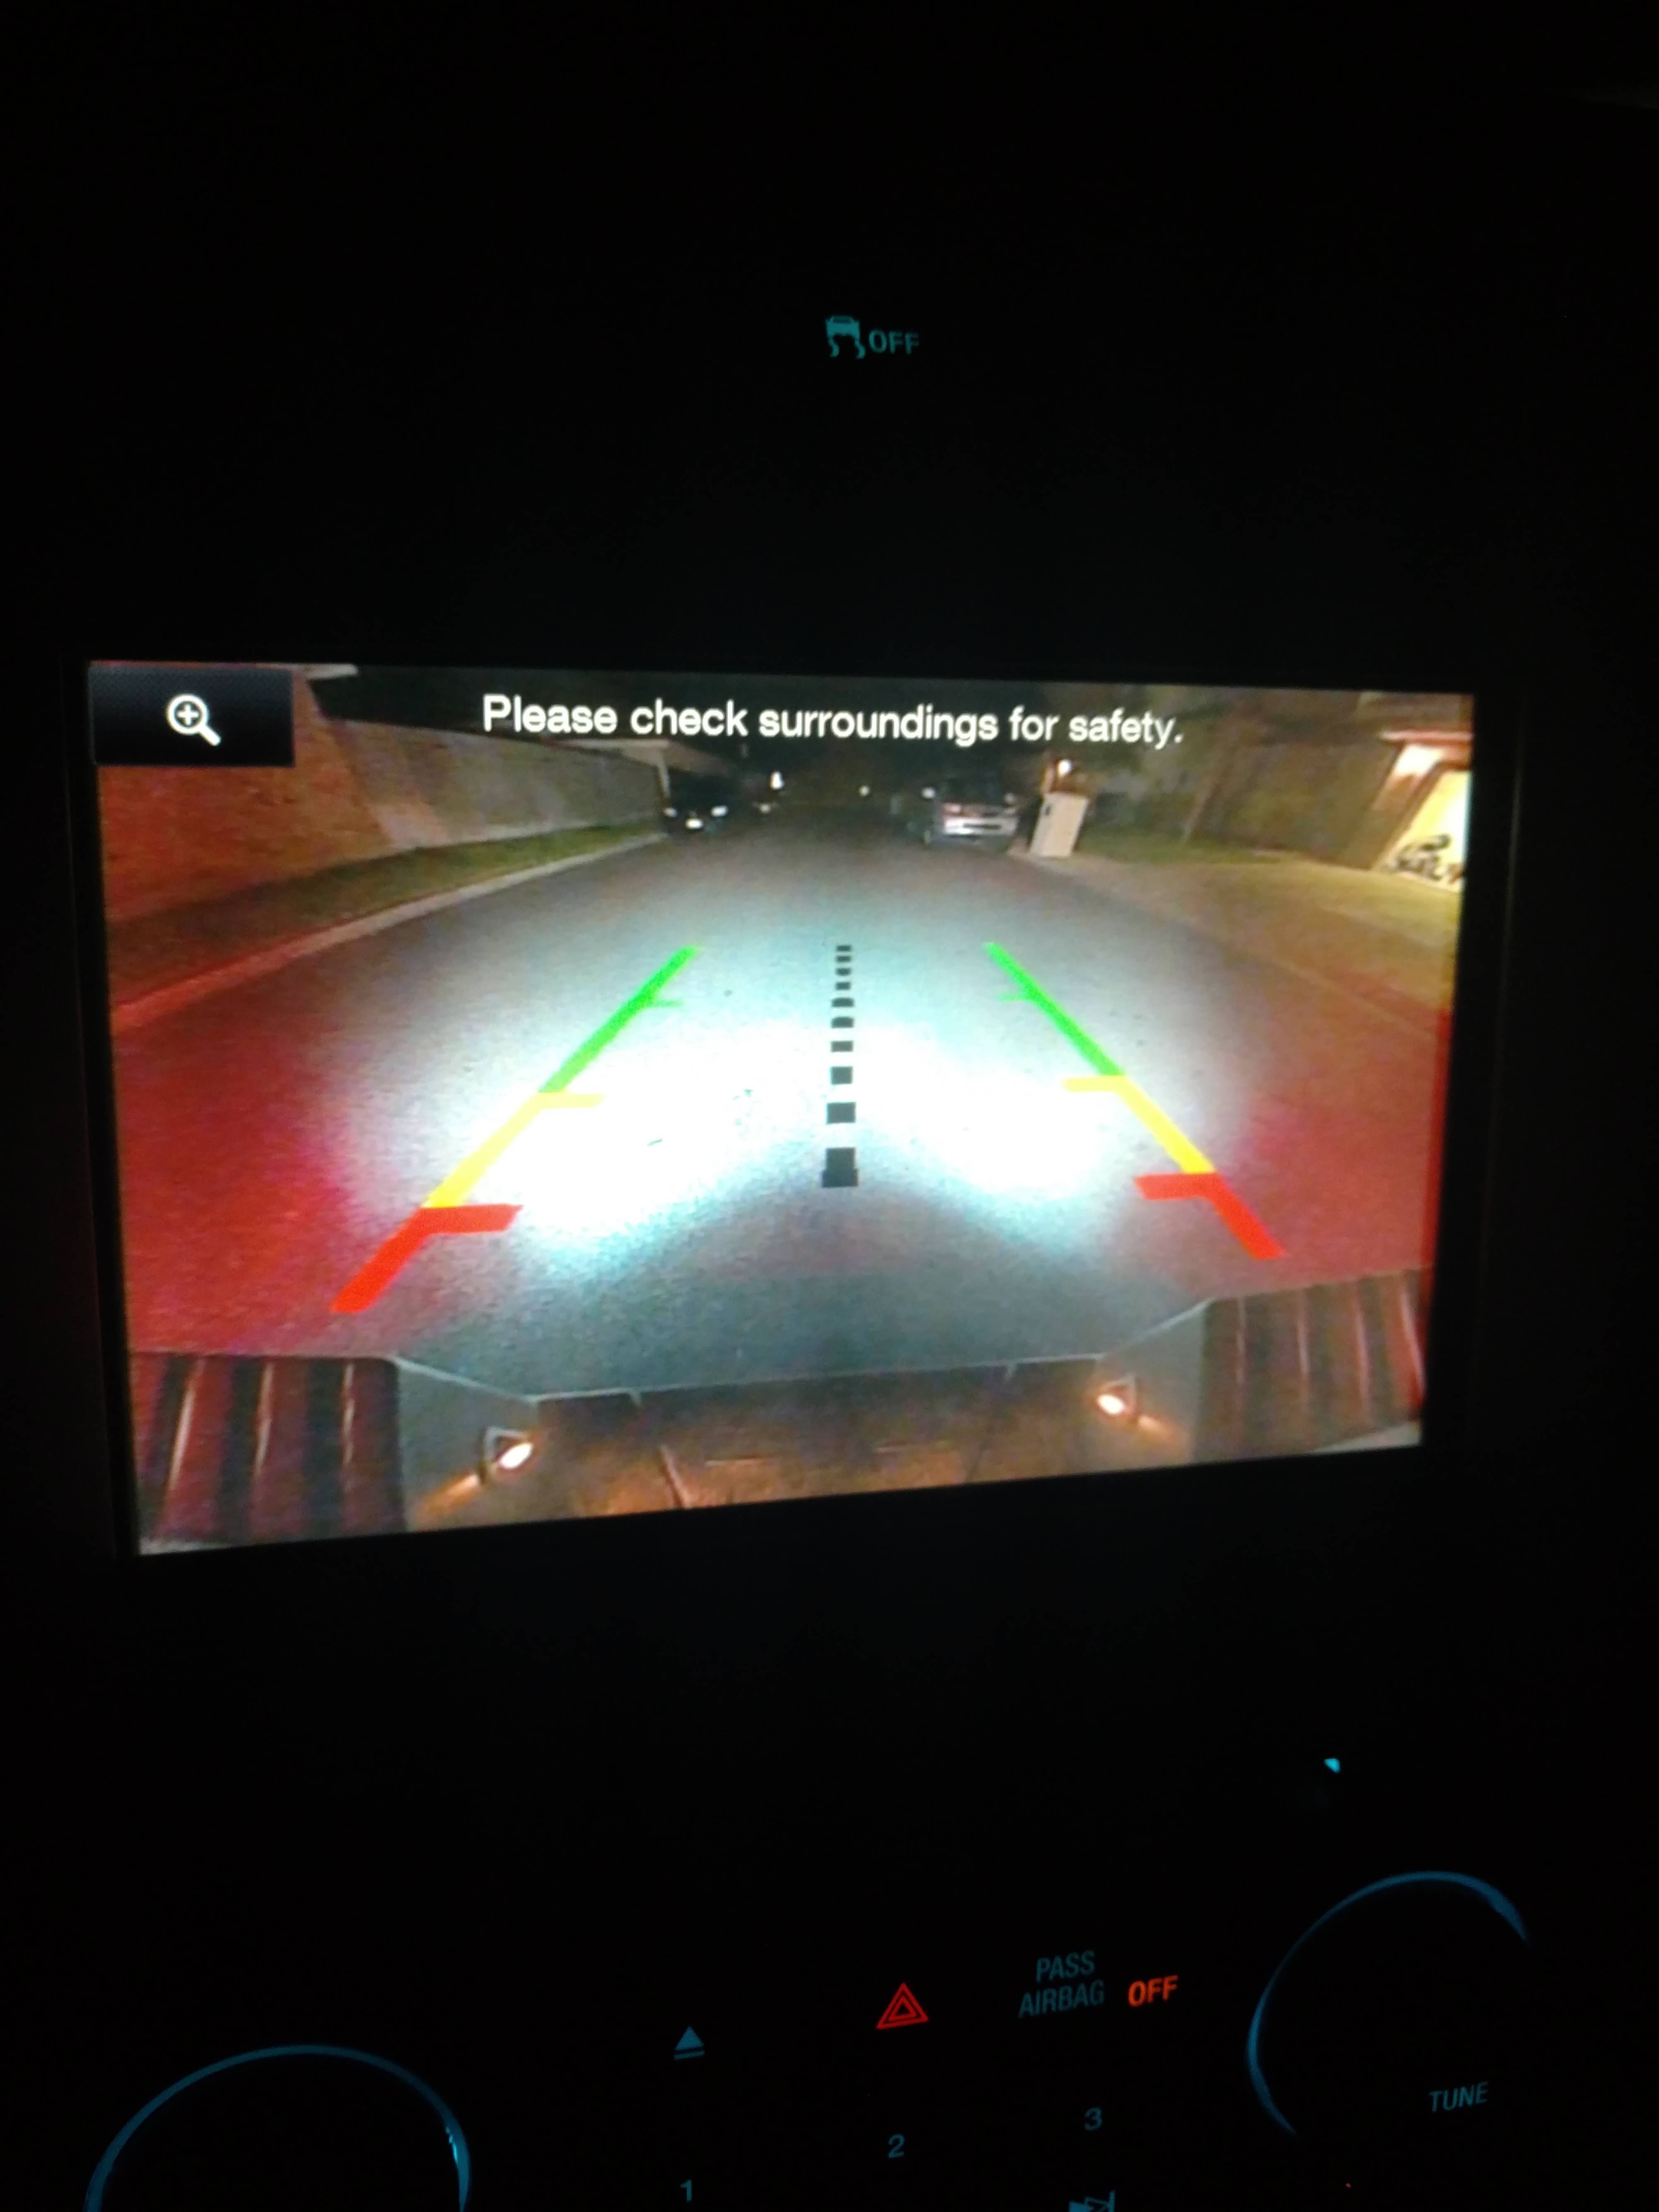
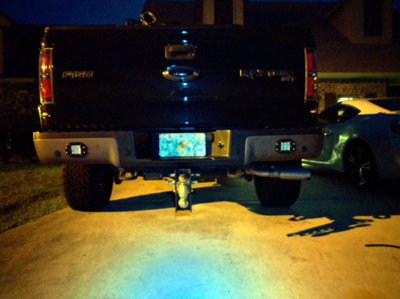
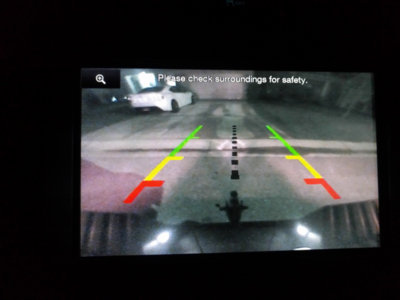
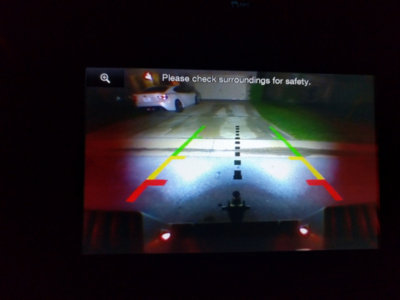
As far as the lights go, I ordered the diffusion pattern because I thought it would offer the most lighting with the least gain on the back-up camera. I will say that the lights still overpower the camera and reversing without them on is easier. Rear visibility through the mirrors is greatly enhanced with the light though.
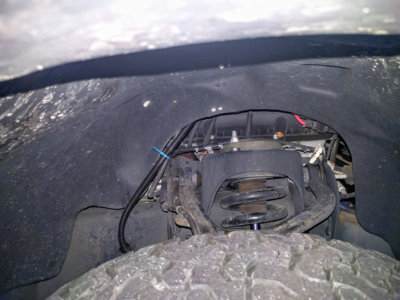
I ran 10ga from the front and along the frame in a wire loom that I zip-tied to opportune points. This took the longest because I wanted everything to me fairly hidden and in the loom. I chose to run these off of the AUX 4 upfitter. I cut the wire harness that is provided which has three components: quick connect for power/ground, eye rings for power ground and a fused relay. Since the upfitter is already on a relay and fused, I cut those wires. I used the quick disconnect but cut it to a length of 6" this allows me to still use the clip to the light but I ran the power/ground from the rear to the front using my own provided wire.
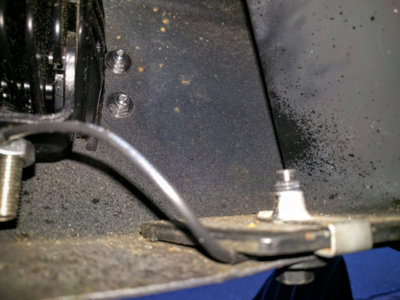
The power wire obviously connects to the AUX 4 power wire. I spliced the power wires for both lights at the rear so there is only one power wire that runs from the bumper to the front. I did independently ground the lights with a ring terminal under the bumper. The bottom of the bumper has a couple of bolts so I loosened the bolts and slipped the ground ring terminal between the bumper and the frame.
Like all of my electrical projects, everything has been wrapped in wireloom and ziptied out of the way.
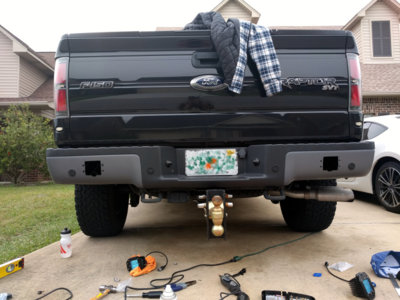
All-in-all, I am very happy with how they look (especially since I used a Dremel and almost an entire pack of wheels instead of a proper tool) on the truck and the light they output.
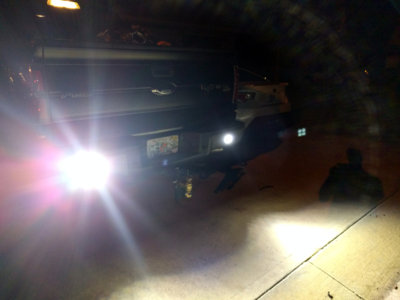
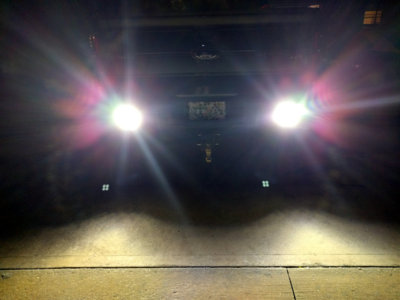
The lights are quite bright even during the daylight which has been verified by my wife. She drives a low sports car and asked for me to flick them on while she was following in daytime and was surprised at how blinded she was. At nighttime it is even worse. I would not advocate for using these on tailgaters due to legal reasons but I will say that they throw an ample amount of light.
Pictures to come later.
Cheers
I tow a boat quite a bit and we usually end up putting it into storage late at night. The storage area has decent lighting but not enough to get fine details when trying to back a boat into tight spaces. After being inspired by another forum member's post, I decided to provide my own to discuss this particular light set.
Like everything else I purchase, I picked these up here.
I took even longer to install these because I knew I would have to cut my bumper. That in itself took quite a bit of convincing for not only myself but for the wife. Eventually we decided to attempt this and I enlisted her help. I had her painters tape the bumper and use the rubber surround for the flush mount as a drawing template. Once we had the area marked, I grabbed my tools.
Here is where I was woefully unprepared. I have a corded, variable speed Dremel and about 20 reinforced cutting wheels. I figured these would be sufficient and they got the job done but not as clean as I would have liked.
First observation...get a better tool for the job. The other gent recommended a cut-off wheel and I'll second that. The Dremel worked but it could have been done faster IMHO.
Second observation...get a damn welders mask. I had eye and ear protection but there were sparks all metal shavings everywhere. I had enough after a couple of minutes and got an old gas mask out which worked wonders!
Third observation...have touch-up paint available. My hand slipped twice and I ended up with two marks on the bumper that are not covered by the fascia of the light. I used grill paint after I finished cutting to inhibit rust/corrosion but before I removed the painters tape so I did not have to re-mask the area. In the end, there are two small spots that are not covered by the light and are black in color due to the spraypaint. I will fix this eventually but it is not noticeable at all.
As far as the lights go, I ordered the diffusion pattern because I thought it would offer the most lighting with the least gain on the back-up camera. I will say that the lights still overpower the camera and reversing without them on is easier. Rear visibility through the mirrors is greatly enhanced with the light though.
I ran 10ga from the front and along the frame in a wire loom that I zip-tied to opportune points. This took the longest because I wanted everything to me fairly hidden and in the loom. I chose to run these off of the AUX 4 upfitter. I cut the wire harness that is provided which has three components: quick connect for power/ground, eye rings for power ground and a fused relay. Since the upfitter is already on a relay and fused, I cut those wires. I used the quick disconnect but cut it to a length of 6" this allows me to still use the clip to the light but I ran the power/ground from the rear to the front using my own provided wire.
The power wire obviously connects to the AUX 4 power wire. I spliced the power wires for both lights at the rear so there is only one power wire that runs from the bumper to the front. I did independently ground the lights with a ring terminal under the bumper. The bottom of the bumper has a couple of bolts so I loosened the bolts and slipped the ground ring terminal between the bumper and the frame.
Like all of my electrical projects, everything has been wrapped in wireloom and ziptied out of the way.
All-in-all, I am very happy with how they look (especially since I used a Dremel and almost an entire pack of wheels instead of a proper tool) on the truck and the light they output.
The lights are quite bright even during the daylight which has been verified by my wife. She drives a low sports car and asked for me to flick them on while she was following in daytime and was surprised at how blinded she was. At nighttime it is even worse. I would not advocate for using these on tailgaters due to legal reasons but I will say that they throw an ample amount of light.
Pictures to come later.
Cheers
Attachments
-
 IMG_20160319_164821_L.jpg33.7 KB · Views: 115
 -
 IMG_20160319_164821_R.jpg30.9 KB · Views: 112
 -
 IMG_20160319_164821.jpg198 KB · Views: 115
 -
 IMG_20160319_192730.jpg235.7 KB · Views: 109
 -
 IMG_20160319_192750.jpg135.8 KB · Views: 107
 -
 IMG_20160319_192755.jpg155.3 KB · Views: 109
 -
 IMG_20160412_185816~2.jpg143.2 KB · Views: 104
 -
 IMG_20160412_185843~2.jpg133.6 KB · Views: 115
 -
 IMG_20160412_201501.jpg111.3 KB · Views: 100
 -
 IMG_20160412_201506.jpg109 KB · Views: 122
Last edited: