Modifying transmission dip stick

Disclaimer: Links on this page pointing to Amazon, eBay and other sites may include affiliate code. If you click them and make a purchase, we may earn a small commission.

Ruger

FRF Addict
Joined
May 16, 2011
Posts
9,235
Reaction score
8,293
Location
Northern Nevada
B&M has conflicting information.
I watched this Youtube video and Steve from B&M installed this dipstick onto a 2011 Ford Raptor.
He clearly demonstrates that the dipstick is to be resting on the top of the housing inlet thread for checking trans fluid level.
The video references P/N 22200. Is this the same P/N you recieved?

Click B&M Dipstick P/N 22200 Video

The video was published just recently.

Yes sir, P/N 22200 is the part I received. The instructions are coherent. When you transfer the marks from the OEM dipstick to the B&M dipstick, the B&M unit is to be fully screwed down according to the instructions. So that when you check the fluid level with the dipstick screwed down, the fluid level you see on the dipstick properly registers against the marks. If you download the printed instructions from the B&M web site, you'll see that they are as I describe.
 
OP
OP
R1jamn

R1jamn

Full Access Member
Joined
Jun 18, 2011
Posts
401
Reaction score
299
I looked at their PDF instructions online and it clearly states to check the trans fluid with the dipstick screwed in, "with the knob fully hand tight" and then remove.

I called B&M and talked with a gentleman named Austin to get this cleared up. He was unsure himself so he spoke with his lead, Ronny.
Ronny says to follow the instructions that come with the dipstick.

So, DO NOT follow the video instructions (linked on their website) for measuring fluid level.
 
Last edited:

Ruger

FRF Addict
Joined
May 16, 2011
Posts
9,235
Reaction score
8,293
Location
Northern Nevada
Thank you, @R1jamn, good work!

There's another question that I have. I am pretty sure that the video says to use Teflon tape on the threads, but the printed instructions don't mention it. Gotta clear that up before I do the installation.

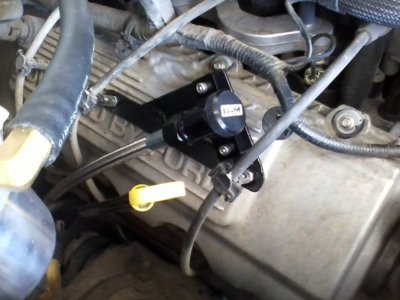
Right now I'm designing and building the bracket that I'm going to mount the top end of the dipstick to. I don't like idea of mounting an engine or transmission dipstick to the firewall of a Raptor for a couple of reasons, so I'm building a bracket that will mount to the two forward studs on the rocker cover that hold the stand-offs for the spark plug wires to the lower bank of plugs.
 

Ruger

FRF Addict
Joined
May 16, 2011
Posts
9,235
Reaction score
8,293
Location
Northern Nevada
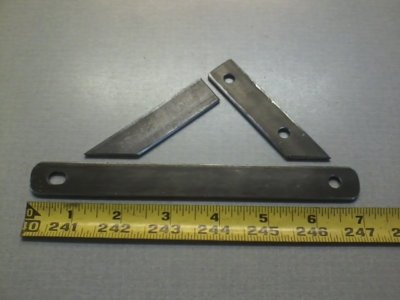
BUILDING THE BRACKET

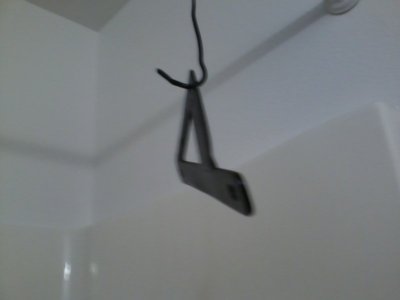
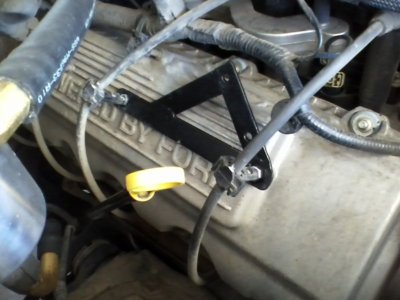
This will enable me to avoid the constant flexing inherent in mounting the upper end of the B&M dipstick to the firewall. This bracket will be mounted to the forward two studs on the passenger side valve cover that hold the standoffs for the lower bank of spark plugs.

The second photo is fuzzy, but it does show the slight angle (roughly 20 degrees) that will provide some convenient distance between the dipstick and the intake and hoses to make using the dipstick an easy thing to do.
 

Attachments

  • Bracket1.jpg
    Bracket1.jpg
    56.1 KB · Views: 23
  • Bracket2.jpg
    Bracket2.jpg
    18.2 KB · Views: 21

J DAMAGE

Full Access Member
Joined
Jul 15, 2012
Posts
880
Reaction score
505
Location
NJ
BUILDING THE BRACKET

This will enable me to avoid the constant flexing inherent in mounting the upper end of the B&M dipstick to the firewall. This bracket will be mounted to the forward two studs on the passenger side valve cover that hold the standoffs for the lower bank of spark plugs.

The second photo is fuzzy, but it does show the slight angle (roughly 20 degrees) that will provide some convenient distance between the dipstick and the intake and hoses to make using the dipstick an easy thing to do.


Good job Ruger, I did the same thing when I put the CAI in my truck, had to make a bracket to support the heater hoses. Those studs come in handy.

user7219_pic10064_1412125681_thumb.jpg

user7219_pic10062_1412125601_thumb.jpg

user7219_pic10063_1412125617_thumb.jpg
 
OP
OP
R1jamn

R1jamn

Full Access Member
Joined
Jun 18, 2011
Posts
401
Reaction score
299
Thank you, @R1jamn, good work!

There's another question that I have. I am pretty sure that the video says to use Teflon tape on the threads, but the printed instructions don't mention it. Gotta clear that up before I do the installation.

@Ruger, If it is a normal metric or SAE thread then I would just torque it down as I'm sure there is an O-ring on the new housing to seal it.

If the thread is an NPT then I would place Teflon tape on it as it provides a seal and it will help with removal if you should ever need to take it off.

I don't believe the stock dip stick cover had an NPT thread.
 

Ruger

FRF Addict
Joined
May 16, 2011
Posts
9,235
Reaction score
8,293
Location
Northern Nevada
Steve's 4 minute installation video on the B&M web site...
- Ignores steps 6, 7, 22, and 23 in the printed instructions in which you record the fluid level on the factory dipstick, and then use that mark to transfer the high and low marks from the factory dipstick to the B&M dipstick.
- Recommends the use of Teflon tape when mounting the dipstick adaptor (referred to as the dipstick tube fitting in the printed instructions) to the transmission. The printed instructions do not mention Teflon tape. I stayed on hold for 20 minutes today trying to get clarification from B&M and finally gave up and left a voice mail message. As a result, I haven't completed the installation.
- Does not mention the use of cable ties to secure the dipstick tube (step 18 in the printed instructions). The parts list in the printed instructions list two cable ties for this purpose. My package did not include cable ties. The installation is so close to the exhaust that the use of plastic zip ties would be ill advised. Ace Hardware has stainless steel zip ties - recommended.

B&M is again out of stock of PN 22200.
 
Last edited:

Jimster58

Full Access Member
Joined
Jul 5, 2016
Posts
124
Reaction score
43
Location
Greensboro, NC
Steve's 4 minute installation video on the B&M web site...
- Ignores steps 6, 7, 22, and 23 in the printed instructions in which you record the fluid level on the factory dipstick, and then use that mark to transfer the high and low marks from the factory dipstick to the B&M dipstick.
- Recommends the use of Teflon tape when mounting the dipstick adaptor (referred to as the dipstick tube fitting in the printed instructions) to the transmission. The printed instructions do not mention Teflon tape. I stayed on hold for 20 minutes today trying to get clarification from B&M and finally gave up and left a voice mail message. As a result, I haven't completed the installation.
- Does not mention the use of cable ties to secure the dipstick tube (step 18 in the printed instructions). The parts list in the printed instructions list two cable ties for this purpose. My package did not include cable ties. The installation is so close to the exhaust that the use of plastic zip ties would be ill advised. Ace Hardware has stainless steel zip ties - recommended.

B&M is again out of stock of PN 22200.

Ruger - great-looking install! You made a useful discovery about the mark-transfer business or just that the video takes a lot of shortcuts?
 
Top