Tahoe Terrain Raptor

Disclaimer: Links on this page pointing to Amazon, eBay and other sites may include affiliate code. If you click them and make a purchase, we may earn a small commission.

Juiced4ever

Full Access Member
Joined
Feb 22, 2013
Posts
227
Reaction score
286
Location
Tahoe
It was suggested to me to enter my bed rack build in the DIY contest. Me being the kind of guy who reads only what I need out of instructions didn't see that I was supposed to do a build thread for it. So here is a build thread for that.

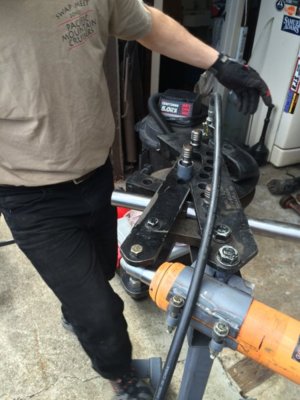
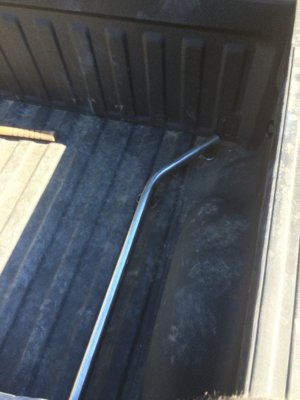
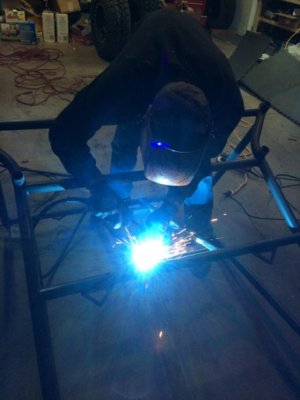
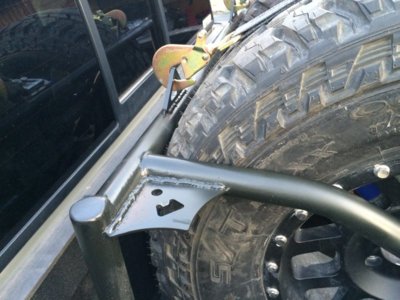
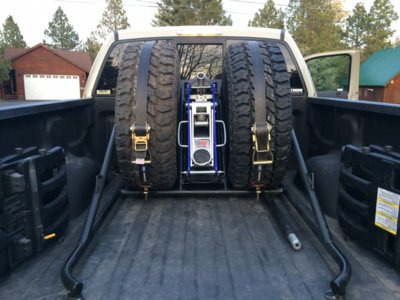
I built this bed cage over the last month or so. Got a bunch of Tubing from a friend, turned out to be DOM was pretty stoked on that. With some help of my Brother in Law as he is the one with the bender. I we knocked out bends, (pneumatic bender is sooooooo much easier than manual) then I got to welding.
 

Attachments

  • IMG_3061.jpg
    IMG_3061.jpg
    61.8 KB · Views: 213
  • IMG_3063.jpg
    IMG_3063.jpg
    51.8 KB · Views: 202
OP
OP
Juiced4ever

Juiced4ever

Full Access Member
Joined
Feb 22, 2013
Posts
227
Reaction score
286
Location
Tahoe
The rack started to take shape pretty quick. Only messed up one bend. Had to change the back end of it as i did not give myself enough clearance for tailgate.
 

Attachments

  • IMG_3067.jpg
    IMG_3067.jpg
    43.4 KB · Views: 206
  • IMG_3074.jpg
    IMG_3074.jpg
    72.6 KB · Views: 233
OP
OP
Juiced4ever

Juiced4ever

Full Access Member
Joined
Feb 22, 2013
Posts
227
Reaction score
286
Location
Tahoe
Built some custom feet for the rack that connect it to the truck bed bolts. So you pull 4 pins and everything comes right out, leaving the feet in place. Keeps my truck bed usable. Also I wanted to use two point MAC straps and not the more expensive 3 points, so having support bars on the rack was crucial.

After a slight delay in the build my jack skid and mount finally arrived from C4 Fabrications. So time to bust out the miller welder again!
 

Attachments

  • IMG_3076.jpg
    IMG_3076.jpg
    54.8 KB · Views: 184
  • IMG_3333.jpg
    IMG_3333.jpg
    41.7 KB · Views: 190
OP
OP
Juiced4ever

Juiced4ever

Full Access Member
Joined
Feb 22, 2013
Posts
227
Reaction score
286
Location
Tahoe
Got the tie down points for the tires as well as cooler and action packer from Ruff Stuff. Great tabs that are super strong and I think gives the rack a unique look, that's different from everything else out there as they are triangular. While I was cruising the old inter-web for those I came across the beer gussets from Chassis Unlimited. Order those up right away. It didn't need gussets for strength but its a cool addition to be able to pop a frosty beverage! Lastly the end caps for all the tubing came from A&A manufacturing. Great people at all shops super easy to deal with and awesome products.

So welded those on, busted out the grinder to clean it up.
 

Attachments

  • IMG_3368.jpg
    IMG_3368.jpg
    88.9 KB · Views: 198
  • IMG_3369.jpg
    IMG_3369.jpg
    102.9 KB · Views: 195
OP
OP
Juiced4ever

Juiced4ever

Full Access Member
Joined
Feb 22, 2013
Posts
227
Reaction score
286
Location
Tahoe
And Finally the finished product! The rack works flawlessly. Just ran it on the Ghosttown PreRun last week and everything was perfect. It holds a cooler and my action packer full of tools between tires and tail gate. Also holds 2 fuel/water 5 gallon cans behind the jack. Basically pull a tire out and slide the fuel/water cans in and tie down, then put tire back. I think it came out well. All in all very happy with it, but I guess you all are the true judges!

Thanks
 

Attachments

  • IMG_3367.jpg
    IMG_3367.jpg
    103.6 KB · Views: 236
Last edited:
OP
OP
Juiced4ever

Juiced4ever

Full Access Member
Joined
Feb 22, 2013
Posts
227
Reaction score
286
Location
Tahoe
Ok so now that I have the DIY contest post out of the way figured I would post some of the other things that have been done to the truck in the last 6 months.

First was the ICON bump kit. Nothing better than sitting under your truck Indian style, (can I still call it that?) for 3 hours or so as you install. But once it was done I was amazed at how it actually preformed. Controls the truck like no other in those really bad oh shit moments keeps the back planted and under control when it comes back down.

Also about this same time I got new wheels and tires. Went with method mesh and Cooper st/maxx tires. Love the stance and the look of the methods and the tires so far have held up great.
 

Attachments

  • IMG_2973.jpg
    IMG_2973.jpg
    52.5 KB · Views: 206
  • IMG_3022.jpg
    IMG_3022.jpg
    57 KB · Views: 209
OP
OP
Juiced4ever

Juiced4ever

Full Access Member
Joined
Feb 22, 2013
Posts
227
Reaction score
286
Location
Tahoe
About this time I started running offroad considerably more and the need for a GPS and Radio became evident, Installed a Lowrance Elite 5 which was super easy. Used the outlaw mount and tapped the back of the 12 volt outlet in the dash. Drug the power through the dash tray speaker like I had seen on the forms and it turned out super clean.
 

Attachments

  • IMG_3449.jpg
    IMG_3449.jpg
    48.4 KB · Views: 181
OP
OP
Juiced4ever

Juiced4ever

Full Access Member
Joined
Feb 22, 2013
Posts
227
Reaction score
286
Location
Tahoe
As for the radio I went to PCI Race Radios, who were really cool to deal with. Super nice guys and answered every question I had and more. I did the Icom 5021 radio with the deep mount antenna.

Dont let drilling the roof scare you its super easy. The guys at PCI told me if I could access from the bottom of the roof i only had to drill a 3/8" hole which made for a really nice install. Ran the antenna wire along headliner around side airbag and down c-pillar then under the door sills to the center console.

oh and thanks to @m3dragon and @vanilla_gorilla for the help with radio wiring.
 

Attachments

  • IMG_3447.jpg
    IMG_3447.jpg
    56.2 KB · Views: 195
  • IMG_3096.jpg
    IMG_3096.jpg
    22.1 KB · Views: 183
  • IMG_3097.jpg
    IMG_3097.jpg
    11.4 KB · Views: 167
Top