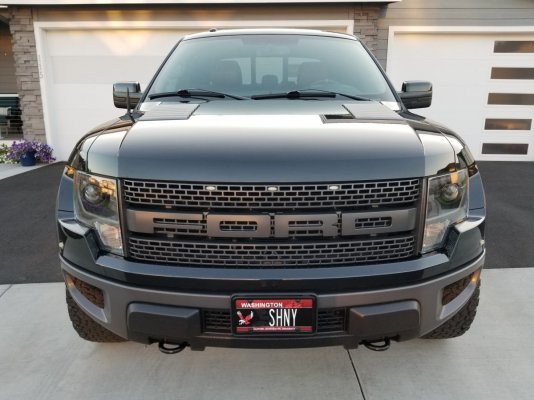
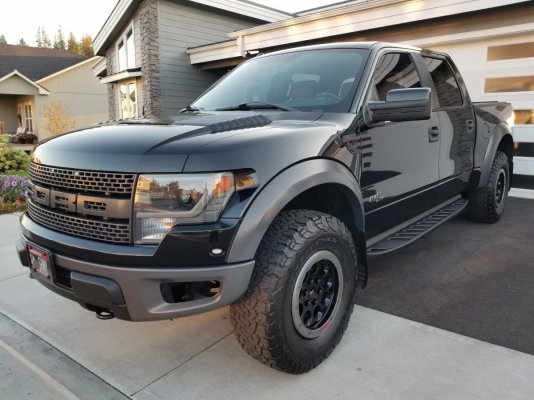
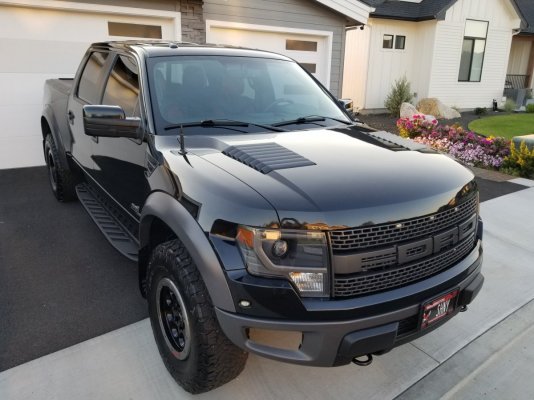
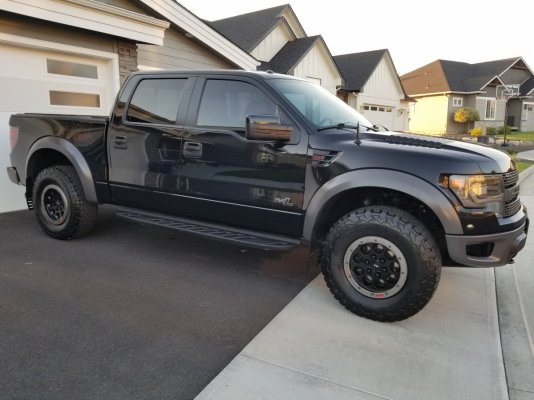
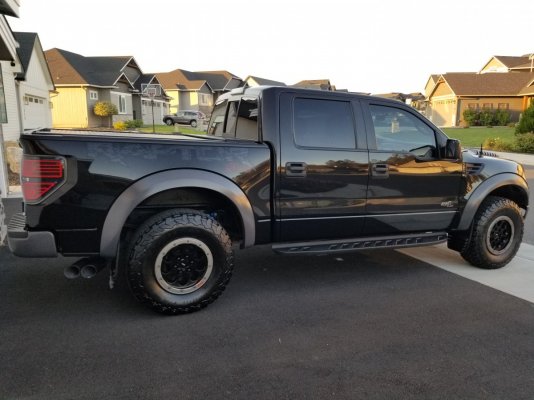
First Detail - Adamized the Raptor

Disclaimer: Links on this page pointing to Amazon, eBay and other sites may include affiliate code. If you click them and make a purchase, we may earn a small commission.

Wilson

FRF Addict
Joined
Jan 27, 2012
Posts
26,211
Reaction score
10,314
Location
South Dakota
Coating Tips:

Number one tip, you need EXCELLENT LIGHTING! While you can get away with polishing in less than optimal lighting by using a flashlight to spot scratches or swirls, when you are applying coating, you have to be able to see that the application is uniform, see the coating “rainbow”, and have to be able to see that all the residue is wiped off. You will not have time to mess around with flashlights. If you typically use a task light (such as a light stand) for detailing, then get a helper who can move the light around as you work, so you can maintain progress on the coating application.

If you are going to be coating both the trim and paint, then apply the Trim Coating first. That way, any trim coating that gets on the paint can be easily cleaned off. If you were to apply coating to the paint first, then any Paint Coating that gets on the trim will be noticeable, and cannot be cleaned off.

When prepping the plastic and rubber trim with Coating Prep and a towel, allow the trim to completely dry before applying the Ceramic Trim Coating. Plastic and rubber trim is porous, so it can soak up some of the Coating Prep, and if this is not all the way dry, it can prevent the trim coating from curing properly. I would recommend at least an hour of drying time after prepping the trim (may need to be longer in cooler temps or higher humidity).

When using the coating applicators, apply the coating to one of the sides adjacent to the side that has the raised closure stitching. On each applicator, there are three panels without seams, the two sides adjacent to the raised closure seam, and the side opposite the seam (which most people tend to use). Since the coating ends up soaking around the edges of the side you are using (and cures), if you use the side opposite the raised closure seem, then you really only have one surface that is useful. Since you may need to switch to a fresh side if you pick up any grime (or drop it), then using the side shown facing up in this photo would allow you to switch to the opposite side, and still have a useful application surface that does not have any seams.

View attachment 94878


When applying the Ceramic Trim Coating, be careful not to get any on the paint, as it will interfere with the bonding of the Ceramic Paint Coating. If you do get some on the paint, wipe it away with a clean plush towel.

For any areas on the trim that do not look uniform after the Trim Coating has dried for an hour, reapply Trim Coating so that it looks uniform.

On any trim areas that are difficult or impossible to get to with the applicator pad, use a detailing swab for application of the Trim Coating. This photo also shows that I removed the hood and fender vents for coating applications, which was easier than trying to coat these items properly while still on the truck.

View attachment 94879

View attachment 94880


When using the Coating Prep on the paint (after the Trim Coating has been applied and cured overnight), pay special attention to the areas around the trim that were previously coated. Any Trim Coating that may have gotten on the paint, which you wiped off, probably left some residue that is not easily seen. However, when you wipe with the Coating Prep, any residue will show up with a rainbow effect, allowing you to see it (until the Prep dries). Clean these residue areas with some Revive Polish on the corner of a clean plush towel, and then re-clean the area with Coating Prep to remove the residue and oils from the polish.

The grill was cleaned and prepped using detailing swabs, to make sure all the areas were cleaned.

View attachment 94881


Before starting the Paint Coating application, walk around the vehicle and come up with a plan on how you are going to break down each panel into 2’x2’ or smaller application areas. Just starting without a plan may result in applying the coating to too large of an area. Applying to too large of an area will not give you enough time to level the product before it starts to cure. If you find that the applicator starts to drag before you get over the area with two opposing passes, then make the application area smaller.

Planning how to apply to each panel also helps with this tip: do not overlap the application area too much with the preceding application area. The fresh coating that is overlapped with the area that was just coated will not flash (rainbow). Wiping off too much of this overlapped coating is going to build up too much residue in the towel, making the residue removal less effective, which creates more work and slows you down.

If you didn’t catch this in the previous tip, the coating that is applied to an overlap area will not rainbow, so don’t sit there waiting for it to rainbow before removing the residue. Start wiping the residue from the application area as soon as you see the coating in the main application area rainbow. The coating in the overlapped are will stay wet (clear).

For wiping the residue, fold the towel into quarters, and keep track of what part of the towel you are using. You do not want to just randomly use any part of the towel, since the coating residue will cure in the towel during the application. After using one surface of the towel for one or two panels, you will find that is becomes less effective at removing all of the residue. When switching faces on the towel, I marked the ‘used’ face with a Sharpie, so that I would not use that face again.

View attachment 94882


Let the effectiveness of the residue removal tell you when to switch to a fresh towel surface. Once your find that the towel is not removing the residue as effectively (and leaving streaks), finish that application area, then switch to a clean surface for the next application area. Also, when you switch to a new towel surface, go back over the previously applied sections and re-wipe them with the fresh towel face to remove any missed residue.

Detailing swabs were used to apply the Paint Coating to the grill. While some might be inclined to skip coating the grill, I think the extra time to prep and apply coating it is worth it, to make keeping it clean much easier.

View attachment 94883


When applying the Ceramic Boost the day after the coating (so the coating has time to cure), take your time to look for any missed coating residue, and remove it by wiping with the Ceramic Boost, and buffing with a clean plush towel.

Do not over-apply the Ceramic Boost, or you will have to spend extra time buffing out the streaks.

Unless your garage has a ton of lighting, then you are likely going to find some coating residue the first time you pull it out of the garage and into the sunlight. Try removing the residue or streaks with Ceramic Boost. If that does not work, try some Brilliant Glaze.

The dark bottles and dripper insert make it nearly impossible to keep track of how much coating is left in the bottle. Use a postal scale, or other small accurate scale, to measure the weight. The empty bottle weighs about 100g, and each ml of coating product weighs about a gram. You can either tare the scale with an empty bottle, or subtract 100g from the total weight, to approximate how much product is left.

View attachment 94884


To keep track of stock, I mark the bottle with the date it was received, and also how much product is remaining in the bottle.

View attachment 94885

I keep waiting for you to be my helper
 
OP
OP
TheWolf

TheWolf

Full Access Member
Joined
Nov 15, 2013
Posts
970
Reaction score
1,337
Location
Spokane, Washington
Bye-bye Kwazar...

I have been using a Kwazar sprayer with foaming tip for the last 3 or so years. I mainly use it as a pre-soak for bugs. It makes runny foam, somewhat similar to what a Foam Gun would make. When I tried using it for All Purpose Cleaner or Tire & Rubber Cleaner, it went through too much product way too fast.

Hello iK Foam Sprayer...

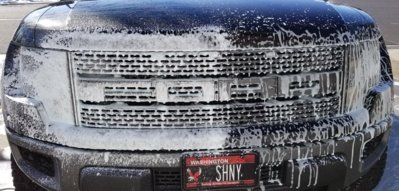
This little foaming sprayer makes nice, dry foam, very similar to a Foam Cannon. I used the purple tip for this first test, and the foam seem just right, not too dry, not too wet.

To compare the two, I did a side-by-side test on the grill. I put 4oz of the regular blue Car Wash Shampoo in each, with the rest of the bottle filled with cold water. Shook them real good, them pumped them up. The iK takes more pumps to get it to full pressure (about 25 pumps compared to 15 pumps on the Kwazar).

I sprayed the two sides at the same time. What a difference in the foam!
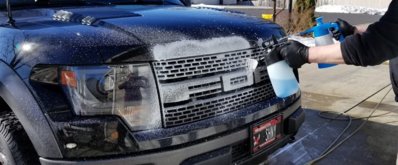
20180303_202325.jpg

20180303_202402.jpg


You can see that the iK makes thicker foam that clings longer. The Kwazar foam is wetter and runs off fast. The iK does not go through product as fast as the Kwazar. After testing it a few times on both the Raptor and the Explorer, the Kwazar was almost empty, and the iK was still half full.

I plan to pick up another iK Foam Sprayer to use with Tire & Rubber Cleaner, and maybe another for All Purpose Cleaner.

20180303_202325.jpg

20180303_202402.jpg
 

raisins

FRF Supporting Member
Supporting Member
Joined
Jan 30, 2017
Posts
273
Reaction score
135
Location
NJ
Ceramic Coating on Wheels

To provide better protection on the wheels, and to make cleaning easier, I applied Ceramic Paint Coating while the wheels were off the truck. Note that I actually coated these wheels last month, before Ceramic Wheel Coating was released, hence the use of the Ceramic Paint Coating. While the two products are very similar, the Paint Coating is rated at 7H hardness, so it is not quite as durable as the 9H rating on the Wheel Coating.

View attachment 83006


The coating kit comes with everything you need for the application.

I started with the backs of the wheels and the barrels. Using the new, clean towel included in the kit, I cleaned the surfaces with Coating Prep, to make sure all soap residue was removed. The coating needs a completely clean surface to properly adhere and provide the longest lasting protection.

When doing the backs, I was a little concerned about having coating drip around to the front of the wheel when being applied to the backs, so I applied with the wheels vertical, so I could immediately wipe any excess from the front before it dried.

View attachment 83007


For applying to the fronts, I laid the wheels flat on the tables. I also used a Detailing Swab to apply the coating to the lug wells, being careful not to get coating on the conical nut seat.

View attachment 83008


Using the provided applicator pad, I applied the coating to half of the wheel, then wiped off surfaces with a clean towel when it started to get tacky. As shown in the product video, you may also be able to see the coating start to rainbow as it dries, indicating the time to start wiping. I then applied to the other half of the wheel.

I also prepped and applied coating to the painted lug nuts.

View attachment 83009


While the wheels were off, I prepped and coated the rear shocks.

View attachment 83010


After letting the coating cure for 24 hours, I then sprayed the wheels and shocks with Ceramic Boost and wiped down with a clean towel.

Dressed the tires with Tire Shine, then reinstalled them.

View attachment 83011


View attachment 83012


Now, the test of how the coating performs for making cleaning easier. This wheel has endured a full month of nasty winter weather, lots of snow and slush, and way too much deicer chemicals given the single digit temps this month.

View attachment 83013


This photo was taken twenty minutes after the above photo, after the wheel was pressure washed and then blown dry with the Blaster Sidekick. No soap or brushes were used, just pressure rinsed and blow dried.

View attachment 83014


You can see the wheel is not 100% clean, but the amount of crud that was removed with the rinse was more than I had previously seen last winter with just sealant on the wheels. I have also washed enough times during the winter to know that the deicer used on the streets is like glue, and is very hard to clean from the paint even with soap and a wash pad. I am certain that typical dust from driving during the non-winter months will rinse even cleaner with the ceramic coating on the wheels.


Looks awesome!
 
OP
OP
TheWolf

TheWolf

Full Access Member
Joined
Nov 15, 2013
Posts
970
Reaction score
1,337
Location
Spokane, Washington
Buy this shiny Gen1.


01.jpg02.jpg03.jpg04.jpg05.jpg
 
Top