OP
OP
KryptosXLayer2
Full Access Member
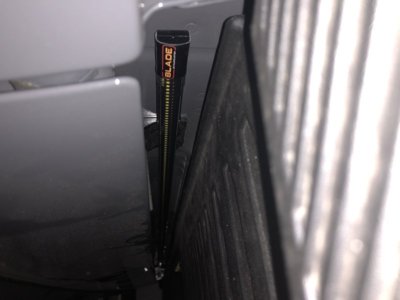
I received my Red Blade light bar and I am in process of installing it now. Some of you might hate me for saying it was plug and play and then receiving the poor instructions included with it from 1/25/17 which coincidentally is my birthday, go figure. I called Nick back at customer service (800-247-3974, Nick - Ext 300 in case you have any questions I've not mentioned after this) and he gave me a better set of instructions I've amended a little and provided below plus a video Putco did for the 2018 F-150. All the other videos are for 2015's and they don't have LED tail lights, trailer detection, or a tailgate step bar guide, so this helps with everything except the last part, so I'm going to explain what I did about the step bar guide in a moment:
Basically follow that video and this below to match up wires for the Raptor. We can't plug and play with the bars that were JUST sent but I was told that maybe in another batch, they will have a Y-harness and that will allow them to be installed directly by plugging in to the 4-pin harness, no splicing required. This is what Nick expected these new bars to be, but said the wiring looked identical to the regular (yellow) Blade light bar, and that's a shame.
Here's the instructions Nick sent me via email:
If you'd prefer to see this in PDF form to print, it is located here (this is Nick's document from Putco, just amended to remove details about the Super Duty that doesn't apply to us and is just confusing).
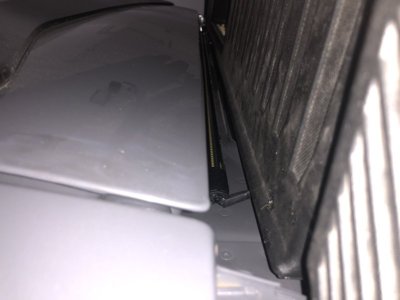
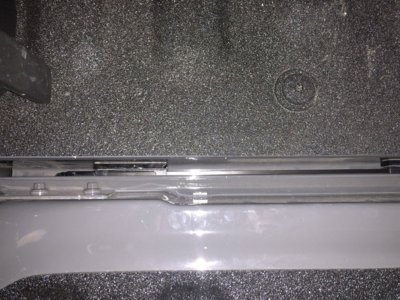
Regarding the tailgate step bar guide, you know what, I've beat my head against the wall thinking about this for so many months, I'm just going to remove it and hopefully it won't shift while I'm using it. I haven't finished the installation yet and tried the step but when I do I'll edit this and tell you if there is any worry with it off, but I was told by Nick that it only helps prevent the tailgate from moving like 1/16" while you are using the step, and if that's the case, I'll just remember not to use it while I'm actually tailgating and drinking, but likely won't notice any movement if that's the case anyways!
Hope this helps, sorry for getting anyone to think it would be a simpler install than it is if you received one of the early shipments and hopefully those who order later will have an easier time installing, good luck and enjoy it!
Basically follow that video and this below to match up wires for the Raptor. We can't plug and play with the bars that were JUST sent but I was told that maybe in another batch, they will have a Y-harness and that will allow them to be installed directly by plugging in to the 4-pin harness, no splicing required. This is what Nick expected these new bars to be, but said the wiring looked identical to the regular (yellow) Blade light bar, and that's a shame.
Here's the instructions Nick sent me via email:
Please follow these directions on the Blade installations of the 2015+ F150s
Begin installation by cutting the supplied 4-pin plug from all wires on the light bar. Follow wiring option 3 of cutting the red power wire with the heat shrink sleeve. Cut the red wire 3” from the driver box. Use supplied heat shrink sleeve to enclose the end of the short wire that you just cut. Pull the other end of red wire that was cut out of the wiring harness sleeve. You will notice that the wire will be connected to the other red wire that comes out of the driver box. This will be the power wire that will supply the power to the light bar.
7-Pin Trailer Harness
Attach the red power wire from the light bar to the orange wire in your 7-pin trailer harness. Attach the black ground wire (with in-line fuse) to the larger white wire in the 7-pin trailer harness.
Driver’s Side Tail Lamp
Run yellow, brown, and white wires from the light bar into the opening behind the driver’s side tail lamp. Connect the wires from the light bar to their respective wires in the factory wiring harness.
Passenger Side Tail Lamp
Run the green wire from the light bar into the opening of the passenger side tail lamp. You may need to extend this wire in order to reach to the passenger side tail lamp. Connect the green wire to the respective wire in the factory harness.
Under Dash Bridge Wire
Cut a 6” piece of wire for the bridge wire underneath the driver’s dash. Follow the ‘Additional Wiring Instructions’ on the instruction sheet for the bridge wire installation
Once installation is complete, verify that all light bar functions are working correctly.
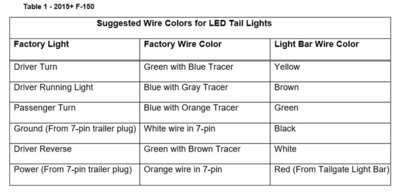
Table 1 - 2015+ F-150
(see attached image for table)
If you'd prefer to see this in PDF form to print, it is located here (this is Nick's document from Putco, just amended to remove details about the Super Duty that doesn't apply to us and is just confusing).
Regarding the tailgate step bar guide, you know what, I've beat my head against the wall thinking about this for so many months, I'm just going to remove it and hopefully it won't shift while I'm using it. I haven't finished the installation yet and tried the step but when I do I'll edit this and tell you if there is any worry with it off, but I was told by Nick that it only helps prevent the tailgate from moving like 1/16" while you are using the step, and if that's the case, I'll just remember not to use it while I'm actually tailgating and drinking, but likely won't notice any movement if that's the case anyways!
Hope this helps, sorry for getting anyone to think it would be a simpler install than it is if you received one of the early shipments and hopefully those who order later will have an easier time installing, good luck and enjoy it!