Stainless Works Exhaust Installation

Disclaimer: Links on this page pointing to Amazon, eBay and other sites may include affiliate code. If you click them and make a purchase, we may earn a small commission.

live4flyng

Member
Joined
May 17, 2013
Posts
7
Reaction score
4
Location
CA
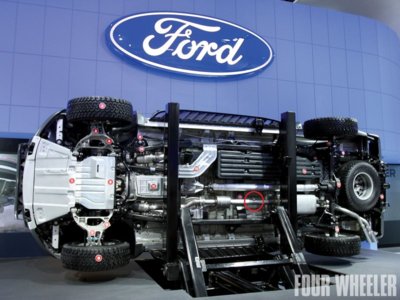
Since Stainless Works has no videos on how to install their Raptor Dual Exhaust System and very poorly written instructions.....As of today I can tell you how. This is for the SW 10-13 Raptor Dual Exhaust with Y. Part number is (FTRPT10CBY) It says factory connect Y-pipe. 3" system with dual turbo s-tube mufflers exit behind passenger rear tire.

Time: About 3 hours

Tools: 15mm Deep Well and normal sockets, 10mm socket, 3/8 ratchet, pry bar, hammer, boots to kick with, floor jack, 2 jack stands, a creeper and some patience.

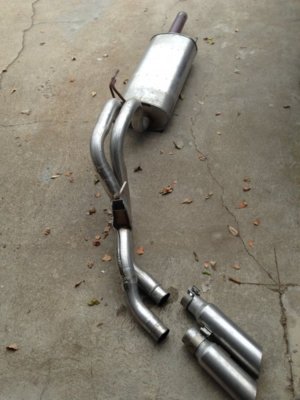
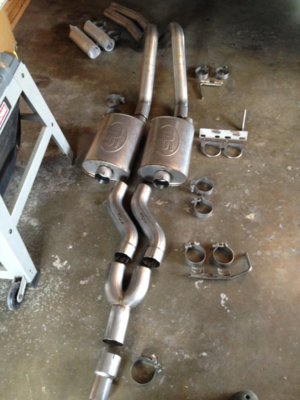
Step#1. Grab useless instructions supplied by SW and flip open to "bill of material. Lay all parts out on the floor as shown and count every one of them. There should be 26 pieces, 27 if you include the useless installation instructions.
 

Attachments

  • IMG_0179.jpg
    IMG_0179.jpg
    54.9 KB · Views: 120
Last edited:
OP
OP
L

live4flyng

Member
Joined
May 17, 2013
Posts
7
Reaction score
4
Location
CA
Step#2. Remove old exhaust system.

Begin by removing the exhaust tips, this will make your life easier when you have to rotate the exhaust above the rear end.

Next loosen the clamp aft of the resonator. (NOTE): This system connects aft of the resonator, not aft of the Y connection like their step #4 of their instructions say.

Then you have a choice, you can either leave the hanger mounts installed on the frame of the truck, or you can unbolt all 3 of them and remove them after the exhaust is on the ground. Since I did this by myself, I unbolted them from the frame (10mm socket) and easily remounted them after the exhaust was removed. Also, this allowed me to wiggle the exhaust free from the resonator connection without excessive force. There is much more room to work with when the exhaust is gone.
 

Attachments

  • Ford Raptor Undercarriage.jpg
    Ford Raptor Undercarriage.jpg
    104.2 KB · Views: 264
  • IMG_0174.jpg
    IMG_0174.jpg
    45.2 KB · Views: 135
Last edited:
OP
OP
L

live4flyng

Member
Joined
May 17, 2013
Posts
7
Reaction score
4
Location
CA
Step #2 Continued

Here is what it looks like aft of the resonator with the exhaust removed. And one more of it on the ground. It's a heavy muffler, that's for sure. Also, I jacked up the rear end and put a jack stand under the frame on the right side as you can see in the picture. The left wheel remained on the ground. I also place a jack stand under the frame below the passer floor so I had room to rotate the old exhaust system during removal. It takes a little more effort if you don't have a lift.
 

Attachments

  • IMG_0177.jpg
    IMG_0177.jpg
    50.6 KB · Views: 115
  • IMG_0176.jpg
    IMG_0176.jpg
    56.4 KB · Views: 103
  • IMG_0178.jpg
    IMG_0178.jpg
    83.4 KB · Views: 123
Last edited:
OP
OP
L

live4flyng

Member
Joined
May 17, 2013
Posts
7
Reaction score
4
Location
CA
Step #3

From this point on, the only thing of value in the SW instructions is the Bill Of Material page with the picture of the whole system. If you notice in the first picture below, there is a small 2.5-3" adapter at the beginning of system I laid out on the ground, you will not need this piece on the 6.2L.

Begin by sliding the next piece (Y-pipe) on to the resonator pipe. Make sure to put a clamp on the pipe before sliding it on, or you will need to take it off again. I used 2 clamps on this, the factory clamp was still attached and I used the supplied clamp directly behind it.

Next slide the muffler inlet pipes onto Y-pipe. Again, make sure to slide clamps on prior to sliding any pipe in place. You will also need to place the first hangar for the muffler inlets and slip the clamps over these. Also think about placement of clamp bolts when you slide them on so you can tighten them with ease after everything is together. Do not tighten down any clamps until everything (the whole system) is together and fitted the way you want it.
 

Attachments

  • IMG_0179.jpg
    IMG_0179.jpg
    54.9 KB · Views: 110
  • IMG_0180.jpg
    IMG_0180.jpg
    56.2 KB · Views: 109
  • IMG_0181.jpg
    IMG_0181.jpg
    64.2 KB · Views: 102
Last edited:
OP
OP
L

live4flyng

Member
Joined
May 17, 2013
Posts
7
Reaction score
4
Location
CA
Step#4

Slide mufflers on, don't forget the clamps. Then slide tail pipes onto mufflers with clamps. It's easiest to slide the tail pipes in from behind the axle and if you look close enough, they might even be labeled Left and Right. If not, the longer one is for the left and you can tell by looking once it's sitting in position.

The straight hangar with the saddle clamps goes on next. It's kind of a pain in the ass to tighten the bolts above, but it can be done. Above the axle is where the last hangar goes, similar to the first hangar with the clamps around the welded lips.

Check to make sure everything is fitted and the location of the tail pipes before tightening. You still have exhaust tips to put on so make sure the angle is correct before tightening all clamps.
 

Attachments

  • IMG_0182.jpg
    IMG_0182.jpg
    78.2 KB · Views: 99
  • IMG_0183.jpg
    IMG_0183.jpg
    43.4 KB · Views: 96
  • IMG_0184.jpg
    IMG_0184.jpg
    65.6 KB · Views: 91
  • IMG_0185.jpg
    IMG_0185.jpg
    35 KB · Views: 93
OP
OP
L

live4flyng

Member
Joined
May 17, 2013
Posts
7
Reaction score
4
Location
CA
Step#5

Tighten all clamps and make sure system is secure. Make sure all clamps on hangars are secure and installed correctly. Exhaust should be tight with very little movement when pushing on it.

Next, lower the truck and install the exhaust tips. Fire it up and take it for a test drive. I have a before and after videos so you can tell the difference in sound, but every time I try to upload them, it fails for some reason. I drove down the highway and didn't notice any drone. Might be because the resonator is still installed. Sounds mean when I get on it and has that muscle car rumble at idle. Overall I'm happy with it. I thought it was going to be louder after reading everything on here, but it's not bad.

If anyone can tell me how to upload the videos, I will post them here. I took them with an Iphone if it matters.
 
Last edited:
OP
OP
L

live4flyng

Member
Joined
May 17, 2013
Posts
7
Reaction score
4
Location
CA
it's clean because it only has 1000 miles on it. I don't do facebook, so I just created a Youtube account for the videos?

Oh, and I forgot to say that I was pleased that SW used the same size nuts for everything 15mm and the way the exhaust fit under the truck was better than the factory system.

Here are the Videos finally!

http://youtu.be/VYv_fedHQdM

http://youtu.be/ICAQCSq3AVM
 
Last edited:
Top