wiz1500
Full Access Member
- Joined
- Aug 24, 2011
- Posts
- 366
- Reaction score
- 464
Like the title says....WOW!!!!
What a great piece. This is one of the most inventive bumpers I have ever seen. The fact that it can be upgraded and reconfigured at will is just great engineering. I just love the fact that I can change the look and function of my trucks bumper at any time in an hour or 2. Then if a need (or want) to go back, I can easily do that. Plus the 2" 4130 Chromoly construction just makes the thing rock solid.
You can buy this bumper in 3 different configurations and each one of them is interchangeable. All tabs and holes for the different light options are already in the bumper.
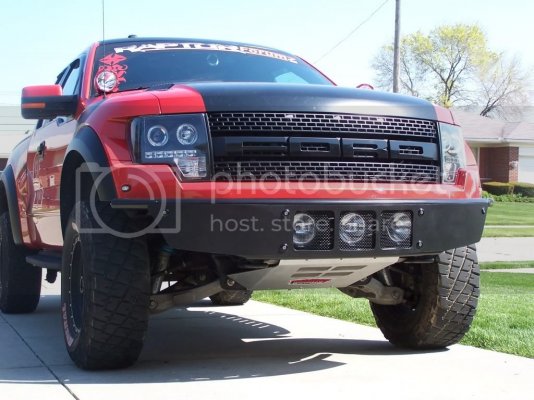
• This is the 3 H.I.D option. You can run any light you want up to a 6.7". This is so you can save money on your initial purchase by getting Halogens and upgrade later.
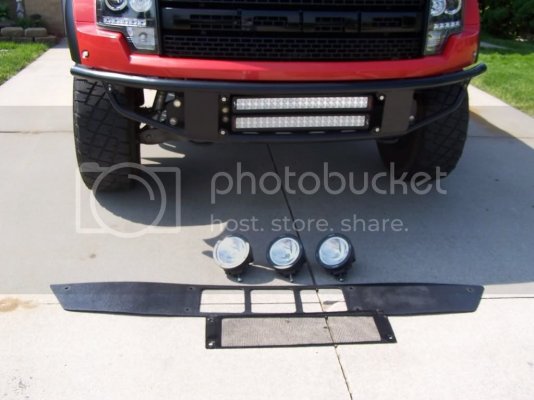
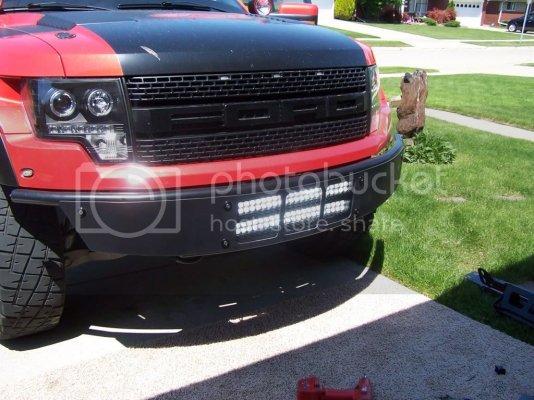
• Then if you want to go with the L.E.D (up to 24") lights you just pull the front cover off by removing 6 bolts and change the lights.(The wiring is even all the same. More on that in a min.)
If you decide that you want to put a ***** on the front of your truck, this bumper can accommodate you.
Simply call SDHQ and order the ***** kit.
• Installing this is straight forward. All mount holes, bolts and brackets are included. The bumper doesn't even have to come off. Just remove your skid plate and remove the inner bumper bolts.
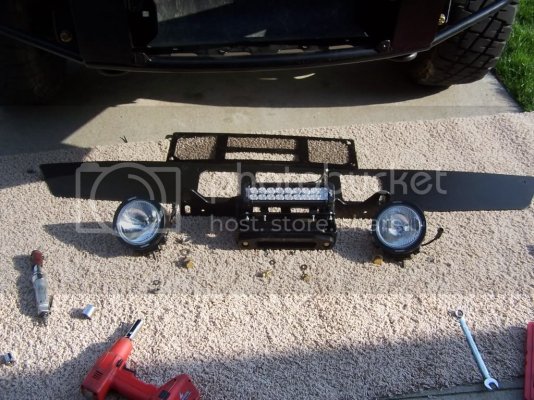
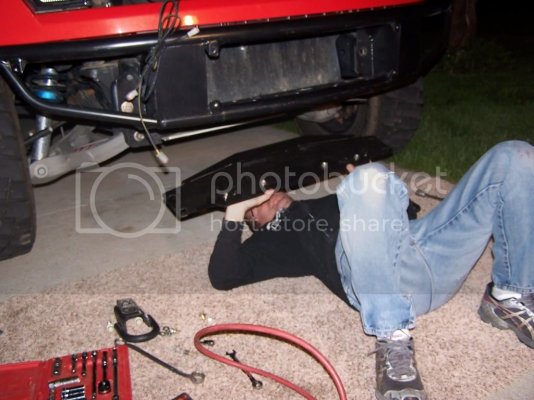
• Installing the winch plate from the bottom.
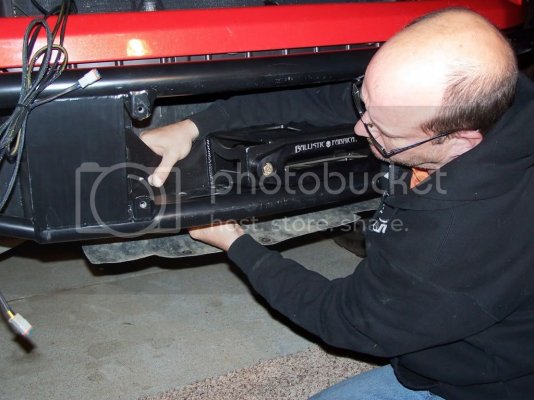
• Installing the farrel lead plate from the front.
• Put your lights back in. Tighten it all up and install your front cover and it's ready for you to use your *****.
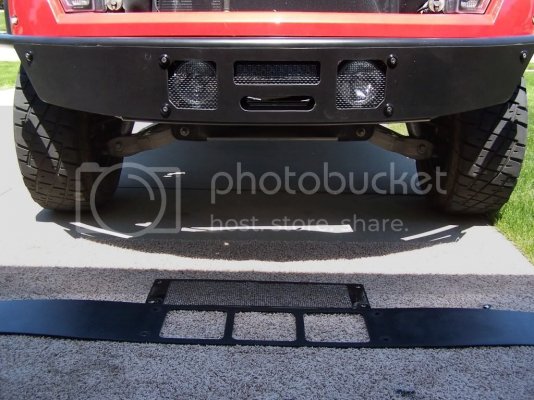
If you simply just order the ***** plate it will bolt in under all light package's and is a great platform for an air tank and/or compressor.
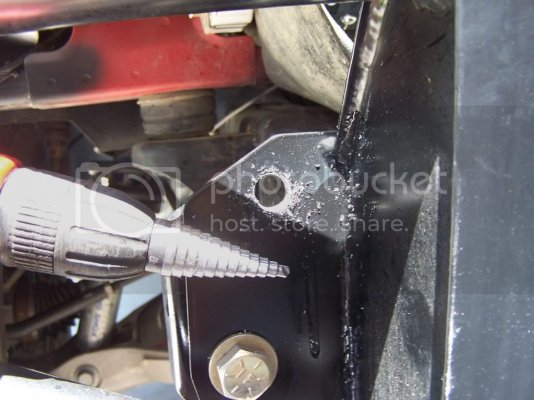
One thing I would recommend, is drilling the "Extra" holes in the stock bumper brackets to accommodate the extra bolts you are given. This will take the bolt count from 4 (stock) to 8. The SDHQ bracket and bumper have the previsions for bolts, all you need to do is drill through Ford’s bracket.
• After the bumper is installed and leveled you can keep the bumper in place and use it as a guide. The hole that needs to be drilled is green.
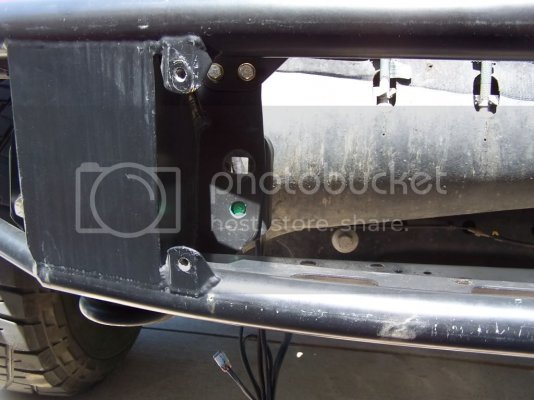
• Now most of us only own a 1/2" drill motor and our indexes only go to 1/2" anyway. The drilled hole needs to be 7/8". To get around this without getting into stepped drills and big drill motors just use a Uni-bit.
**I don't recommend using the Uni-bit right off the bat. Start with a small pilot hole, go up to the 1/2" drill, then use the uni-bit to "open" the hole. Since the metal is so thick, drilling with the Uni-bit is very hard on the bit and you will destroy it. Remember to use lubrication when drilling (WD-40 works well).
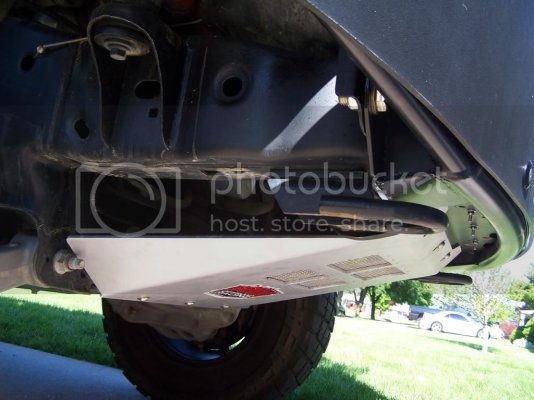
• Also this bumper and all it's configurations will accommodate the factory skid plate so right out of the gate you don't have to make that purchase. Then as money (and the wife) allows, you can upgrade into the stronger thicker SDHQ one.
Now to the wiring!
All the connectors on these lights are of the same weather tight type and are interchangeable. The bumper comes with a custom fit harness that is state of the art and a perfect fit for our trucks.
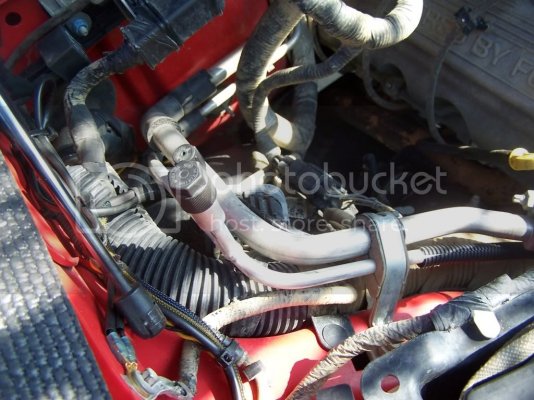
• The ground lead is run within this harness and exists right at the chassis ground under the hood up by the up-fitter switch wires.
• Pull one 10mm bolt and slip the ground eyelet under it and connect 2 wires to your switch wires. This is a life saver in itself. You are not running individual hot wires and ground while trying to tape them into a harness. This deal is factory looking and functioning.
• You can see the 2 small grounds in the left lower corner. All lights in the bumper share the same ground the second one is for my A-pillar lights.
• As you can see in this shot the harness is armored and has all the heat shrink tubing in place for you.
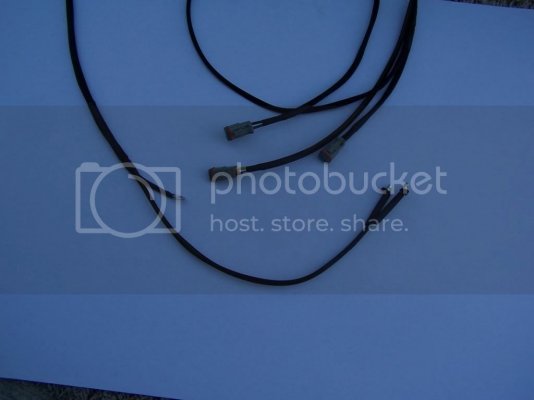
• Now there are 2 different harnesses available: one for the LED light package's which only comes with 2 light connectors. If your going to upgrade or change your lights to a 3 light system be sure you have the 3 connector harness from the start. This way you will not have to run any new wires ever.
• One last thing that is cool about this package, you don't have to run with the black plastic piece on the front. If you feeling like you want more of a pre-runner type look one day just take the 6 bolts out remove the face and stick the bolts and washers back in the holes and now you have an all tube bumper...Then when you want to hit the trail and have a little more protection up there just bolt the light screen and top plate back in....
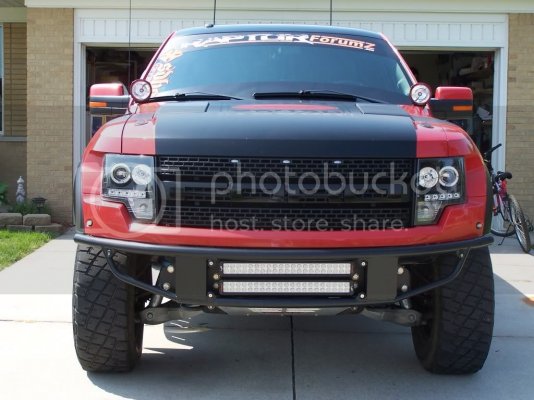
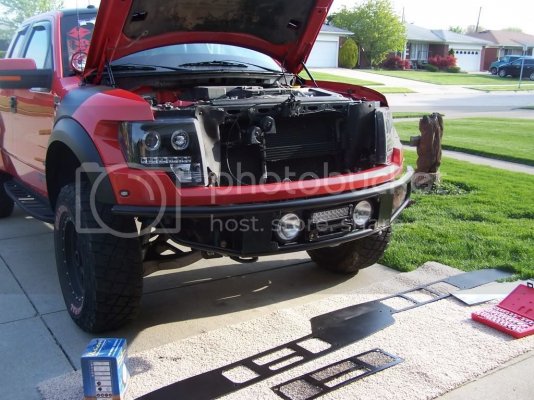
I think one of the funniest things I’ve been asked is from a race car acquaintance of mine who only see's the truck every so often. He asked me "How many damn bumpers do you own for that truck?" I laughed and explained it to him. He jokingly asked if they (SDHQ), made Mustang stuff (he knows they are a truck company). We laughed and agreed that some of these aftermarket company's need to get their act together and start thinking about their products.
There it is guy's! This bumper system has the WIZ stamp of approval! I just really couldn't be happier. This deal has everything I was looking for in a bumper. Durability, Cool Styling, Up Gradeable, Light Protection and I can change the whole look of the truck with 6 bolts.
Great job SDHQ and thanks for putting out a great product!
If anybody has any questions at all about this bumper please ask.
What a great piece. This is one of the most inventive bumpers I have ever seen. The fact that it can be upgraded and reconfigured at will is just great engineering. I just love the fact that I can change the look and function of my trucks bumper at any time in an hour or 2. Then if a need (or want) to go back, I can easily do that. Plus the 2" 4130 Chromoly construction just makes the thing rock solid.
You can buy this bumper in 3 different configurations and each one of them is interchangeable. All tabs and holes for the different light options are already in the bumper.
• This is the 3 H.I.D option. You can run any light you want up to a 6.7". This is so you can save money on your initial purchase by getting Halogens and upgrade later.

• Then if you want to go with the L.E.D (up to 24") lights you just pull the front cover off by removing 6 bolts and change the lights.(The wiring is even all the same. More on that in a min.)


If you decide that you want to put a ***** on the front of your truck, this bumper can accommodate you.
Simply call SDHQ and order the ***** kit.
• Installing this is straight forward. All mount holes, bolts and brackets are included. The bumper doesn't even have to come off. Just remove your skid plate and remove the inner bumper bolts.

• Installing the winch plate from the bottom.

• Installing the farrel lead plate from the front.

• Put your lights back in. Tighten it all up and install your front cover and it's ready for you to use your *****.

If you simply just order the ***** plate it will bolt in under all light package's and is a great platform for an air tank and/or compressor.
One thing I would recommend, is drilling the "Extra" holes in the stock bumper brackets to accommodate the extra bolts you are given. This will take the bolt count from 4 (stock) to 8. The SDHQ bracket and bumper have the previsions for bolts, all you need to do is drill through Ford’s bracket.
• After the bumper is installed and leveled you can keep the bumper in place and use it as a guide. The hole that needs to be drilled is green.

• Now most of us only own a 1/2" drill motor and our indexes only go to 1/2" anyway. The drilled hole needs to be 7/8". To get around this without getting into stepped drills and big drill motors just use a Uni-bit.
**I don't recommend using the Uni-bit right off the bat. Start with a small pilot hole, go up to the 1/2" drill, then use the uni-bit to "open" the hole. Since the metal is so thick, drilling with the Uni-bit is very hard on the bit and you will destroy it. Remember to use lubrication when drilling (WD-40 works well).

• Also this bumper and all it's configurations will accommodate the factory skid plate so right out of the gate you don't have to make that purchase. Then as money (and the wife) allows, you can upgrade into the stronger thicker SDHQ one.

Now to the wiring!
All the connectors on these lights are of the same weather tight type and are interchangeable. The bumper comes with a custom fit harness that is state of the art and a perfect fit for our trucks.
• The ground lead is run within this harness and exists right at the chassis ground under the hood up by the up-fitter switch wires.
• Pull one 10mm bolt and slip the ground eyelet under it and connect 2 wires to your switch wires. This is a life saver in itself. You are not running individual hot wires and ground while trying to tape them into a harness. This deal is factory looking and functioning.
• You can see the 2 small grounds in the left lower corner. All lights in the bumper share the same ground the second one is for my A-pillar lights.

• As you can see in this shot the harness is armored and has all the heat shrink tubing in place for you.

• Now there are 2 different harnesses available: one for the LED light package's which only comes with 2 light connectors. If your going to upgrade or change your lights to a 3 light system be sure you have the 3 connector harness from the start. This way you will not have to run any new wires ever.
• One last thing that is cool about this package, you don't have to run with the black plastic piece on the front. If you feeling like you want more of a pre-runner type look one day just take the 6 bolts out remove the face and stick the bolts and washers back in the holes and now you have an all tube bumper...Then when you want to hit the trail and have a little more protection up there just bolt the light screen and top plate back in....


I think one of the funniest things I’ve been asked is from a race car acquaintance of mine who only see's the truck every so often. He asked me "How many damn bumpers do you own for that truck?" I laughed and explained it to him. He jokingly asked if they (SDHQ), made Mustang stuff (he knows they are a truck company). We laughed and agreed that some of these aftermarket company's need to get their act together and start thinking about their products.
There it is guy's! This bumper system has the WIZ stamp of approval! I just really couldn't be happier. This deal has everything I was looking for in a bumper. Durability, Cool Styling, Up Gradeable, Light Protection and I can change the whole look of the truck with 6 bolts.
Great job SDHQ and thanks for putting out a great product!
If anybody has any questions at all about this bumper please ask.

