TheJoker
FRF Addict
What are Mid Flaps, and why do I need them?
Mid flaps are basically mud flaps which are located between the front and rear tires. They are critical for preventing debris impacts on the rear leafs, brakes, and especially your rear shocks. Replacement shocks can cost anywhere from $600 to well over $3k. Mid flaps are a low cost way of protecting your high cost investment.
Whether you never go off road or hit the trails every chance you can, Mid flaps will protect your vehicle. Anyone who has driven down a dirt road with the stock BFG’s knows how much debris is picked up and kicked out the rear by these tires. My first mod was mud flaps on the front wheel wells. Mid flaps are just as important and should be on everyone’s mod list.
Why not just buy some?
Mid flaps are available to buy, at around $300 a set. They bolt-on and are easily removable with a quick connect system. If you aren’t handy and you have plenty of fun-money then go ahead and buy a set, you will not be disappointed. But, if you enjoy doing things yourself, and like to work with your hands, or if you just hate to throw $300 out the window, then why not just make your own, like I did?
It is extremely easy to do (this is a 1 beer project, on a scale where writing this “how to“ is a 4 beer project), and you can customize them any way you choose. I first made some out of old WeatherTech floor liners, last September, they held up great, but, I just wanted something a little beefier. After finding an old mud flap on the side of the highway, I knew I had to “upgrade” my starter set.
Here is what you’ll need:
2 - Mid flaps, approximately 12”w x 14”h x 5/16” thick (I used an old mud flap from a semi which I found).
4 - ¼”-20 x 1” hex bolts
4 - ¼”-20 nuts
4 - ¼” lock washers
4 - ¼” fender washers (I used a scrap piece of steel from an old dovetail jig which I cut into 2 - 9.5” lengths. You could use angle iron here).
1 - Drill with appropriate bits (I used a step bit for most of the project).
2 - 7/16” wrenches /sockets
1 - Utility knife and/or sharp tin snips
1 - Can of black paint / bed coating / under coating.
Originally, this project cost me nothing, I used some old floor liners, hardware that I had on hand, and parts from an old broken dovetail jig. For this how-to, I bought some new hardware just to make it pretty, so I would say it cost me about 5 bucks and some of my time. I’ll let the pictures speak for themselves:
This is what I started with, an old dirty mud flap which I found on the side of the highway. You can get new ones on eBay or Amazon.
Photo bucket sucks!
This is after cleaning up the old mud flap and cutting it to size. A piece or cardboard cut to size works well as
Here you can see the existing holes in the frame, and the hole I had to drill in the running board
Everything is ready to be installed. Note the elongated mounting holes in the mid flaps to allow
These pics show how I attached them to the truck (drivers side):
Photo bucket sucks!
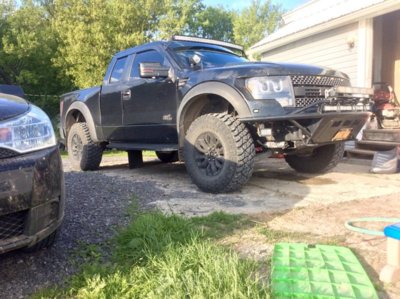
Sexy:
Some have said that the “manufactured” mid flaps whack the underside of the truck, and have even had to weigh them down to prevent this. I haven’t experienced any of this, either on my original set, or the latest version. Maybe because of the bar I used to clamp them down, or maybe it’s because I bolted them directly to the truck (no quick connect), I’m not sure?
The idea for this project started after I attended a “suspension seminar” at RK Motorsports aka: www.ratorkustomz.com, where the owner, Rory Koehler actually suggested making mid flaps out of old mud flaps. I also had help from @BIGt0007 who had already made some DIY mid flaps, as well as many other DIY projects for the Raptor. I also want to quote @Ruger who said: “This isn’t rocket surgery”. Thanks guys!
You can't see it in the pictures, but this mud flap was "Made In The USA". I also plan to make paddles for my snowthrower's auger with the left over rubber, and a wind chime out of the old rusty metal, left over from the mud flap. Hows that for yankee ingenuity?
Mid flaps are basically mud flaps which are located between the front and rear tires. They are critical for preventing debris impacts on the rear leafs, brakes, and especially your rear shocks. Replacement shocks can cost anywhere from $600 to well over $3k. Mid flaps are a low cost way of protecting your high cost investment.
Whether you never go off road or hit the trails every chance you can, Mid flaps will protect your vehicle. Anyone who has driven down a dirt road with the stock BFG’s knows how much debris is picked up and kicked out the rear by these tires. My first mod was mud flaps on the front wheel wells. Mid flaps are just as important and should be on everyone’s mod list.
Why not just buy some?
Mid flaps are available to buy, at around $300 a set. They bolt-on and are easily removable with a quick connect system. If you aren’t handy and you have plenty of fun-money then go ahead and buy a set, you will not be disappointed. But, if you enjoy doing things yourself, and like to work with your hands, or if you just hate to throw $300 out the window, then why not just make your own, like I did?
It is extremely easy to do (this is a 1 beer project, on a scale where writing this “how to“ is a 4 beer project), and you can customize them any way you choose. I first made some out of old WeatherTech floor liners, last September, they held up great, but, I just wanted something a little beefier. After finding an old mud flap on the side of the highway, I knew I had to “upgrade” my starter set.
Here is what you’ll need:
2 - Mid flaps, approximately 12”w x 14”h x 5/16” thick (I used an old mud flap from a semi which I found).
4 - ¼”-20 x 1” hex bolts
4 - ¼”-20 nuts
4 - ¼” lock washers
4 - ¼” fender washers (I used a scrap piece of steel from an old dovetail jig which I cut into 2 - 9.5” lengths. You could use angle iron here).
1 - Drill with appropriate bits (I used a step bit for most of the project).
2 - 7/16” wrenches /sockets
1 - Utility knife and/or sharp tin snips
1 - Can of black paint / bed coating / under coating.
Originally, this project cost me nothing, I used some old floor liners, hardware that I had on hand, and parts from an old broken dovetail jig. For this how-to, I bought some new hardware just to make it pretty, so I would say it cost me about 5 bucks and some of my time. I’ll let the pictures speak for themselves:
This is what I started with, an old dirty mud flap which I found on the side of the highway. You can get new ones on eBay or Amazon.
Photo bucket sucks!
This is after cleaning up the old mud flap and cutting it to size. A piece or cardboard cut to size works well as
Here you can see the existing holes in the frame, and the hole I had to drill in the running board
Everything is ready to be installed. Note the elongated mounting holes in the mid flaps to allow
These pics show how I attached them to the truck (drivers side):
Photo bucket sucks!
Sexy:
Some have said that the “manufactured” mid flaps whack the underside of the truck, and have even had to weigh them down to prevent this. I haven’t experienced any of this, either on my original set, or the latest version. Maybe because of the bar I used to clamp them down, or maybe it’s because I bolted them directly to the truck (no quick connect), I’m not sure?
The idea for this project started after I attended a “suspension seminar” at RK Motorsports aka: www.ratorkustomz.com, where the owner, Rory Koehler actually suggested making mid flaps out of old mud flaps. I also had help from @BIGt0007 who had already made some DIY mid flaps, as well as many other DIY projects for the Raptor. I also want to quote @Ruger who said: “This isn’t rocket surgery”. Thanks guys!
You can't see it in the pictures, but this mud flap was "Made In The USA".
I also plan to make paddles for my snowthrower's auger with the left over rubber, and a wind chime out of the old rusty metal, left over from the mud flap. Hows that for yankee ingenuity?
Last edited: