Need Idea for RPG Light Rack Mod

Disclaimer: Links on this page pointing to Amazon, eBay and other sites may include affiliate code. If you click them and make a purchase, we may earn a small commission.

RaptorScrew

FRF Addict
Joined
Mar 12, 2011
Posts
3,213
Reaction score
1,903
Location
Oronoco, MN
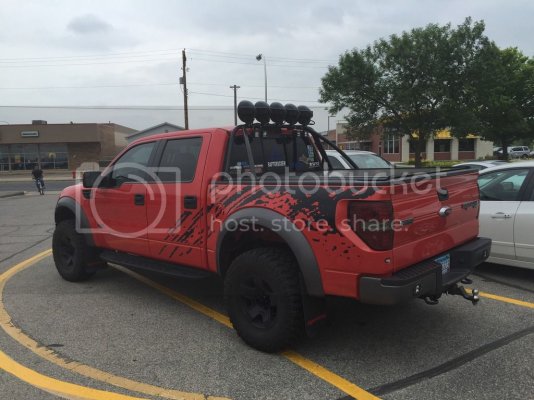
I purchased this setup from a member here on the forum and love the overall setup! No questions!
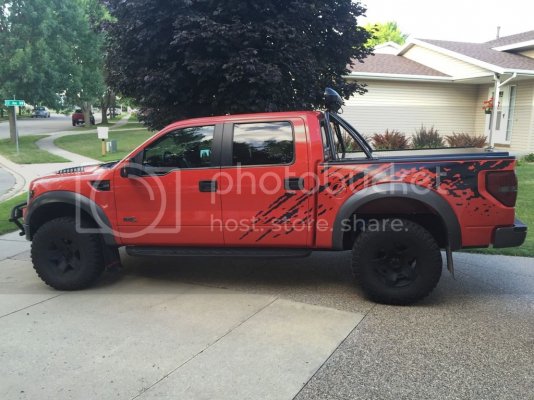
IMG_0354_zps781kkz2h.jpg

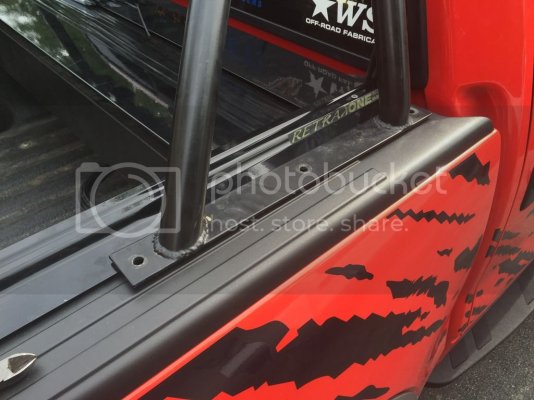
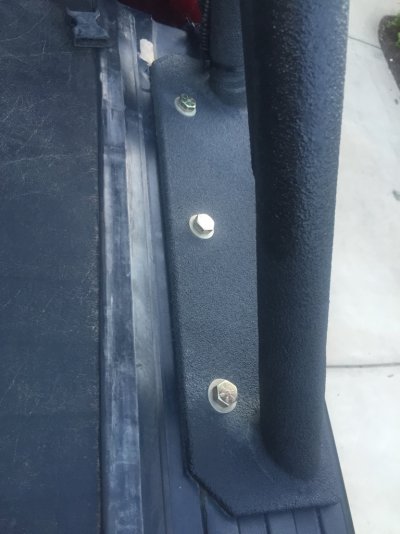
The Support plates sit on the inside of the fender and are not accessible from the inside of the bed. @Kmandoske and I bolted on raw steel shims to the rack. The shims go UNDER the Retrax One. There are two bolts holding the Retrax to the Shim to the Bed Rail.

There are there upside down bolts holding the rack supports onto the shims. The whole setup was used to get the rack back to Rochester, MN from Keith's place.

I'm looking for something that isn't "Thrown together" and doesn't look cobbled.

I've touched base with Jimmy @WSI to get his thoughts. I'm wanting definitely a more professional look to it. I'd have to weld a new shim to the bottom of the rack and then have than tuck under the Retrax (which I'm trying to keep also).

Any thoughts would be greatly appreciated.

Rick
IMG_0326_zps6pqauvrw.jpg

IMG_0308_zpsbmrinhk2.jpg
 
Last edited:
D

Deleted member 12951

Guest
I cannot suggest anything positive about how WSI mounts their rack the bed. I had Jimmy install mine (his rack) and the bolts kept coming loose and the support plate finally broke due to the design.

I redesigned it from help of another vendor on the forum and paid a welder to install a thicker support plate all the way across like the RPG one. I mounted it and it is so much better and the bolts so far have never came loose, thing is solid now.

I am not understanding what you are describing on your setup but I can take pictures of mine so you can see what I did, if you think that might help you?
 
D

Deleted member 12951

Guest
Here are some pics. I replace the hardware also with grade 8 instead of what WSI used. The concept is the same though with a wing nut first then a nylon nut.

095b468bf16fda59d5f6a7f6c6d99b2b.jpg

dd8647ad51d6d1481b467fd3aa4d8273.jpg

64a46a99f55dbfb85696316205e0e111.jpg
 
OP
OP
RaptorScrew

RaptorScrew

FRF Addict
Joined
Mar 12, 2011
Posts
3,213
Reaction score
1,903
Location
Oronoco, MN
That's exactly what I'm looking to do.

My question is: why the Wing nut AND nylon nut?

Also, what bed cover are you using? Can you post a full picture of the bed with the cover open AND closed?

Thanks in advance~~!
 
D

Deleted member 12951

Guest
That's exactly what I'm looking to do.

My question is: why the Wing nut AND nylon nut?

Also, what bed cover are you using? Can you post a full picture of the bed with the cover open AND closed?

Thanks in advance~~!


That is how Jimmy did it and I also was like, Why?

So when I redid it, did it first without the wing nut but it was loose. The wing nut gets into the tight area, especially the one closet to the front and makes everything tight. No washer on the underside as it won't work.

Bed cover is the BAK RollX
 
OP
OP
RaptorScrew

RaptorScrew

FRF Addict
Joined
Mar 12, 2011
Posts
3,213
Reaction score
1,903
Location
Oronoco, MN
That is how Jimmy did it and I also was like, Why?

So when I redid it, did it first without the wing nut but it was loose. The wing nut gets into the tight area, especially the one closet to the front and makes everything tight. No washer on the underside as it won't work.

Bed cover is the BAK RollX

Thanx, I like how your cover does NOT have the 3" lip on the side of it. It looks much more stream line.

My question is: Can you lock the cover in ANY position you decide? Or are there specified positions in which the cover must be located?

Thanx
Rick
 
D

Deleted member 12951

Guest
Thanx, I like how your cover does NOT have the 3" lip on the side of it. It looks much more stream line.


My question is: Can you lock the cover in ANY position you decide? Or are there specified positions in which the cover must be located?


Thanx

Rick


Only "locks" when fully closed. It rolls up like a soft cover. The roll is too big to get past the light rack so I have to flatten the roll to get it past it then lift it up and finish rolling it up. Then the straps holds it in place.
 
OP
OP
RaptorScrew

RaptorScrew

FRF Addict
Joined
Mar 12, 2011
Posts
3,213
Reaction score
1,903
Location
Oronoco, MN
Thanx for the info...


Now to figure out how to meld my light rack to my current Retrax One with this light rack... But at least you've given me pictures to show my fabricator what it is i'm looking for...


Thanx again...
Rick
 

Snoopaloop

Full Access Member
Joined
Aug 29, 2014
Posts
125
Reaction score
87
Location
Chicago 'burbs and Houghton MI
I'm not too sure if this would work but here goes...

Since the rack will always overlap the cover rails no matter the orientation of the rack, could you machine a pocket into the rails of the cover? Basically remove the material on the rails that is preventing the rack from sitting on the plastic.

2 things I could think of that would stop you though...
1: Will cutting the rail defeat the weatherproof seal on the bed rails?
2: Since you already drilled holes to anchor the outrigger plate, I would question the strength of a hole drilled close to the existing hole since it is sheet metal and would already be weakened by the existing hole.

I don't know about you but I wouldn't want my bed rails looking like Swiss cheese!
 
OP
OP
RaptorScrew

RaptorScrew

FRF Addict
Joined
Mar 12, 2011
Posts
3,213
Reaction score
1,903
Location
Oronoco, MN
I am slowly figuring this out. Based on @RDFTS photo I'm going to have the rack cut right at the weld and place a wider base plate on there. This will drop the height of the rack by 1/2" or so. I do have enough thread left on the base of the lamps that I can insert a 1/2 shim/spacer to raise the lamps back to current height.

I will mark and use the existing holes that I've already made if at all possible.

64a46a99f55dbfb85696316205e0e111.jpg
 
Top