KaiserM715
Kaiser Söze
I have been on the lookout for a front bumper for a very long time. I wanted improved durability and increased approach angle. This bumper caught my eye when it first came out:
http://www.fordraptorforum.com/f11/mystery-bumper-4980/
I got a chance to see it first-hand at TRR last year on Baja Jones’ truck. The things I really like about this bumper are that it is a simpler design, offers the best approach angle for no-cut bumpers and has integrated tow points. Maintaining front tow points was something that was important to me. In addition, I like how tucked up the skid plate is and that it wraps up towards the frame (refer to side view pic below).
I finally got a chance to pull the trigger and order it. I ordered it with the skid, powder coat (Dale at LGE suggested a light textured powder coat and it came out great) and mounts / tabs for my lights.
http://www.fordraptorforum.com/f184/baja-raptor-front-bumper-lge*cts-motorsports-19294/
Exterior : Baja Raptor Front Bumper | LGE*CTS Motorsports home of L&G Enterprises and Custom Truck Shop
Once it came in, I was amazed at how well it was packed. The bumper and skid plate were in a custom built wooden crate and strapped down on the inside. I have seen a couple of posts about guys receiving bent up bumpers, but that was not even possible in this case.
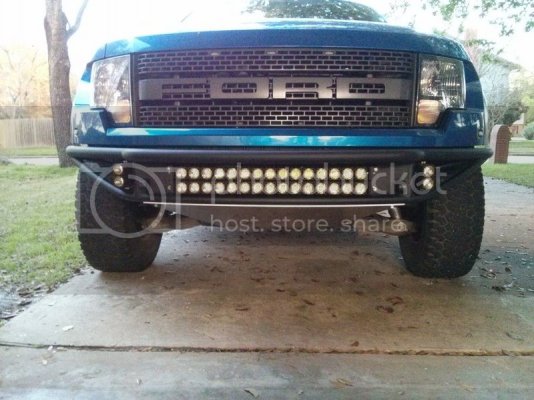
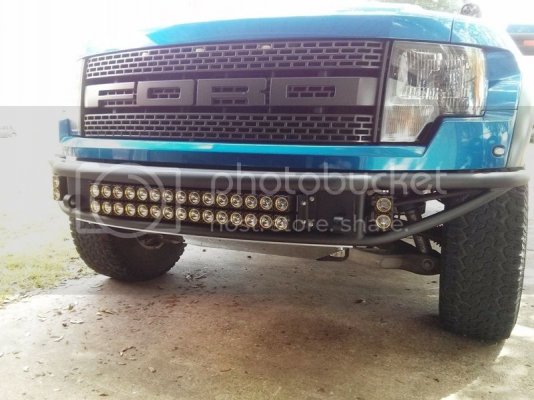
I installed the lights (covered in another thread linked below) and had a buddy come over and mock it up. I marked the holes in the body mount structure for the side supports. We took the bumper back off and then I drilled the holes.
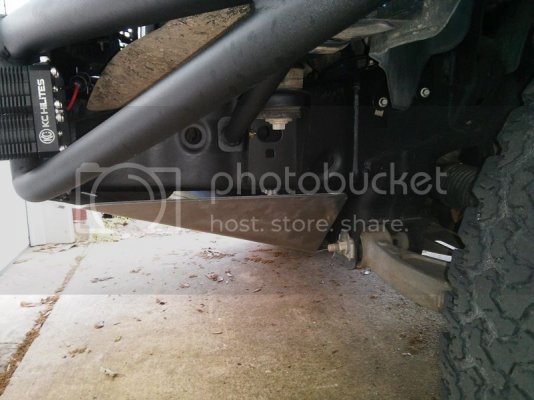
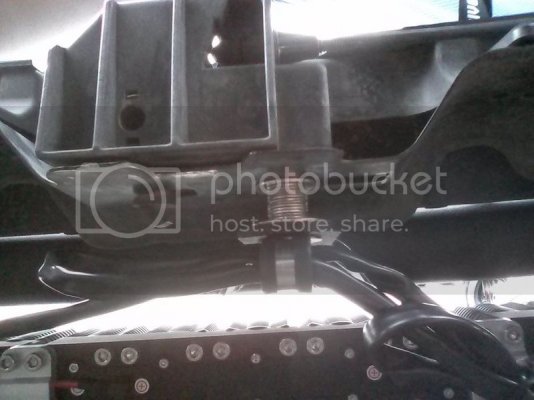
Then we remounted the bumper for the final time. I took my time getting it all lined up to my liking. The next step was to remove the valence support brace, which also has the mount for the hood release. I mounted it using a long bolt and a stack of washers to the bracket on the bumper. This will prevent the “smiley face” that the valence can turn into without support.
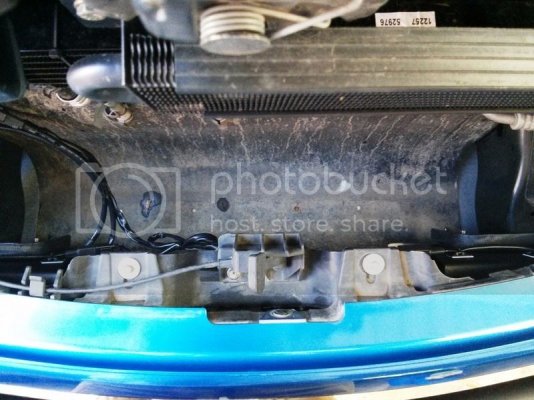
Here is a pic from the inside looking out. I put a stack of washers in between the tab on the bumper and the valance support.
The last step was to mount some zip-tie pads with double sided tape to secure the radiator skirt with zip-ties. This skirt (refer to pic above) normally attaches to the back side of the stock bumper using christmas tree connectors.
The only thing I have left to do, is work something out for the front license plate (supposed to have one in Texas).
Light install thread: www.fordraptorforum.com/f81/kc-hilites-flex-led-install-41816/
http://www.fordraptorforum.com/f11/mystery-bumper-4980/
I got a chance to see it first-hand at TRR last year on Baja Jones’ truck. The things I really like about this bumper are that it is a simpler design, offers the best approach angle for no-cut bumpers and has integrated tow points. Maintaining front tow points was something that was important to me. In addition, I like how tucked up the skid plate is and that it wraps up towards the frame (refer to side view pic below).
I finally got a chance to pull the trigger and order it. I ordered it with the skid, powder coat (Dale at LGE suggested a light textured powder coat and it came out great) and mounts / tabs for my lights.
http://www.fordraptorforum.com/f184/baja-raptor-front-bumper-lge*cts-motorsports-19294/
Exterior : Baja Raptor Front Bumper | LGE*CTS Motorsports home of L&G Enterprises and Custom Truck Shop
Once it came in, I was amazed at how well it was packed. The bumper and skid plate were in a custom built wooden crate and strapped down on the inside. I have seen a couple of posts about guys receiving bent up bumpers, but that was not even possible in this case.


I installed the lights (covered in another thread linked below) and had a buddy come over and mock it up. I marked the holes in the body mount structure for the side supports. We took the bumper back off and then I drilled the holes.

Then we remounted the bumper for the final time. I took my time getting it all lined up to my liking. The next step was to remove the valence support brace, which also has the mount for the hood release. I mounted it using a long bolt and a stack of washers to the bracket on the bumper. This will prevent the “smiley face” that the valence can turn into without support.

Here is a pic from the inside looking out. I put a stack of washers in between the tab on the bumper and the valance support.

The last step was to mount some zip-tie pads with double sided tape to secure the radiator skirt with zip-ties. This skirt (refer to pic above) normally attaches to the back side of the stock bumper using christmas tree connectors.
The only thing I have left to do, is work something out for the front license plate (supposed to have one in Texas).
Light install thread: www.fordraptorforum.com/f81/kc-hilites-flex-led-install-41816/
Last edited:


