Shitizen Kane
Member
- Joined
- Jan 7, 2017
- Posts
- 2
- Reaction score
- 2
Hi everyone, I'm new to the forum and thought I'd introduce myself with a potentially useful post. Quick background, my truck is a 5.0 FX4 with long travel. But this little mod will work the same on a Raptor.
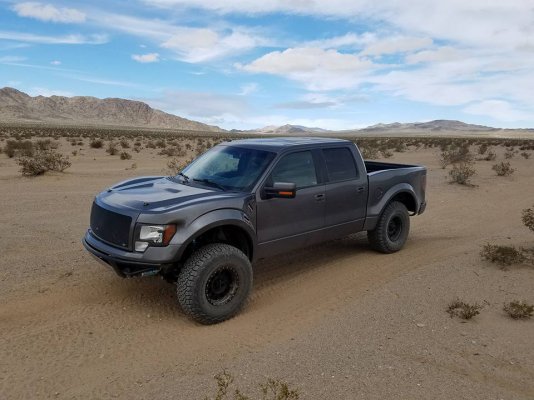
I hesitated for a long time over the options to carry a full-size (37X12.5R17) spare. I didn't like the bed-mount racks, because I like to sleep in my truck bed when camping. And I didn't like the Tiregate at first because I would lose my backup camera, which I need (I live in LA and have to squeeze between cross-eyed Prius drivers on a daily basis). So I solved my problem by coming up with this simple mod that reuses the OEM camera and only requires one unique part.
Parts List:
-6061 Aluminum U-Channel Mcmaster PN 1630T32
-4x #10 X .75L screws*
-8x #10 washers
-4x #10 nuts
-2x #10 X .25L aluminum spacers
*I chose button head cap screws because they're low profile and will make it slightly harder for a thief to remove the $200 camera.
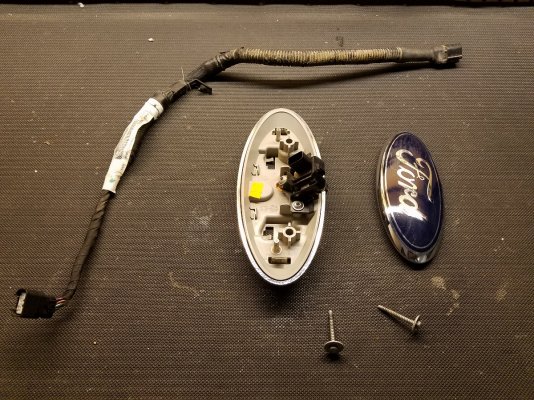
Step 1: Remove OEM Backup Camera. First pry off the Ford emblem. This is easy to do with just your fingers, but be warned you WILL break the plastic tabs that hold it on. Then unscrew the two bolts holding the chrome emblem mount onto the tailgate and remove the entire assembly from the tailgate, including the camera wire harness, which will be reused. Then unscrew the 3 bolts holding the camera onto the emblem mount, and the camera is free.
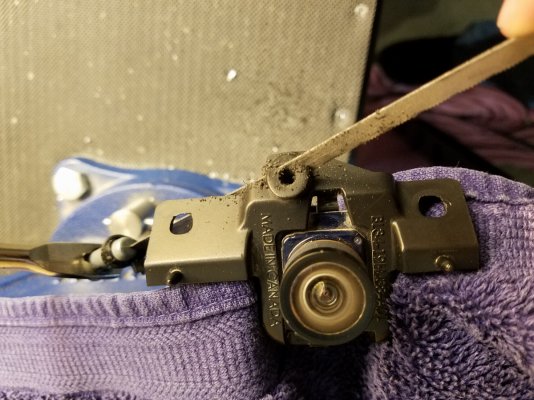
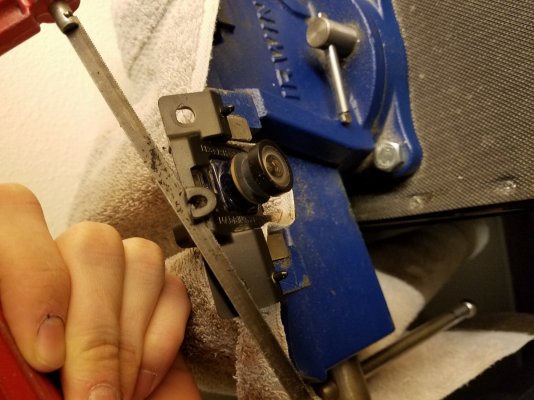
Step 2: Modify the OEM Camera. Some material needs to be removed from the camera's ABS bracket. Two easy cuts, see images below.
Step 3: Cut Bracket out of U-Channel. The pattern is straightforward. A table saw and drill press would save time here, but I did it with hand tools because I'm stupid.
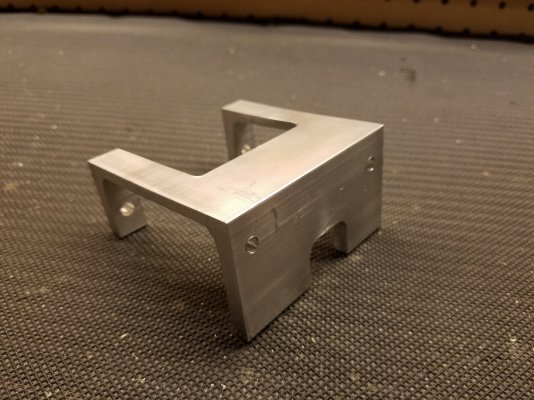
Step 4: Drill mounting holes in truck bed. I used the bracket itself as a stencil, and drilled holes with a slightly greater diameter than the screws so I had some wiggle room to level the bracket. I recommend a test fit at this point.
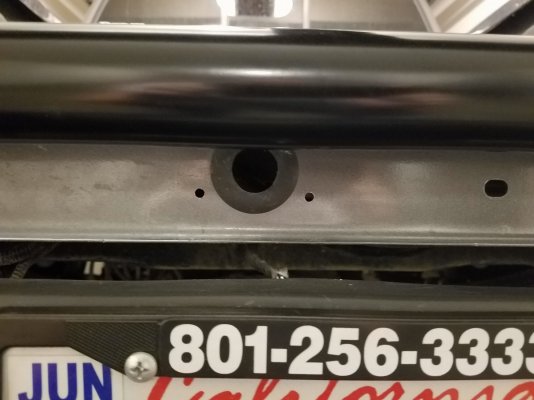
Step 5 (Optional): Primer & Paint. I used one spray coat of Rust-Oleum primer and 2 spray coats of Rust-Oleum satin black.
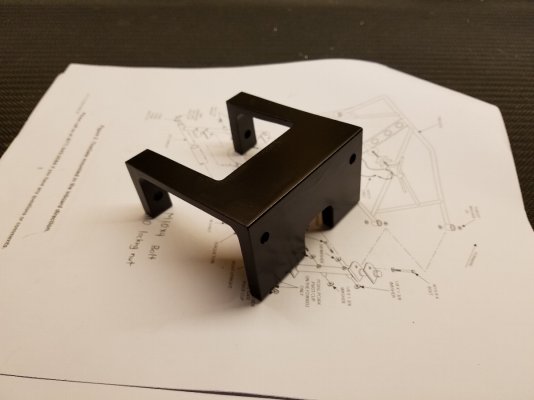
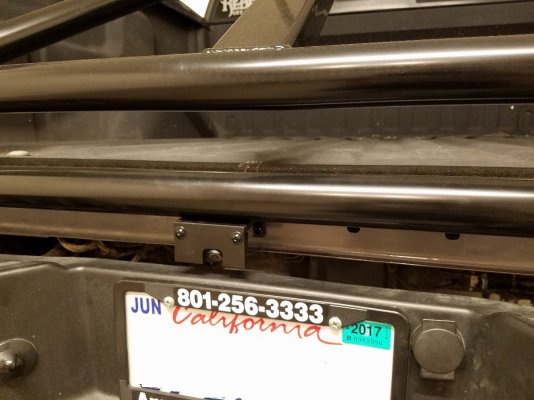
Step 6: Mounting. I mounted the camera to the bracket like this: Screw, washer, bracket, spacer, washer, camera, washer, nut. I ended up cutting/grinding the spacers down to about .09" to get the camera to stick out of the bracket a little more.
Then connect the wiring harness and mount the whole thing to the truck bed like this: screw, washer, bracket, truck bed, washer, nut. Then I used a small brush to paint over the mounting hardware so the whole thing is satin black.
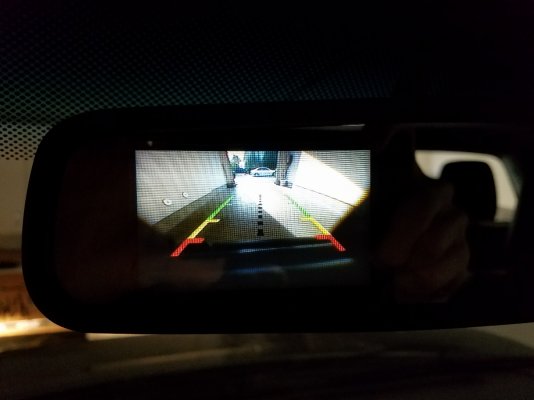
The end result is sturdy, looks clean and professional, and gives the backup camera a decent field-of-view.
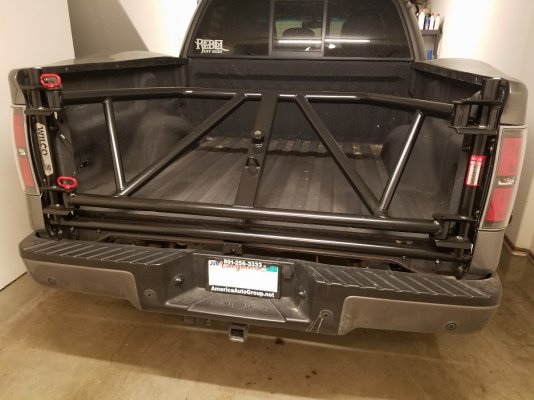

I hesitated for a long time over the options to carry a full-size (37X12.5R17) spare. I didn't like the bed-mount racks, because I like to sleep in my truck bed when camping. And I didn't like the Tiregate at first because I would lose my backup camera, which I need (I live in LA and have to squeeze between cross-eyed Prius drivers on a daily basis). So I solved my problem by coming up with this simple mod that reuses the OEM camera and only requires one unique part.
Parts List:
-6061 Aluminum U-Channel Mcmaster PN 1630T32
-4x #10 X .75L screws*
-8x #10 washers
-4x #10 nuts
-2x #10 X .25L aluminum spacers
*I chose button head cap screws because they're low profile and will make it slightly harder for a thief to remove the $200 camera.
Step 1: Remove OEM Backup Camera. First pry off the Ford emblem. This is easy to do with just your fingers, but be warned you WILL break the plastic tabs that hold it on. Then unscrew the two bolts holding the chrome emblem mount onto the tailgate and remove the entire assembly from the tailgate, including the camera wire harness, which will be reused. Then unscrew the 3 bolts holding the camera onto the emblem mount, and the camera is free.

Step 2: Modify the OEM Camera. Some material needs to be removed from the camera's ABS bracket. Two easy cuts, see images below.


Step 3: Cut Bracket out of U-Channel. The pattern is straightforward. A table saw and drill press would save time here, but I did it with hand tools because I'm stupid.

Step 4: Drill mounting holes in truck bed. I used the bracket itself as a stencil, and drilled holes with a slightly greater diameter than the screws so I had some wiggle room to level the bracket. I recommend a test fit at this point.

Step 5 (Optional): Primer & Paint. I used one spray coat of Rust-Oleum primer and 2 spray coats of Rust-Oleum satin black.

Step 6: Mounting. I mounted the camera to the bracket like this: Screw, washer, bracket, spacer, washer, camera, washer, nut. I ended up cutting/grinding the spacers down to about .09" to get the camera to stick out of the bracket a little more.
Then connect the wiring harness and mount the whole thing to the truck bed like this: screw, washer, bracket, truck bed, washer, nut. Then I used a small brush to paint over the mounting hardware so the whole thing is satin black.
The end result is sturdy, looks clean and professional, and gives the backup camera a decent field-of-view.


Last edited:

