I was very interested in doing this project as well. I researched the OEM parts and part numbers and found it to be close to $1000 for all pieces. You would need the LED plastic ring, top cup holder and bottom cup holder. Then up to you if you wanted to purchase the wiring harness or DIY.
For me I almost dropped my dip cup more than a couple of times trying to find the cup holder at night. My vision sucks at night and eventually I would have Copenhagen all over the place. For me this wasn't a question of if I was going to do it. What I came up with is this DIY solution and Ill try and explain as best as possible for those who are thing about doing this project at home.
What you will need:
1- EL wire
I found that the best diameter is 2.3mm and was able to purchase from Radio Shack for about $14.00. If you are going to purchase from ELwirepros or some place just make sure the length is 3 ft minimum. That length wraps around perfectly. I also tried thicker gauge EL wire but the space between the cup holder and the silver ring is small if you want the clips to attach inside the console.

2- 12v inverter
I tried a few of these and most are poop. They make whining noises and become pretty annoying during long drives. The best I have found is from electroluminescent which I purchased off eBay for $12.00. It has a rubbery seal at the bottom and is very very quiet. If you buy cheap then you get what you paid for. Some of these can cost as little as $3.00, but again… poop!

C- model glue and super glue
I used both but I have seen people use just super glue and it works just fine. The silicone was crap and didn't work for me in my trial and error.
First you want to pull you center console out. It lifts straight up and out. You can find many videos on YouTube if you research F150 center console removal. Next pull it all apart. Me personally I took it ALLLLLL apart and cleaned it. Lots of coffee and junk gets caked up in there.
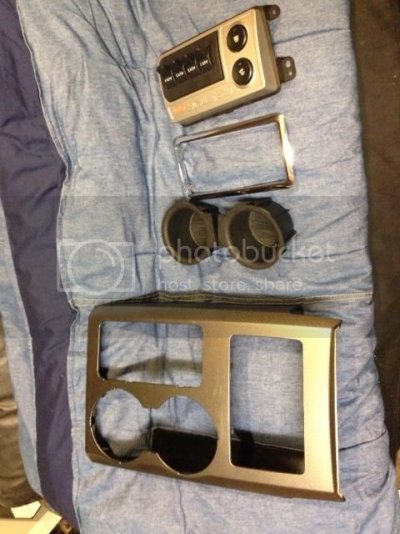
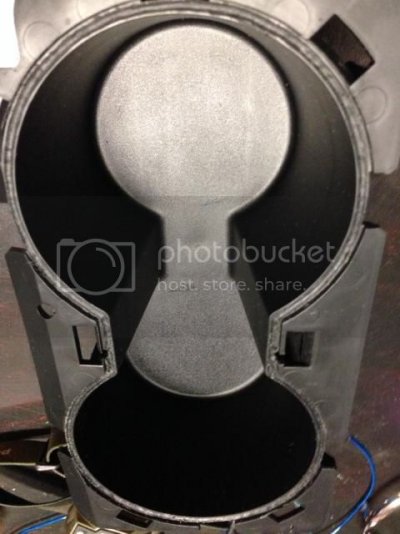
Next I used a Dremel to rout out a groove along the lip. The trick is to CAREFULLY stick to the inside edge (the edge closest to the cups). I made the depth about 1/4 of the EL wire thickness. The tool I used pretty much did that for me.

Here is the cup holder with the groove in it. Take your time doing this.
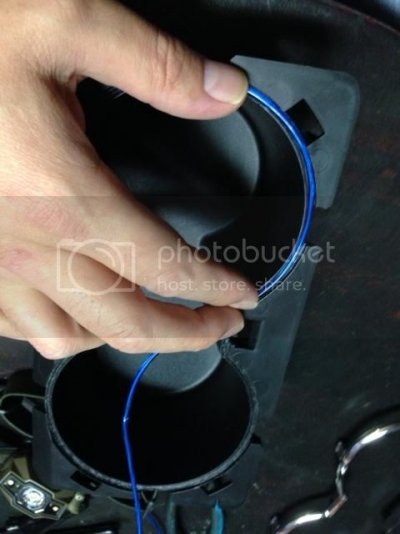
Its important to cut 2 channels in the back of the cup holder so the EL has a place to go when running the remainder under the console. Sorry but I didn't take a pic of this part. Next step is to lay down a light foundation of model glue then the wire.
I used masking tape to hold everything in place. I also dabbed a very small amount of super glue in-between the wire and the cup holder for good measure using a toothpick. Then I let it all dry over night.
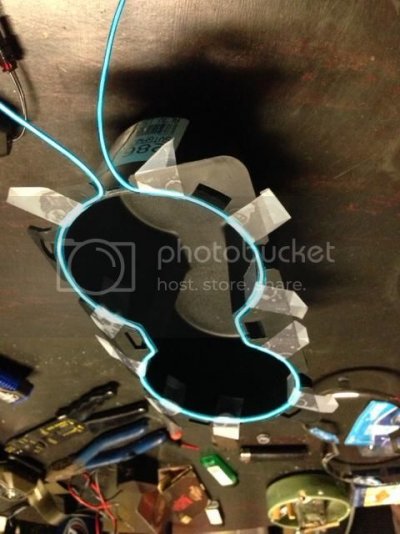
Here is a test fit before carefully removing the masking tape.
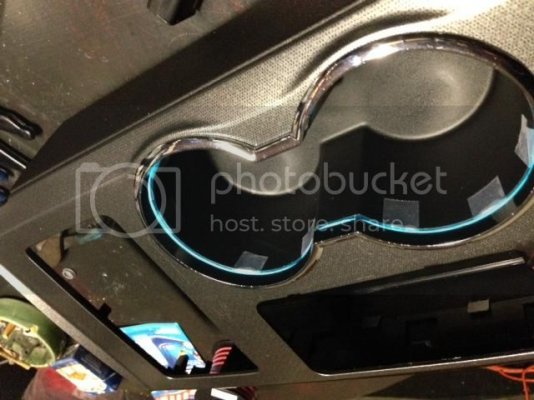
I found it very effective to test the light after each phase of the build. Would suck to get half way threw and find out the light doesnt work anymore. Be careful not to bend the wire at to hard of an angle because it will destroy the light.
Next wire up the inverter to the Orange wire and blue wire at the shifter. The video shows which wires and is really simple. Again I apologize for not having a photo.
The outcome was pretty amazing and Im more than happy with it. You can seriously get away with spending under $20 if you wanted to. Take your time with the Dremel and don't rush it. I apologize in advance for my grammar and spelling.


