What did u do to your raptor today?

Disclaimer: Links on this page pointing to Amazon, eBay and other sites may include affiliate code. If you click them and make a purchase, we may earn a small commission.

Sozzy12

FRF Addict
Joined
Oct 13, 2017
Posts
1,770
Reaction score
2,930
Location
South Idaho
Ok, I did this Saturday, but I'm only getting around to posting now...
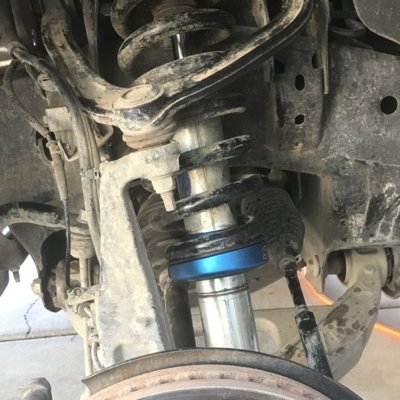
Installed new ceramic brake pads front and rear. The old ones were really thin up front and had some cracks. The rear had more friction material but the shim on each outside pad was loose. Amazing I didn't have any noise.
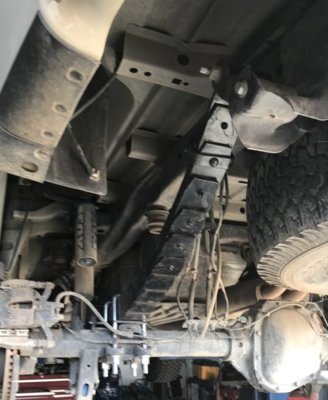
While the tires were off I put some rust converter on all rusty areas like the caliper and spindle. After it dried, I sprayed it with some black paint. I'll get around to undercoat everything later.
 

Fyrman702

Full Access Member
Joined
Oct 5, 2016
Posts
29
Reaction score
52
Location
Henderson, NV
What did you do to your raptor today?

Over the last week I have gone to mid perch which went pretty smooth in the driveway with hand tools. Used the RPG method from the video. One set screw needed to be drilled out, a little scary drilling into the side of the shock. I just went slow and tapped on the perch until it moved, not too big of a deal.

Purchased Deaver +3's for an awesome price off Craigslist. Also bought RPG bump stop striker plates to install with the springs from Walter @aftermarketheadquarters. Picked up the front spring to frame bolt from Ford so I could cut the bolt next to the fuel tank. Passenger could be cut also but, dropping the exhaust on the passenger side works.

Today I installed the springs with the help of my son, a friend and the lift at my friends shop. Made it easy and only took a little over 2 hours. Also installed RPG bump stop striker plates with the springs for that future upgrade.

I've only driven about 15 miles. Everything feels great. No vibrations. Will check torque after a few hundred miles. Also need to have alignment cams installed and alignment checked soon.
 

Attachments

  • fullsizeoutput_456.jpg
    fullsizeoutput_456.jpg
    90.3 KB · Views: 93
  • fullsizeoutput_458.jpg
    fullsizeoutput_458.jpg
    59.1 KB · Views: 96

Heeblet

Full Access Member
Joined
Oct 9, 2017
Posts
186
Reaction score
102
Over the last week I have gone to mid perch which went pretty smooth in the driveway with hand tools. Used the RPG method from the video. One set screw needed to be drilled out, a little scary drilling into the side of the shock. I just went slow and tapped on the perch until it moved, not too big of a deal.


Purchased Deaver +3's for an awesome price off Craigslist. Also bought RPG bump stop striker plates to install with the springs from Walter @aftermarketheadquarters. Picked up the front spring to frame bolt from Ford so I could cut the bolt next to the fuel tank. Passenger could be cut also but, dropping the exhaust on the passenger side works.


Today I installed the springs with the help of my son, a friend and the lift at my friends shop. Made it easy and only took a little over 2 hours. Also installed RPG bump stop striker plates with the springs for that future upgrade.


I've only driven about 15 miles. Everything feels great. No vibrations. Will check torque after a few hundred miles. Also need to have alignment cams installed and alignment checked soon.


+3 side pic of truck?


Sent from my iPhone using Tapatalk Pro
 

Sozzy12

FRF Addict
Joined
Oct 13, 2017
Posts
1,770
Reaction score
2,930
Location
South Idaho
Installed a new tailgate emblem... The dealer had a foil backed sticker on the tailgate that was a PITA to remove... The clear looked a little cloudy so I decided to simply cover it.
 

Attachments

  • emblem.jpg
    emblem.jpg
    46 KB · Views: 81

dixonk

HMFIC
Joined
Oct 14, 2017
Posts
960
Reaction score
1,586
Location
Oklahoma
Installed a 20” Baja Designs ONX6 Hi Power. Literally turns night into day. I am in awe at how much light it puts out. Now off to bandage up my cuts and ice my bruises because that thing was a bitch putting in lol.


Sent from my iPhone using Tapatalk Pro
 
Top